Rubicon Summit: Classroom’s Journey To Student-Led, Interactive Lessons

A Classroom’s Journey To Student-Led, Interactive Lessons

Written for the RUBICON SUMMIT

About two years ago, I found myself struggling to find ways to keep my students engaged in the lesson. I tried to get them involved more in class activities by offering more choices and providing opportunities for them to be part of the decisions made about what we were doing in the classroom. Why did I do this? Partially because I saw – and could feel – a decrease in student motivation and engagement. It was approaching the end of the school year, and the focus had shifted more to “when does summer begin?”

So I tried to do things a bit differently, think creatively, and take some risks. I wanted to keep us all moving, to finish strong at the end of the school year and begin summer vacation with a sense of accomplishment, to celebrate all that we had learned throughout the year and also what we had gained from these new experiences.

Educational Technology and Digital Tools with Purpose
Educational Technology provides so many resources that enable students to learn anywhere and at any time, and at a pace that is comfortable for each student. We can instruct from inside the traditional classroom, ​”​the brick-and-mortar​” ​as it is called, or from anywhere around the world. Using digital tools provides more differentiation and personalized learning, and provides opportunities for the students to move from consumers to creators. When students have choices in how to show what they have learned, they are more likely to be engaged and excited for learning. They will feel valued​,​ and the lesson and learning will be more meaningful because it has been made perso​n​al to them.

Creating Interactive Lessons
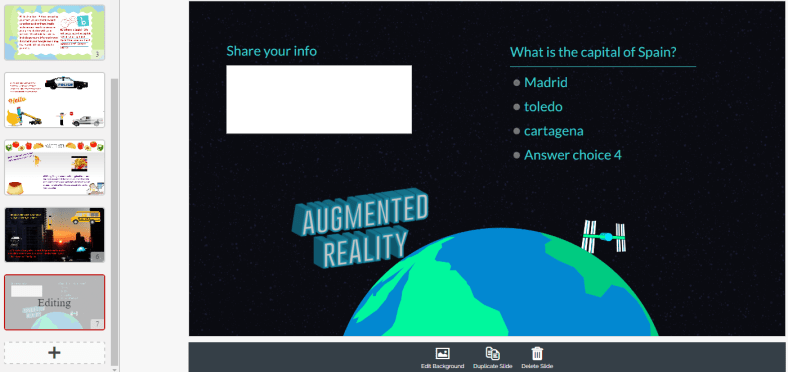
What did I change? I started by having my students create some interactive lessons using educational technology tools like Formative, Nearpod, and EDPuzzle, or even games with Kahoot! and Quizizz. It proved to be a very beneficial learning experience for all of us. By doing this, we had extra resources available that could be shared with students who might need some extra practice. I thought it went so well that I decided to take it a step further and start a “teacher for a day” activity during which the students create a lesson based on a grammar topic or vocabulary.

I stepped back and had the students lead our classroom. It was a really good way to learn a lot more about the students, to better understand what their needs were in terms of the content material, and for the students to learn about each other. Giving students the control and the opportunity to become the creators and leaders in the class has tremendous benefits and it has been something that we have enjoyed.

Giving Students the Control
At first when students created interactive lessons, I would launch the lesson and control it on the SmartBoard, but find ways to involve the student who created it during the presentation. I eventually decided to move aside, and took a seat in the back of the room, having the student lead the lesson, give explanations, answer questions, call upon students for answers, and provide feedback. Having the opportunity to sit back and experience this was tremendous. The students enjoyed the activity, supported each other, collaborated, and provided some positive feedback to each of their classmates. I was very impressed with how well they taught, led, and learned during each of the “teacher for a day” lessons.

Empowering Students in Learning
The use of these digital tools means ​that ​the “time and place for learning” is no​ longer​ confined to the ​traditional time and setting of the physical ​classroom​. It opens up the learning environment ​to​ anywhere​, at any time and at a pace that is comfortable for the students as well. Learning and having timely, purposeful and authentic feedback is critical ​for growth to happen. When we shift our focus to creating opportunities, giving students the control, leaving the decision making to students to choose ​how t​o show what they have learned, or ​letting them​ design their own assessments, they are more empowered in their learning.

What are the Next Steps?
Have a conversation with your students and ask for their honest feedback. What did they like? What did they not like? Which lesson or format seemed to help the most? What did it feel like to be in control, decide how to deliver the lesson, and experience being the teacher? You can have this as a face to face conversation, students can respond on paper, or use one of the many digital tools available for communication. No matter which way you choose, look to your students for the valuable feedback to decide your next steps. Be sure to ask yourself these same questions and continue to reflect on steps taken and progress made!

For more strategies about integrating technology into instruction, read Overcome

EdTech’s Problems With Blended Learning!

Practical Ways to bring SEL into the Classroom


Published on Getting Smart, 


Toward the end of the past school year, I noticed some changes in student behavior. There was a decrease in student engagement, especially while I responded to the question of a student seated close to me, students around the room became distracted or stopped listening. Trying to get the group to refocus sometimes presented a challenge and resulted in a loss of valuable instruction time. A second concern was how students had been treating one another. I overheard conversations in the hallways, witnessed unkind interactions in the classroom, or heard directly from students who sought help in dealing with different situations. There were two issues to resolve: eliminate the valuable instruction time that was being lost and help students to develop more positive, collaborative peer relationships. How could I connect students more to the content and to one another, so they could work together to foster a more positive classroom. After some brainstorming, I decided to first focus on ways to promote collaboration and to step out of my role of “leader” in the classroom by stepping aside.

The changes:

My first realization was that I needed to shift roles in my classroom. I needed to get out of the way, and students needed to do more than simply sit for the entire class. To get started, look at your own classroom. Where are you and the students spending the class period? Are you the only one speaking and moving? If so, think about how you can open up space and provide a more collaborative setting for students. Think about how you can involve the students in more “active learning” that will lead to better student engagement.

One morning, I looked at the physical space of my classroom and decided to break apart the rows of desks. By doing this, it created more flexible spaces for students to interact, to create and lead, and do more than just sit and listen. Students need opportunities to work with their peers through lessons and engage in activities where they can master the content together, and that will provide opportunities to develop their interpersonal skills, self-awareness and social awareness of others.


Making these changes can feel uncomfortable because it means going against what likely has been the traditional classroom structure. However, many teachers have moved toward flexible learning spaces, creating a more student-centered and student-driven classroom. A classroom which moves away from simply lecturing, reviewing homework, passing out materials, assigning new homework, and repeating this same routine the very next day. While this process may promote the acquisition and application of knowledge, it does not effectively promote collaboration, invite student input, nor foster development of vital SEL (social-emotional learning) skills.

CASEL (The Collaborative for Academic, Social, and Emotional Learning), formed in 1994, is an organization which actively works toward promoting the importance of developing SEL skills in education. SEL is focused on five competencies: self-awareness, self-management, social awareness,  relationship skills and responsible decision making. The development of these skills can benefit the level of student engagement as well, leading to higher academic achievement and reduce discipline issues in the classroom. To promote the development of SEL, here are some ideas and additional resources to get started.

Practical ways to promote SEL:

  • Icebreakers: I started the school year with fun icebreakers, to get to know one another and to find out what students had in common. Why? It all starts with relationships, building a connection with peers and the teacher, and using this to connect with the content area. Returning after an extended holiday break, doing even one icebreaker can be a good way to welcome students back to the classroom, to ease into the daily routine and to start the year fresh by working on relationships. Perhaps have students share what they did over break, show a picture, talk about favorite foods for holidays even, and let students make connections on their own.
  • Games and activities: Providing opportunities for students to interact through the use of games and activities in the classroom promotes the development of social-emotional learning skills. There are many online tools available to help you get started. For elementary and middle school, Centervention provides free online games, activities and printables for teaching students about SEL. Gaming helps students to learn to problem solve, collaborate, think critically, and develop empathy through scenarios within the game itself, or as a result of being part of a team. It creates a sense of community and belonging, which foster the social-emotional skills students need. Even by using Minecraft, educators have seen a connection between the benefits of gaming for learning and the development of SEL skills.
  • Learning Stations: Something that has really made a difference in my classroom has been using learning stations. I started the year with rows and decided one morning, that the rows had to go. I quickly set up clusters of desks or “stations” to accommodate three students each, with four extra desks grouped together in the center. At each station, students spend 10-14 minutes doing a hands-on activity like a worksheet, creating flashcards, watching a video, playing a game or simply coming up with their own ways to practice. Deciding upon the activities takes some planning, especially when trying this for the first time, but it is well worth it. Start by explaining the “stations”, involving students in the discussion and asking for feedback. When we explain our goals and share any fears we may have, we are modeling “self-awareness” and “self-management”. By using stations, we also have more time to interact with each student and group, work on relationships and foster a deeper understanding of the content as well as connecting with one another and creating a more positive classroom culture.

Challenges and solutions:

  • Groups: The first few class periods there were complaints. Students wanted to work with their friends and others wanted to work alone. It can be awkward if you are the only one who doesn’t find somebody to work with, but it can also be a challenge to work with a group when you may end up being the only one doing the work. Assigning random groups can help alleviate some of these uncomfortable feelings, even though in life and for the future, students may face the same challenges and uncomfortable moments, not having a choice in collaborative work. However, for the time being, the importance is to help students to develop interpersonal skills that will enable them to be successful in the future, to develop the social and emotional learning skills, especially in terms of relationships, decision-making and developing a self- awareness.
  • Timing: It can be a challenge at first to know how much time to provide for each station. I started by spending ten minutes reviewing material, asking questions, or doing an activity with the whole class, before starting stations. I tried giving 15 minutes for each, so students would work through two each day. Some students finished early and wanted to move on. To work through this, I would use the time to speak with each group or individual students, and then make adjustments during the next station rotation. There is always room to improve, but the important thing is remembering to be flexible and open to changes that will positively impact student learning and relationships.

Benefits:

  • Student engagement: Students have been more engaged in learning, and have come in to tell me how much they look forward to coming to class. Because of the different activities within the stations, students participate more because they are active and moving, and know that each station offers a new way to learn.
  • Student leaders: Students are offering to help one another, to explain concepts, and to cheer each other on. They keep each other on task and by working in these small groups, there are less distractions than working as a whole group. Each small group can ask questions, receive individualized feedback because I can freely move around the classroom and clear up any misunderstandings.
  • Teacher-student relationships: Students are getting timely, authentic and personal feedback. By using learning stations, more time is student-focused and those individual conversations can happen as needed, to help students to be successful and be more confident.
  • Student learning: In terms of academic achievement, the participation and results of recent assessments are the highest they have been. Students enjoy coming to class because they know they’re going to be leading and making decisions about their learning, in a way that is comfortable, flexible and fun.The learning experience is more authentic and meaningful for students. Research has shown the positive benefits of incorporating SEL into the curriculum.
  • Student behaviors: As for the class distractions and the negative interactions that existed before, both have decreased tremendously. It is not something that is going to change overnight but what matters is that we make constant progress. We are learning and becoming better together.

7 Tips to Get The Most Out of Blogging This Year

Originally Published on Kidblog,

Getting ready for the start of a new school year – new students, new curriculum, and new tools – means teachers have a lot of preparation ahead of them. Whether new to Kidblog or a veteran classroom blogger, these tips will help you get the most out of your class blog this year.1) There is no better way to start the year than by way of introductions. Blogging can be a great way to get your students comfortable with you as their new teacher, as well as, their new classmates. In my classroom, I also use this time to cover expectations in the classroom. This is all done in a “Welcome back to school” blog post. Choose a fun theme for the class, add some links and include helpful information. Share information about you, including some fun facts, and encourage students to then respond to your post. You can begin to develop those vital relationships for your classroom.

2) Get parents connected. Make the decision to use blogs as a way to keep parents informed about what is going on in the classroom. Set a goal to write a blog post with a weekly update and share what is going on in the classroom, give highlights of upcoming events and activities the students will be participating in. Also, use the blog as a way to share student work with parents, which will really connect the home and the classroom, and involve all members of the learning community.

3) Involve students in planning for blog posts. Encourage students to come up with their own ideas or to work with peers to brainstorm some writing prompts to use throughout the year. Gather their ideas and then draw from their prompts. Involving students in the decision making process in the classroom helps to provide more authentic and meaningful learning experiences. It promotes student voice and choice in the classroom and helps students feel more valued and empowered. By actively engaging them in classroom decisions, students will feel more connected to the content and their peers.

4) Create a bridge between content areas by doing some cross-curricular blog posts. Find time to talk with and encourage other teachers who may not be using blogs, to work with you to create some cross-curricular opportunities. The blog can be a way for students to complete some writing assignments or projects for communicating their ideas and showing their learning. Students create their own personal space to share ideas and really have an opportunity to practice their skills for multiple content areas in a comfortable manner.

5) Try adding some other tech tools to app smash with Kidblog or use Kidblog as the means to share student work! Implementing other tools will help students develop their technology skills and digital literacy. For example, have students create a Buncee and write about what they’ve created, or, they may share it with a peer to create a story. These apps can be easily embed into Kidblog for their classmates to comment.

6) Have a routine for sharing student blog posts and set aside time in class for the students to work together to share their blogs, offer feedback and learn to reflect on their work. Making time for students to work with peers will build those positive classroom relationships and help students to become more confident in their learning. Their confidence will increase through the writing process and also by communicating and collaborating in the classroom.

7) Be sure to have resources available for students so they understand how to use the blog, how to write a post and to properly cite any images or other information they add to their posts. A great way to do this is by screen-casting a tutorial available to students, as well as, creating a “guide post” that gives students pointers on how to publish a post, the required format, and other information related to your expectations. By providing all the information in a place which is accessible, the process will be much easier for students throughout the year to have the support they need when they need it.

Engaging Students: Movement through games and music

Published on Getting Smart, November 5, 2017

What image comes to mind when you think of classrooms today? Where is the teacher and where are the students? Who is leading the discussion and doing most of the talking and moving in the classroom? For many, the image that comes to mind is that of a room of students, lined up in rows, with their attention directed to the teacher at the front of the room or involved in some activity at their desks. In this scenario, students are passively learning. Their involvement in class, in some cases, has them seated for the entire class period, while the teacher does most of the talking and moving around the room.

In the past, this may represent the typical format of classroom instruction, however today, with a greater focus on flexible learning environments, and educators looking to promote student choice and voice, this image or perception of “what classrooms look like”, has changed and continues to evolve into a more active learning space, a place where students are empowered. A space in which students take a more active role, transform students from consumers to creators and the former teacher-centered classroom into a student-centered and student-driven space.

Because students have typically spent so much of their school day seated, taking information in and do not always have time to ask questions, interact with peers, or do more than consume, they may become more passive learners. I started to notice this in my own classes. There was a decrease in student engagement, and reflecting on my methods I realized that I was spending so much time talking, that it was me making the decisions and leading all of our activities. There were not many opportunities for the students to work with peers, to move around, to really take control of their learning.

In an effort to encourage students to become more active learners as well as to be more involved in the types of activities and instruction in the classroom, I started to implement some teaching strategies involving music and games. There are many benefits to getting students more actively involved in learning and this can be done quite simply through a variety of teaching strategies. It can be a challenge to change over from the traditional classroom lecture model, however, there are some easy ways to change to a more active, engaging space.

IMG_20171025_115723178.jpg

How to design more active learning experiences:

1. Game-Based Learning (GBL): GBL is a great way to add fun into the classroom and help build student excitement for learning. The use of gaming offers different ways for students to practice and develop their skills in more active learning environments. Games encourage students to learn and master content by problem-solving, collaborating, creating and engaging in more authentic and meaningful learning. It is a way to promote independent learning as well as by offering students choices in games to play and the means to work toward individual goals.

2. Tech: Students can create a game as a way to help themselves and their peers practice concepts and gain mastery. It can be a game created using one of the many digital tools available like KahootQuizlet or Quizizz. Students enjoy the opportunity to create a game, which leads to a more authentic learning experience when students select the specific vocabulary they need to practice, thus leading to more personalized learning opportunities. Students add to their skills by choosing how to leverage technology for the purpose of more self-directed learning.

3. No-tech: Students are very creative and offering them a chance to design a game to practice new content can lead to better retention and increase motivation. To get started, a few examples that can be used are to create a chart which includes 4 or 5 different categories or topics related to the content and grade level being taught. After deciding on categories, perhaps select 5 or 6 letters of the alphabet, or use numbers, which students must use to come up with a word, topic or date, that relates to each category. For example, in teaching Spanish, selecting categories such as classroom objects, verbs, colors, family and then deciding on the starting letter, students can brainstorm words and review in unique ways. Students can then randomly be assigned to small groups and then share the words their group came up with. An activity like this will promote communication between peers and provide an opportunity for collaboration and some fun as well. It can also be a good way to have students review, be creative and brainstorm new ideas. This creates time for teachers to assess student needs and decide the next steps in the lesson.

4. Music: Music livens up the classroom and is useful for helping students retain their learning. There are many ways to include music in learning, one just as simple as playing music when students enter the room, or while they work in small groups, to add to the culture of the classroom. As instructional materials, one idea is to have students create rhymes or a song using a vocabulary list, names of famous people, state or world capitals, monuments or anything related to the content area. Students can work in pairs or a small group and create a song which can be used as a mnemonic device, to help them retain the information in a more meaningful way. Students can then present live in class or use a tool like Flipgrid or Recap to record and share with classmates. These student creations add to the authentic classroom resources and engage students more in learning.

In trying one or all of these activities, students have an opportunity to be more active in the classroom, work together, build relationships, collaborate and engage in more authentic learning experiences. Placing students in the lead provides the teacher with an opportunity to step aside and become a facilitator and use time in class as an opportunity to not only assess student learning but to interact more and provide feedback for students.

IMG_20170925_105644849_HDR.jpg

There are many ways to build students skills in the classroom, and these are just a few of the ideas that we have been trying and they are a work in progress. Knowing that something works takes reflection and student input. With students creating more and working in small groups, I have more time to move around and work with every student and group and provide more individualized instruction.

Students are asking more questions like, “Can we…?, What if…?, Is it okay to…?” and adding their creativity into our activities. Students suggest improvements, “Maybe we could… It might be better if we and This has helped me to remember…can we keep doing these activities?” And my answer to all of these has been “Yes, I think we should try it. If it works, then great. And if not, we will try again!”

Students need to be moving in the classroom and have opportunities to learn in different formats using a variety of instructional strategies and tools, and it’s okay if they are not in the traditional format.

New features to our favorite tools: Part III

I have really enjoyed getting to know the creators of Quizizz and being able to try some of the new features and learn about how they got started with this great learning tool. I am impressed with their dedication to creating a learning tool that will engage students in learning and offer more ways for students to engage in more authentic experiences. There is more to come from them, stay tuned!

Quizizz has continued to improve and add new features over the past two years,  especially with the option to assign games for practice, which students can do wherever they are, at any time. There is so much discussion and debate about the value of homework, and the “value” in having students complete the exact same assignment. Quizizz offers a better way to engage students in more authentic practice and be able to receive feedback available instantly. It is of great benefit for students to then be able to review their responses after completing the game. Learning opportunities like this are much more authentic than having students complete a traditional worksheet.

Joining a game of Quizizz simply requires sharing a join code with students, whether it be during a live session or assigned as a practice game. Teachers can set up a practice game for students and extend the time period that the game is open, for up to 15 days, and if students start the game, they can resume at a later time by using the same login information.

In addition to these ways of sharing the game, I was absolutely thrilled to find that I can assign the games directly to my students through Edmodo which is our base for our class.  I had been sharing games by posting the join code on our class pages in Edmodo, and I had no idea that this option existed until I created the game for practice, and it showed up as an option. Let me just say that my students in the room wondered what happened because I jumped up and yelled “YES!”  I really was excited to see this available. 

How does it work? When assigning a game for practice, you now have the option for sharing to Edmodo. When this is done, it creates an assignment where you can choose which class to assign it to, and you can also provide additional instructions. Once completed,  it posts the game directly to Edmodo for students to access. This addition makes it a lot easier to share games rather than having to remember the join code or going back to search through the reports to find it. Quizizz also integrates with Google Classroom.

Earlier this fall, Quizizz also launched their app, ZipQuiz, full of games to challenge friends in different content areas. Read about it in my prior post here.


Stay tuned for some new things coming from Quizizz, not going to give any details yet, but let’s just say, they’ve got some really great updates and features coming out very soon. Stay tuned!!


These are just a few of the newer updates to some very popular digital tools. If you have not tried them, choose one and start there. See what your students think, and see how adding just one of these in can increase student engagement and provide more meaningful practice for students.

Next up, taking a lot at the AR and VR tools available! Metaverse, Merge VR, CoSpaces, ARKit

IMG_20170628_111914745.jpg

EdmodoCon 2017

Honored and Amazed: EdmodoCon 2017


I have been a huge fan of Edmodo the last four years and it has really brought about tremendous, positive changes in my classroom, for my students and opened up a lot of new opportunities for me as well  Edmodocon, an online conference, takes place in August and is held at Edmodo headquarters in San Mateo, California. Each spring, Edmodo accepts proposals from educators to be selected as one of the featured speakers during this event. The last two years I had submitted a proposal to speak at EdmodoCon, not fully understanding the magnitude of it even though I had watched it each year, and definitely not expecting that I would be one of those selected to present.  I took a chance again this past year and submitted a proposal and definitely put some extra time into what I wanted to say and decided to just go for it. Honestly, I did not think that I would be selected.

​Finding out I was one of the educators selected to speak at ​EdmodoCon was really an emotional moment where I felt a little bit overwhelmed, very surprised, tremendously honored, and definitely scared. There was also ongoing disbelief that I had been chosen.

I had watched ​EdmodoCon the last two years and knew how it was set up​,​ where the people were speaking from​,​ and also that many thousands of people were watching from around the world while the event was ​streaming live. All of these images passed through my mind a​t​ a glimpse when I found out I was selected but the excitement ​was sometimes exchanged for nerves. I​ just could not believe that I was chosen and could not wait to attend.
I have been using Edmodo ​since 2015 and it truly has made a huge impact in my classroom. I found it almost accidentally, looking to find a way to open up more access for my students and to help solve some problems in communication, and availability. Over the years, the way​s​ that we have used Edmodo has changed and many new features have been added, making it even better than it already was. Having the opportunity to see the people working behind the scenes at Edmodo and to talk with ​each person was phenomenal.

How does one prepare for ​EdmodoCon?

Unlike any other presentation you have prepared for! While I have given many presentations in the form of Professional Development sessions, speaking at conferences and online learning ​events, preparing for something like this was a much greater feat. My session would be a ​2​​0 to ​30 minute presentation, speaking ​live from​ Edmodo. I needed to craft a message that would inform the participants or “Edmodians”, who were​ ​already familiar with Edmodo and knew so much about it. My goal was to convey my message of why and how it has made such an impact ​in​ my classroom.
Countless hours spent crafting the presentation​,​ re​-​working the images​,​ thinking through what I would say on August 1st, and lots of communication between myself and N​iccolina and ​Claire. The support I received was fantastic. The team was always readily available to give guidance and feedback, to do practice run​s​ ​or​ whatever was needed. They were there to support me and all of the speakers and definitely made the whole experience phenomenal, and always found ways to calm those nerves with reassurances and positive encouragement.


Prepping for EdmodoCon

I think I lucked out because I had the benefit of a little preparation when I was asked to speak about Edmodo during the Microsoft Hack the Classroom in San Antonio​ while at ISTE​ this summer. I prepared a​ ​5 minute “Ignite” talk on the integration of Microsoft Office with Edmodo and this experience definitely help​ed​ me to better prepare for EdmodoCon, but then again it was unlike any other experience I have had. It gave me some practice speaking in a studio setting with a live audience, microphone and cameras, but it didn’t quite prepare me for the full experience since it was only a five minute talk. But nevertheless, I am grateful for having had that opportunity to connect and to get a little bit of practice in before heading to the main event. Being able to step out of my comfort zone, and do something like this for the first time, was a challenge and I was very nervous about it, but having this experience definitely helped.

Heading to EdmodoCon

Going ​to San Francisco, arriving at Edmodo Headquarters, and meeting the other educators was tremendous. I was very excited about the day, getting to spend time at Edmodo, practicing a little and just being in the same space with educators from around the world, and having time to sit down with them and share how we use Edmodo was awesome. Being there and having the support and generosity of the whole Edmodo team, becoming connected with these other educators, really added so much more to what I already love about Edmodo. The whole team of Edmodo is people focus​ed,​ they work ​​for the students, they are a family and they are there to be a constant source of  support and encouragement to one another.

The way that we were all welcomed by the team was unlike anything I have ever experienced. We were greeted at check-in with welcome bags full of Edmodo gear, picked up by members of the team and driven to Edmodo headquarters where we had time to tour the office and also to ask questions of all of the team members working hard to make Edmodo what it is. We had catered meals, access to anything we could possibly want to make our time there more comfortable and most of all, we experienced a true sense of belonging and being part of the Edmodo family. Being able to meet for the first time people who have done nothing but work to make Edmodo a better platform for students and for education and who truly value the input from educators and the connections made, was an honor. Edmodo is how I made changes to my classroom that enabled me to open up more access to the resources the students need and also access to a world full of learning opportunities. Being selected to speak there and to share my experience with so many educators around the world was very humbling.

It is probably the most nervous I have ever been before a presentation and waiting for it to be my turn to speak was definitely a challenge for me to stay calm and focused.  But hearing Jennifer’s presentation before mine helped and once I entered into the room and put the headset on, my nerves pushed aside and I was ready to go. Of course I was still nervous but I felt like I could get through it, I was ready to share our story.  And I think the one thing that really helped to break the ice for me was when my slide deck would not load correctly and I just had to go on and start talking with fingers crossed that it would actually work. It’s really not much of a surprise that I would have some kind of a technical difficulty because I often joke that the technology cloud of darkness follows me at times. But the show must go on and if my slides did not work well then I was just going to have to talk my way through it as best as I could. Fortunately it only took a few minutes for everything to reload and so I was able to carry on through the presentation.

How did it go? I think for the most part I am pleased with how it went and I caught myself getting a little emotional at the start because it really hit me that I was speaking there and I have been so thankful for what Edmodo has provided for me to make things available for my students in my classroom. But standing there and having that chance to speak and share our experience with my own personal learning revelations about my teaching methods and why I needed to change was bittersweet.

Because I’m a reflective person and I did want to evaluate my speaking and be mindful of words or mannerisms that catch my attention, I watch the replay of the video. I first noticed the look on my face when told that my slides weren’t loading and then I should just start, it was a look of wait what? And as for my overall presentation, of course I did come up with a few things  that I would change. But that’s how we learn and grow and move forward. We have to reflect, we will make mistakes, we will face challenges and while it is important to acknowledge these, the most important thing is that we share our message and that we also share our learning and reflections in the process.


Edmodocon was amazing and it gave me a lot of new ideas for this school year and ways we can use Edmodo to knock down those classroom walls and to bring in opportunities for students to learn more about the world and to provide a safe space for them to connect with other students in the world. We can empower our connected learners.

Celebrating together after EdmodoCon 2017

IMG_20170801_184215600.jpg


How Kidblog supports and meets the ISTE Standards for Students


  1. Empowered Learner
  2. Digital Citizen
  3. Knowledge Constructor
  4. Innovative Designer
  5. Computational Thinker
  6. Creative Communicator
  7. Global Collaborator


The Student Standards reflect the skills that we want the students of today to develop, so they can become more connected with their learning and prepare for their future in an increasingly digital world. The use of blogging is a good way to address the ISTE Standards for Students. The new standards, which were released in June 2016, focus more on what we want for students – The pursuit of lifelong learning and ways in which we can help to empower students in their learning. The emphasis is on providing opportunities which promote student voice and choice and help educators to implement technology in ways that will increase student growth and readiness for the future. The ISTE standards represent the skills and qualities that students need for su​​ccess in the 21st century.

Supporting the standards with technology
There are many educational tools (both digital and traditional) available to promote student voice in the classroom. Blogging is one tool that serves to support and meet the ISTE standards. Educators can refer to the standards as a guide for selecting tools to use with students that will amplify learning and promote student choice. The goal is to support students so they begin to take ownership in their learning. A move in the classroom from teacher-centered, to student-centered and optimally, student driven. Here is how Kidblog can help.

1. Empowered Learner: As empowered learners, students “leverage” technology to show their learning and demonstrate their mastery in a platform that is comfortable to them and in a personalized space. Students take more responsibility for and have choices in how to show their learning.

2. Digital Citizen: Blogging promotes digital citizenship as it helps students to develop their social presence. Through blogging, students become active in online communication, learn about proper use of internet and resources and interact in a safe learning environment. Posting online and sharing information helps students to develop the skills they will need in the future and to recognize their responsibility when it comes to digital resources. Blogging gives students the opportunity to practice appropriate and ethical online behaviors, which transfer into the classroom space as well.

3. Knowledge Constructor: Students gather information and resources to use in creating stories, conveying information in a way that is more authentic and meaningful for their learning. The use of blogs helps students to work on their writing skills and ties in nicely with gathering information to share in their digital space. Students can research and analyze the resources, to determine which is most relevant and applicable to their task.

4. Innovative Designer: Students can use the different tools and features in the Kidblog platform to express themselves in a more unique way, share ideas and create in an innovative way. Designing and creating more authentic ways to show their knowledge as well as creating new and more “imaginative” solutions to a question or problem presented.

5. Computational Thinker: Students can use blogs as a way to discuss and talk through a process of decision-making. Blogging is a great format for working through projects or solving complex problems, and to demonstrate the thought processes and analysis involved through their writing.

6. Creative Communicator: Students can use the different features of Kidblog to share their knowledge, convey information or tell a story in a more engaging and creative way, to be shared with peers and the teacher. Blogging opens up more opportunities for students to be more expressive than the traditional formats such as paper or other digital tools. Students can express themselves in a way which promotes creativity and with Kidblog, can incorporate other tools to present their information in a way that supports the learning goals and meets individual student needs and interests.

7. Global Collaborator: Students can use blogs as a way to learn about other cultures and connect with others by posting their blogs and sharing information with peers. Students narrate background experiences and connect with others in a safe learning environment that builds confidence and promotes student learning. Students share their blogs with peers and can also connect with other students from around the world. It facilitates the opportunity to local and global issues and perspectives, and to use the blog as a way to express their thoughts.

The focus of the ISTE Student Standards, helping students to become better with communication, collaboration, critical thinking, problem solving and to express themselves in more creative and innovative ways, falls in line with the features of Kidblog.

How I Connect Students Through Project-Based Learning

Posted on Teach ThoughtPBLTT.jpg

One area that I’ve tried to focus on more in my teaching recently is collaboration, specifically how students collaborate with one another, and finding more ways to do this in class so that I can facilitate their learning.

I enjoy having students work together within the same class because I believe in the value of building relationships and establishing a positive classroom culture. I also know how effective it is to take advantage of the time in class for students to become more familiar with each other and to work together towards a common goal.

Understanding that not everything can be accomplished in a classroom is a big reason for this shift in my teaching–and this is where I believe that technology can be extraordinarily useful with a real sense of purpose.

The Tools Of Collaboration

I have been using various tools over the past few years which have really opened up the possibilities of how, when, and where students communicate and collaborate.

Our interactions are ​​no longer confined to being in the same classroom, let alone the same school. Collaboration can occur between students across the globe and does not have to be done synchronously. The nature of tools such as Padlet or Wikispaces for example allows students to collaborate on their own terms. Time and place don’t matter as much as purpose and connectivity.

Thinking Bigger

I recall driving home one day and trying to come up with innovative ways to have students create with the language.

I liked the idea of projects, but wanted something more than simply having every student completing an individual project on the same topic. Each of my Spanish courses were at a place where I thought it would be great for them to do a project and work through learning in their own authentic way, so I decided to go big and involve the students from levels 1 through 4 as part of a team project.

I didn’t have a clue how this would work, but it seemed worth figuring out. I hoped that something like this would bring students together and show them the power of technology for collaborating and putting a project like this together, so I gave it some thought and this is what I came up with: A cross-level, cross class team project.

Executing The Project In The Classroom

Here’s how it worked: Spanish IV students had been studying careers and planning for the future. Spanish III was focused on travel and preparing for a trip. Spanish II was learning vocabulary related to a community and and types of activities that one can do in a neighborhood. Spanish I was learning vocabulary for houses, chores and describing living arrangements.

Taking all of these themes into consideration, I decided that one student from Spanish IV would be the ‘Team leader,’ and their ‘mission’ would be finding a job to apply for in a Spanish speaking country with the idea of going to work abroad.

Their task was to create a collaborative space, whether that be by creating a Padlet or Google Slides or something else altogether, and share it with the other members of their ‘team.’

Team leaders also had to write a brief note to their Travel Agent, Community Specialist and Realtor (students from Spanish I, II, and III) to let them know their travel interests and needs they have for moving abroad. The team members would then take this information when creating their part of the project. Spanish III would then plan how their team leader was getting there.

To make it more fun, I included a requirement that each Team Leader wanted a chance to sightsee before starting work, so the Travel Agent’s task was to plan a two-day tour that would meet the interests of their client.

Spanish II would research the neighborhoods where the client would be living and let them know what types of services and businesses were available for their new community. Spanish I, with two members assigned to each team, had to prepare to real estate ads for the clients. Each group would take the information from the notes and try to cater to the needs of their client.

There was a tricky part to this which was that I had to be out of school for a period of time. I was not there to oversee the work, however I use messaging tools like Celly, Voxer, and edmodo to communicate. The biggest tool I used, though, was the concept of collaboration among students.

While I didn’t plan this wrinkle in the beginning, I started to see that I relied on them as much as they relied on me and one another.

Stepping Aside & Letting Students Work: The Outcome

I distributed list of teams to each student. I put the team list on the board and left a space for the team leaders to put their link and their notes or however they saw fit to share this information.

There were problems at first. Students said they did not have the link, or had the link but did not have access and a few other issues, all of which I had expected and told the students to send messages or leave a note on the board. Always plan for failure, and have a backup for your backup.


Ultimately, I wanted the students to practice the vocabulary in their respective Spanish classes, but I also wanted them to learn how to work towards a common goal and without having to be in the same physical space or during the same time. I wanted them to see what great resources are available through technology and how they can work as a team without being in the same place.

The team leaders had the opportunity to say whether or not they really liked what the group members had put together for them, and for me it gave me another opportunity to let the students be creative, independent, to decide whatever they wanted to in terms of this project and that’s very important.

Giving the students a choice in how they show what they know and can do with the material and being open to their ideas was crucial to the success of the project. When planning, keep in mind that even if things don’t turn out the way you had planned, if the critical objectives of the project are met (whether academic standard-based, soft-skill, or something else), then the project has to be considered successful.

While planning is important and leadership essential, the tighter you hold to your vision of things as a teacher, the less ownership students can take over their learning.

CoSpacesEdu

CoSpacesEdu: Opening up new learning worlds 

COSP.jpeg

I have always been a fan of technology and any time I learn about a new tool, I go straight to the computer if time allows, create an account and start trying to figure it out on my own.  Or if I don’t have time, I will add it to my seemingly never-ending list of tools that I want to check out. Last summer, I came across CoSpaces. I had no idea what to expect other than knowing that the purpose was for creating and experiencing a virtual learning environment. I created an account, looked at the gallery of what was available, and tried to figure out exactly how to create my own 3D space.

I am the type of learner who would rather struggle and figure things out on my own first. I think it is better as a teacher, to work through those struggles so that we can better help our students. If I’ve exhausted all of my efforts, then I will look for a help section or connect with other educators that I know have experience using the tool. Sometimes even simply posting a question on Twitter, or searching YouTube for helpful videos, will give the answers that I need. However with CoSpaces, I was determined to work through it on my own because as soon as I started trying it, I knew right away that it was something I would want to use in my new STEAM Emerging Technology course for the upcoming school year. And while I greatly enjoy  learning from the students, I also enjoy being there to watch the student responses as they begin to figure things out on their own and have those “aha” moments when they realize that they’ve uncovered exactly how to do something. Better yet is when they share this knowledge with their peers and also teach me new things to do with what we are working on.


My plans for using CoSpacesEdu were uncertain at the time, because I knew virtual reality was a topic that I wanted to cover in my class. My course is focused on STEAM and Emerging Tech. I had plans to help students develop some vital technology skills, starting with learning about digital citizenship and then adding on new tech skills as we progressed.  I knew that many students did not have much experience creating with anything other than Microsoft Word or PowerPoint, if even these two. I also wanted to know the different possibilities for using CoSpaces in the classroom, so I spent some time looking at the gallery, I joined the community on Facebook and reached out to the CoSpaces team to see what additional information I could find. But while doing all of this I did manage to create my own project in which I added many random items and had a lot of fun creating. I was truly amazed at what I was able to do within my own “space”. The ideas started flowing for how I could use this in my STEAM course and also with my foreign language classes. I could foresee students who had to create items such as biomes or do a book report, or a science project using CoSpaces as a way to represent these by building their own space and environment to represent the story they were trying to recreate or to tell. Talk about creativity, imagination, innovation and critical thinking, and more all in one tool.


As with my other projects this year with my STEAM course, I wanted to find a way to connect using this tool for our class with a learning target or project for another class. There are so many possibilities. While waiting for some feedback, I decided to offer a few different options for students to choose from after looking through the gallery. Consulting a friend of mine who is outstanding in the field of AR/VR, Jaime Donally, (@JaimeDonally) who gave me some really fantastic ideas for creating with CoSpaces. I was also fortunate to have a conversation with Manuela, who provided a lot of insight into the new features that CoSpaces would be offering. There are updates sent regularly with details about the new features and links to sample projects and helpful videos.  

So if you have not yet checked out CoSpacesEdu, I recommend that you do because I guarantee that you will find it has applicability for something in your classroom. And it is a tool that will further engage students in their learning. Once they have created their own project, they can then immerse themselves in their own environment with the use of the app on the iPad or installing it on their phone and having a headset to walk through their own environment. How cool is that!


So for our first project in STEAM, I asked students to create three scenes in which they either told a story about a TV show, a movie or a book that they had read, or create a different type of a living space, or come up with their own focus, as long as they included the required number of elements into their project. Once they were finished, I had them share their link on a Padlet, so that all projects could be accessible and that students could take turns walking through each other’s environment. The students were excited and amazed at what they were doing. While looking at the gallery and playing some of the games were fun, being able to create their own space, walk through it and explore on their own was way better, according to several of my students.

Screen Shot 2017-08-20 at 5.48.06 PM.png


There are some new features with CoSpaces and I’m sure the changes will continue to come. I recommend that you check it out and think about something that you may be teaching in your class or a project coming up in which students could create a virtual space. Using CoSpaces will really open up your learning environment and immerse students in authentic experiences, increase student engagement and I believe add to motivation the students have for learning and taking some risks and being up to the challenge of figuring out exactly how things work. And hopefully the next time they have project rather than wanting to create in PowerPoint or with Google Slides, they will think of CoSpaces Edu as the perfect way to represent what they know and can do with the material

Building Skills with App Smashing: Buncee, Padlet and now new Buncee Boards!!

Buncee

There are a lot of great digital tools that promote student creativity and choice and give students an opportunity to learn about each other in the process. Two tools that have worked well together for this purpose are Buncee and Padlet. Using these together promotes student creativity, provides more authentic and meaningful ways for students to share backgrounds and introduce themselves to classmates. It builds digital citizenship and technology skills by teaching students how to interact in a virtual space. It promotes communication and collaboration through the sharing of projects and opens the ability to engage in conversation through the commenting feature on Padlet.


When students start the school year, learning about classroom procedures and becoming familiar with their peers are important activities. Teachers go about these procedures in different ways, some even choosing to dive right into the content material and to open up opportunities for these typical procedures on a daily basis. The past few years I have tried to get students to interact more at the start of the year, share who they are, their experiences, their interests and have them set some goals as well. I try to do so with variety of icebreakers or other activities like surveys or classroom games to get the conversations started. However, this year I plan to have students share their information by creating a visual representation. Students will be able to choose from the library of thousands of images, props, icons, animations and more in Buncee to tell their story. The requirement will be that they use very little in terms of text and rather choose the images, animations and even videos to tell their story. I also hope that it creates a way for students to share some learning goals they may have or things they wish their teacher knew.

BunceeJenna

Before the advancements in technology and the increase in types and number of tools available, sharing these creations required either printing or sending through email or storing on a flash drive. But with collaborative tools such as Padlet, it has been very simple to not only share the information quickly but to embed a Buncee project right onto the Padlet so it is fully visible to everyone instantly. By doing this, students have gained new knowledge of technology, developed peer relationships, teachers learn about the students, the students will learn about each other, and it will start the conversations going. By using imagery rather than so many words, students will be able to see some commonalities in the classroom which will help to drive the development of a classroom culture.

Besides the learning potential in this, I think it is a lot of fun and highly engaging for students to create and to see what their classmates have created. I would not be setting a good example if I myself did not create a Buncee and add it into the group. Students need to learn about their teachers as much as the teachers need to learn about the students. I’ve heard the quote and read the quote of Teddy Roosevelt many times “Children do not care how much you know until they know how much you care.”  This couldn’t be truer, so we need to learn about our students and show that we care about them and their success.

BunceeSpain

Combining Buncee and Padlet

Throughout this app smashing (when two tools are used in conjunction to create and present a product), students enhance their skills in many areas. In terms of the ISTE Student Standards, all seven are addressed in completing these activities. The main one addressed is 6, Creative Communicator. Students have a choice and their voice is represented in creating their Buncee. But in the process of creating, they become Global Collaborators because by posting it on Padlet, others can view their work and comment. They are Empowered Learners because they have choice and voice in their learning experiences. Computational Thinkers because they are deciding how to present the information in the Buncee, Innovative designers choosing from the thousands of features available in the library to put into their own creation. Digital Citizens because they are learning to respect others’ work and to publish and post responsibly. For some students, this will be the first time they are really interacting with digital tools and so it will be perhaps a big learning curve. However, everyone will be doing the same thing and there will be comfort in this which will help student confidence to increase. I promote student empowerment and it will be a good way to set up the classroom culture and to help students gain some new skills moving forward.

FETCpresentation

New Buncee Boards! Announced today!

Today is an exciting day for Buncee and the many users of Buncee. The newest feature, Buncee boards, provide a great way to gather resources in one place, open up communication and collaboration, and share ideas with others in and out of the classroom. There are a lot of great ideas for using #BunceeBoards in the classroom, so be sure to check out this post: 10 ways to use Buncee Boards to see some of the ways Buncee Boards can be used in the classroom. There are a lof of great ways to use these in the classroom, and even better, students can have fun sharing, commenting and posting reactions to the boards.

There are many possibilities for using Buncee in the classroom and the nice thing about it, the best thing about it, is that it promotes choice and authentic creations for students and teachers and anyone. It is a skill that students can learn and can share with their families which will open up more learning opportunities beyond the school setting and move it into the community and beyond.