3 Ways to Implement Blended Learning In The Classroom


3 Quick Ways to Implement Blended Learning In The Classroom

Best practices for blending or flipping your classroom continue to be topics of discussion in education today. Much of the discussion focuses on finding clear definitions of what these terms mean and the benefit to classrooms.

There are many resources and ways to educate yourself on this topic available including a diverse selection of books and blogs (such as the book Blended by Michael B. Horn and Heather Staker, and of course the Getting Smart blog) related to the topic, reaching out to colleagues or members of your PLN or attending conferences such as FETC, ISTE, state edtech conferences, edcamps and other professional development experiences.

All of these are great for finding examples, vignettes, templates, suggested tools and ideas. But even with all of these options, sometimes it is more valuable to take a risk and try something out on your own. The outcomes will not always be the same for each teacher, classroom or student, but it’s at least worth a try.

There are different models for implementing blended learning, and the method used will vary depending on your classroom. I recommend starting with one method–if you see positive effects, that you have more time to collaborate in class and your students are more engaged then continue. If not, then use this opportunity as a way to learn more about your students and their needs. As teachers, we need to constantly reflect on our methods and encourage self-assessment with our students, all part of learning and growing together. Getting started can take some risk and exploration, and definitely time.

Here are some different ways to use technology to “blend” or “flip” learning that in my experience have worked well. These tools can offer innovative or creative learning methods in your classroom, opening up the time and space for where and when the learning occurs.

1. Flipping and Blending with Videos

In the past when I heard “flipped classroom” I thought that meant simply assigning a video for students to watch. It can be, as it was originally considered the traditional way of flipping the classroom, but there has to be follow-up, accountability and more than just simply assigning a video. How will we know what the students gained from the experience?

The benefit of having students watch a video outside of class is that it reserves the class time for discussion and peer collaboration, and moves the teacher to more of a facilitator in the classroom. There are video tools such as EDpuzzle and PlayPosit, through which students interact with the video.

By responding to questions throughout, they are held accountable for the material and can show what they are learning. The teacher has instant feedback and can better understand how the students are learning and provide more personalized instruction. Either of these tools are great for the teacher to create lessons, but also provide the opportunity for students to create lessons that can be shared with other students.

In my experience, these tools have both provided a lot of authentic learning, problem-solving, critical thinking and collaboration. More importantly, they create an opportunity for students to move from learners to leaders, and from consumers to creators in the classroom. This is one of our main goals as teachers–to provide opportunities which empower students to take more control and drive their own learning. These leadership opportunities also help the students to feel valued because of the work that they are doing. There are sample lessons or “bulbs” available, so try one of from the library, and see how it works in your classroom.

2. Game Based Learning and “Practice” as Homework Alternatives

Perhaps you want students to simply play a game or have some practice beyond the school day. There are lots of options available, some of which enable students to create and share their games as well.

A few of these that you are probably familiar with are Kahoot, Quizizz and Quizlet. Creating a game with any of these three apps is simple. There are many public games and Quizlet flashcards available to choose from, and it is simple to create your own or for students to create something to share with the class. You can use these to differentiate homework and have students create something more personalized and beneficial for their own learning, and then share these new resources with other students and classes.

It’s another great opportunity to understand student needs because of the types of questions they design and the vocabulary they choose to include. Another bonus is that using something like Quizizz means students can complete it anywhere. Have you tried these  three? Give Gimkit a go. Created by a high school student, this is a game that students enjoy, especially because they can level up, use multipliers and really practice the content with the repetitive questions that help them to build their skills.

3. Discussion Beyond the School Day and Space

There are tools available for having students brainstorm, discuss topics or write reflections which can be accessed at any time and from any place.  For example, Padlet is a “virtual wall” where teachers can post discussion questions, ask students to brainstorm, post project links and more. It is a quick and easy way to connect students and expand where and when learning occurs. Take the posts and use them as discussion starters in the next class.

Synth is great for having students create or respond to a podcast. The idea is that students can do some of these activities outside of the classroom period, and teachers can create prompts which provide opportunities to engage students with their peers in a more comfortable way.

Even though all of these involve technology at some level, they are interactive tools to engage students, to expand and “flatten the walls” of the classroom and offer students an opportunity to do more than just sit and learn; to become more actively involved, giving them a voice and choice, through more authentic learning.

By giving the students a chance to do more than absorb information, but instead to create, design and think critically, we not only give them the knowledge to be successful, we encourage them to create their own path to success. And hopefully, in the process, they learn to better self-assess and reflect, both of which are critical skills they’ll need for success in school and in their careers.


10 EdTech Tools for Encouraging Classroom Collaboration

Thank you Getting Smart for the opportunity to be a Guest Author for this post.

10 EdTech Tools for Encouraging Classroom Collaboration

By Rachelle Dene Poth

Today’s technology offers so many options for educators and students that deciding on where to begin can be overwhelming. To get started, think about one new approach that could be the catalyst for positive change in your classroom. In looking at your learning environment, what could benefit your students the most?

How do you find tools to help meet your needs? Resources are everywhere: books, blogs, social media like Twitter chats, Voxer groups, your PLN, or even conferences, EdCamps and similar professional development opportunities. But even with all of these resources available, it still comes down to taking a risk and trying something new.

Here are some helpful and versatile technology tools to easily and quickly integrate into your classroom and help meet your needs.

Discussion Tools: Get Them Talking

Teachers need to hear from students, and we know that asking questions or calling on students to discuss a topic can often make them nervous. When students, or anyone, develop that feeling of “being on the spot”, it can become more difficult to encourage students to share what they are thinking, what they are feeling and what their true opinions are. This is where digital tools can provide security and opportunities for students to express themselves. Technology has a true purpose. Students still need to develop an ability and gain confidence to speak in class, but these tools can help by providing a comfortable way for students to develop their voice and express themselves.

Depending on the type of question or discussion format you want for your classroom, there are many tools available that can help.

  1. SurveyMonkey is a good way to ask a variety of questions, find out what students are thinking, use it for a quick formative assessment, and many other possibilities. I have used it to find out how students prepared for tests, what areas they need help with, and even for voting for club officers and planning trips. You have the results quickly and can provide feedback instantly, to plan your next steps in class. It can be a different way to find out about your students and their needs.
  2. TodaysMeet is a backchannel tool that can be used in or out of class, as a way for students to contribute to a discussion or ask questions. It can also be used to provide “office hours” online, for students to ask questions beyond the school day. There are many possible uses for this tool, and setting it up is easy.
  3. GoSoapBox is a response tool that can be used to ask a variety of questions without students having to create accounts. Students simply need an “event code” provided by the teacher to access the activities available. GoSoapBox can be used for polls, discussion questions, quizzes and more, and provides a fast way to assess students or to simply learn more about them and their thoughts.
  4. Recap is a video response tool, where students can respond to a prompt and all responses are compiled into a “daily reel” for teachers to view and provide feedback. Students can respond from anywhere and feel comfortable in sharing their thoughts using this tool.

These are just four of the many options—sometimes it just takes a bit of research. Asking the students for new ways to use the tools you have already been using in class can also be helpful.

Communication Through Collaboration

There are many options which promote student collaboration and enhance writing skills and student voice.

5) Blogging: Through blogging, teachers can provide support for students and help them to gain confidence in writing and speaking. We have used Kidblog to complete many writing tasks and creative writing assignments.

6) Wikispaces: A Wiki has worked really well in our classes for having students collaborate on a topic, create a discussion page, and set it up to inform on a topic, to list just a few examples. We created a wiki on Spanish art and also created our own travel agency.

7) Padlet: Padlet is a “virtual wall” which promotes collaboration, communication, creativity and more because of its versatility. Students can write a response to a discussion question, add resources for a collaborative class project, work in small groups, use it for brainstorming or connect with other students and classrooms throughout the world.

Using digital tools in this way is great because the discussions don’t have to end when class does. These tools give ways to get students talking, share their ideas, so that we can help them grow.

Creating presentations and telling a story

A few options for having students present information in a visual way with options for multimedia include the following:

8) Buncee is a web based tool that can be used for creating presentations, interactive lessons and more, with many options for including different characters, fonts, animations, video and more.

9) Piktochart is a tool for creating infographics, social media flyers, engaging presentations and more. Students have created menus, self-descriptions, movie and tv advertisements, recipe presentations and much more.

10) Visme is a “drag and drop” tool that is easy to use for creating infographics, reports, different presentations and more. It has a library full of images, charts and more, making it easy for users to create exactly what they need.

What are the benefits of these tools?

Each of these tools promote more personalized and meaningful learning for students. These tools can be used to enhance, amplify and facilitate deeper and more authentic learning . Using technology just for the sake of using it doesn’t make sense. But using it to help students find their voice, learn what they want to do, what they can do and what they need help with, does makes sense. Purpose.

For more, see:

Rachelle Dene Poth is a Foreign Language and STEAM Teacher at Riverview Junior Senior High in Oakmont, PA. Follow her on Twitter at @rdene915.

Quizizz and ZipQuiz: Fun ways to learn!


Ever since I had the opportunity to talk to the creators of Quizizz in January of 2016, I have been fascinated by how hard they work and appreciate how active they are in continuing to seek feedback from educators.
Quizizz began in 2015, the idea of Ankit and Deepak, who wanted to create a learning tool that would help students and teachers in the classroom. I remember that first conversation. Hearing their story was so inspiring, knowing how hard they worked to achieve success, not giving up, really emphasizes the importance of working through challenges, setting goals, reflecting and to keep moving forward when you believe in something like they did. They did not give up but rather worked harder. 


I had the chance to meet them face to face at ISTE in Denver last summer. I really enjoyed the conversation and seeing people learning about Quizizz for the first time. We have kept in touch, they send updates and announcements about new features on a regular basis and I have been fortunate enough to be included in some of the testing and conversations. My students even had some fun creating their own memes to be used in our games, imagine their surprise when I added some of theirs into our game the first time. 

ISTE 2017

Photo from #ISTE17 Twitter feed


If you have not yet tried Quizizz, I recommend giving it a try for some additional ways to engage your students in learning and provide more opportunities for practicing the material. In addition to reinforcing the content material, students will definitely have a lot of fun in the process. The benefits of Quizizz are that not only can you play it live in class, it can be assigned for practice and students can redo the Quizizz game for extra practice and preparation whenever they want. Students can start a game and continue later as long as they use the same join code and user name, which makes it really beneficial for having the opportunity to learn anywhere and anytime, regardless of their schedule.

I caught up with the Quizizz team again this year at ISTE in San Antonio, before the conference officially kicked off and I was excited to learn about their newest app which is called ZipQuiz. I definitely enjoyed playing it, although I did not do so well and felt really bad when I was told at what grade level the questions were. I will not share that information now. But you can’t always remember everything, can you? Or maybe there is a way. This is what ZipQuiz can help you do!

So here is how ZipQuiz works:


Quizizz itself is a great way to review in the classroom and even use the games as an assessment for quick feedback for the students and for you to plan your next steps. And now, with the new app ZipQuiz, students are able to continue practicing and even compete against friends and others, on various school subjects whenever and wherever they want.


ZipQuiz is easy to use. Once students have the app, they simply need to select their appropriate grade level from 1st through 12th grade and choose one of the subjects that are currently available: math, science, English, history, geography, or even select the “fun” subject.​ A​ll​ of​ the content ​in ZipQuiz​  is created by teachers  and curated by editors at Quizizz.
Once the subject is selected, a quiz will be generated with a 60 second timer that the students can then start to play. Once the game ends, they have an option to challenge someone to try the same quiz and beat their score.​ Students can play these “s​olo” games and then​ share the​ games​ as challenges to friends​ ​or​ they can play​ in a ​ “Versus” mode where ​they will be pair​ed​ with other students from around the world.​ As for safety, I have been told there is no​t a ​way for students to communicate with each other through the app​ and so it is safe to play.
They showed me a few of the games and some of the features of ZipQuiz. I had a lot of fun playing it and trying to figure out the correct answers was not always easy, as the subjects were ones that I had studied many years ago. I look forward to trying this with my students and sharing it with colleagues and who knows maybe even challenging a few friends myself. But I think I should probably practice first to see if I need to practice on my subject knowledge

Currently it is available as an app for the iOS systems and they are of course working on the Android app, which I am sure will come out soon.

ZipQuiz

​As for Quizizz, some of the other great features ​are that Quizizz integrates with Google classroom, it has great ​d​ata ​t​racking​,​ teachers can look at reports ​and quickly understand which questions were answered incorrectly by all ​students and they can also look at each student’s response​, question by ​question. ​Reports are saved, making it easy to go back in and check the ​results. There is also the option to ​s​end an email to parents with the student’s’ ​results from the ​Quizizz, which is a great way to keep that communication open with parents and share the assessment data.

Quizizzmeme2

Another fun meme, thanks Quizizz 🙂


For added fun, Quizizz also offers memes​,​ question timers, ​music and the ​option of including a l​eaderboard​,​ all of which can be turn​ed​ on or off by the teacher, depending on their preferences.
Not a lot of time to create a game?  No worries. There are thousands of public Quizizz games available, and creating a game is quite easy with the “search” feature. You can quickly create a game by gathering questions and adapting them to your specific content or changing the choices by using the search and pulling questions from the various public games available.


If you are looking for a new tool to start the school year with that provides some different options for learning and fun, try Quizizz. And if you have some fun ways to play or ideas to share, let me know, or contact Quizizz directly. They will be happy to hear from you!

Thanks Quizizz for making the meme for me!

Thanks Quizizz for making the meme for me!

Quizizz1


12 Tools That Made The Biggest Difference In My Teaching

Posted on TeachThought, January 5, 2017

12 Tools That Made The Biggest Difference In My Teaching This YearRachelle Dene Poth

There are so many digital tools available today to promote student learning in the classroom. The task is in figuring out what you need for your classroom. What could benefit your students the most?

Over the past year, I took as many opportunities to learn as I could, spending time gathering information from reading books and blogs, staying active through social media in Twitter chats, Voxer groups, and by attending many conferences, both physically and virtually. I created long lists of new ideas, new tools, and created new accounts for many digital tools and tried as many as I could.

12 Tools That Made The Biggest Difference In My Teaching This Year

Communication, Collaboration

Technology can help give students a voice, where otherwise they may not be willing to or want to respond, especially within the traditional classroom space.  Here are the tools that changed our classroom this year and why.

1. Recap recap pioneer badge 2017 (1)

A video response tool that can be used for many purposes including formative assessments, student reflections and for sharing student work with parents. One of the biggest benefits of using Recap is that it provides a comfortable way for students to connect with their teachers, to share their ideas, thoughts or reflections, in a way which promotes student voice.

After using Recap with students for assessments, for providing their feedback to me about what they liked and did not like about class, and more, I could see that they were comfortable being able to speak freely, in their own space. I like being able to ask questions, provide different prompts, give feedback, and receive the daily reel that Recap compiles, to make reviewing it an easy process.

2. Voxervoxer

I found out about Voxer after being invited into a group created for ISTE Denver 2016. It started with a group on Facebook, and led to the implementation of Voxer as a means to connect everyone, build excitement for the conference and much more. I was amazed with the diverse uses of Voxer, ranging from individual conversations, a specific topic focused chat focused, a book study and much more.

Becoming more familiar with the different uses  got me to thinking how I could use it as a way to be accessible to students when they needed help with assignments. I had already been using various platforms including a messaging app and an LMS, but thought I would try Voxer out with a small group of students. The students loved it and used it for a few Spanish projects and even on a personal communication basis. After some time reflecting, I thought it could probably be a good tool to use for speaking assessments and to get the students involved in having conversations in Spanish with each other.

There are many uses for Voxer in general, but as an educator, it can be a good way to become more connected, receive and provide support for colleagues and students.

3. PadletPadletBlended

Padlet, which is equated to being a virtual wall, kind of like writing on a bunch of post it notes, has emerged as quite the multi-purpose tool in my classroom. What initially began as a way to have back-channel discussions, emerged as a means to communicate with other classrooms on Digital Learning Day, to have students quickly research and post pictures for a fun class activity, to curate student projects for easy display in the classroom, and even for students to use to create a project which included activities and multimedia links.

The uses keep emerging and I’ve found that sometimes it’s best to turn to the students for some extra ideas of how you can use some of these tools in your classroom.

4. PiktochartPIKTODash

A tool for creating infographics, social media flyers, presentations and more, Piktochart has become one of the tools that my students enjoy because they find that it is easy to use and enjoy the options which enable them to really personalize and make their project authentic. I have used it to create visuals such as birthday cards, classroom signs, Twitter chat graphics, and also for creating presentations for conferences. Regardless of what your needs may be, if you want to give students an option to create something visually engaging, personal to their interests and which enhances their creativity, according to my students this is something that you should try.

5. Vismevisual-storytelling-in-the-classroom-1024x590

Several of my students who have been very hesitant to use anything other than traditional presentation tools through Google or Microsoft Office, have found Visme to be a tool which encouraged them to take some risks and try new things this year. Students had to create a timeline about their summer, or basically anything they wanted, as a back to school project. At first, several asked to use something different, but they quickly found how easy it was to create something and have fun in the process.

Several students enjoyed it so much that they contributed to two blogs about the use of audio and the benefits of it for education as well as other areas. (hearing from the student’s perspective, and seeing them featured for their work was a great experience). So if you want to try something more engaging that promotes creativity, helps to build those vital technology skills and also lets students have fun in the process, then this could be a tool to try in the new year.

You can create infographics, reports, presentations, social media flyers and more. It is an easy drag and drop tool, that encouraged those “hesitant” students to take some risks and try new things. Check out Visme’s video series for “how-to” information!

6. Nearpodnearpod4

This is one of the game changers in my classroom this year. After many years of using the same Spanish reader in Spanish III, I wanted to add to the learning experience of students by enabling them to see some of the locations described in the book. I had found many videos and magazines, but I found Nearpod to be a much better way to really engage students in the lesson. Not only did students enjoy the lessons because of the interactive nature of it, they were overwhelmed by the ability to become immersed in the virtual field trips and feel like they were in the places they read about in the book.

I knew it was working when those students who were constantly watching the clock move were the last to leave the classroom. The only thing that made this better was when students created their own lessons and took over the classroom, becoming the teachers and giving me the opportunity to become the student and experience it from their perspective. There are many uses for this in the classroom: interactive lessons, multiple question formats, ability to upload content, assigning a lesson for practice and more.

It is definitely worth taking some time to try out, even looking over some of the lessons available in the Nearpod library, and asking your students what they think. And the Nearpod for Subs is AMAZING!

7. FormativeGoForm

A tool that can be used for having students complete formative assessments either live in class or as practice outside of the classroom, and a great way for teachers to get students more involved and be able to provide real-time feedback so that they can continue their learning process. Formative is a tool that has gone through many tremendous changes and improvements throughout the course of this year which make it a great tool for teachers to use for assessing students.

Formative is another tool that my students enjoy using because of the individual benefits of having feedback sent instantly and directly to them, being able to “show” their work or have their answers corrected immediately. It has been a way to create a more interactive classroom and also another tool which I have used to flip roles with students so that I could also learn from their perspective. It is something which students ask to use and which they are excited to tell others about, which is why I know that it is having a positive effect in my classroom.

Join #formativechat on Monday nights

8. QuizizzQuizizz1

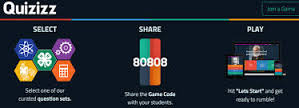
A way to involve students in game-based learning in the classroom and also to provide more personalized instruction, based on the feedback you receive when students participate in a live lesson, or when you assign it as a homework practice assignment. I have enjoyed seeing students create their own Quizizz games, which I have found provides more focused practice for the students because they choose the material they need to practice.

Another benefit is that it also enables me to share these resources with the class and with individual students who may need some extra practice There are many features offered by Quizizz, and if time is lacking for creating your own Quizizz, you can gather questions and edit from all the public ones available. Try the game with your students and see what they think, and use their input to help plan the next game!

9. Buncee

The first time I created my own Buncee, I was amazed by the number of choices available for adding elements into my creation. I found myself thinking about how much the students would enjoy creating using it and having so many choices available. I have some students who like to “dab” every time they get an answer correct and so I quickly realized they would really love the fact that they could add a dabbing dancer into their presentation.

I created a Buncee for our annual Open House and was able to record my voice and add extra elements in from the diverse library of choices.  Being able to create a Buncee like this, is a great way to share the information with parents who may not be able to attend. I had students create projects with themes ranging fr9. om a medical chapter to a lesson on teaching verbs and more. Students love the choices and the ideas for how we can use this tool keep growing. But the best part of it is that it enables every student to find something to add into their project and to bring out their creativity. And it definitely builds confidence with a lot of fun in the process.

10. Blendspace TES Teach

A few years ago I found “Blendspace” and it was exactly what I was looking for. I wanted an easier, more reliable way to share some websites with students to use for practice during and outside of the classroom. I had been doing this, by typing the links on paper, but the problem was that deciphering the link (between i’s, l’s, for example) sometimes made it a bit challenging. So when I started using Blendspace, now “TES Teach,”  it was simply as a way to put activities and resources into a lesson and share one link which would open an entire page full of possibilities for enhanced learning.

But over this past year I have found many more uses for it, ranging from providing an asynchronous lesson, curating professional resources, storing student projects for easy presentation in class, and mostly for the simplicity of building a digital lesson full of multimedia resources, from scratch to share with students and colleagues. Creating a lesson is easy to do and can be done quickly when using the TES resources or when adding your own content.

Students can also use it to create their own presentations and this is a great way for them to incorporate a variety of media and to have everything available in one “lesson” using one tool. Accounts are free and you can have students join your class through a “pin” or Google Classroom or through a link. Teachers can also look at the lessons available through TES Teach and try some in the classroom.

11. Storyboard ThatSToryboardCH

Storyboard That is an online tool that is used to create storyboard and provide a way for students or anyone to tell a story in a comic strip presentation Style. You can create by choosing from so many different characters props background scenes comma speak Bubbles and so much more. It is easy for students to create as this work as a drag and drop tool. It is a lot of fun for students to be able to really personalize the characters and create a very authentic and meaningful representation of the story they are trying to tell.

There are many characters and backgrounds related to specific times in history, you can change the color of the characters, their clothing, adjust their movement and more. It’s really nice for the students because they can customize so much according to their personal needs which really enables them to be creative and have fun and be more engaged in their learning.

Another benefit is that by having an account with school, there are lesson plans and examples available that can really help to see how to integrate StoryboardThat into your classroom, or really into any type of setting, to communicate information in a more visual, creative and innovative way. Another nice feature is that students can use it to present in class and have it presented similar to a power point.

12. BloomzApp bloomz1

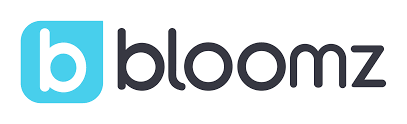
Bloomz is a tool which I began using at the end of the past school year, to see how it could enhance my classroom and open up more communication with parents. Bloomz offers a lot of great features, integrates the features of a messaging app, LMS, an event planner and more. It even provides translation capabilities with translation into 84 languages. Teachers can quickly create an event, share permission slips, create a sign-up sheet, track RSVPs, send reminders, and share photos and videos with parents.

Bloomz also enables teachers and parents to communicate instantly, privately, and as often as needed each day throughout the year. It recently added the features of a student timeline for building a digital portfolio to share with parents, as well as a behavior tracking program, for communicating about student behavior and providing positive reinforcement.

Conclusion

Even with all of the great digital tools available, we have to make some decision about what will work the best for our classrooms. What is the purpose for the implementation of technology? In looking over this list, are there any that you think might help to enhance, amplify or facilitate student learning in a more beneficial way than what you are currently doing in your classroom? Determining the answer is the first step, as we know that using technology just to use it doesn’t make sense. However, when we use technology in a way that enables us to help students find their voice, discover more about what they want to do, what they can do and what they need help with, makes sense. These are some of the tools which helped my students and had a positive impact on our classroom and learning experiences this year. To get started with the new year and some of these tools, my advice is to simply choose one of these tools and try it out.  See how it goes and be sure to ask your students for their feedback as well.

Kidblog: Don’t Let the Learning Stop: How to keep students engaged over extended breaks

Don’t Let the Learning Stop: How to keep students engaged over extended breaks

stocksnap_c91r095cw5

The “Slide”

Throughout the school year, extended breaks provide both teachers and students the opportunity to give their mind a chance to reboot. However, learning opportunities do not have to stop while we take a break from the classroom to devote time to family, friends, and relaxation. Without opportunities for active learning during these extended breaks, some loss of knowledge is inevitable.  Similar to what has been termed the “summer slide”, this phenomenon also occurs during shorter breaks throughout the course of the school year.

There are many opportunities available to avoid this “slide”; teachers can help students engage in learning in fun ways that do not feel like “learning” at all. For my students, this means  blogging. Thanks to the availability of technology and platforms like Kidblog, students can stay connected, while still working on building skills over the break.

From “assignment” to “activity”

So, what turns a blog post from “an assignment by the teacher” over break to a fun student activity? It’s all about the content. For example, students may be asked to write a blog surrounding their time over break. Perhaps they describe what activities they participated in; writing a review of a book or movie they experienced, sharing how they spent time with friends or family, or even posting a new recipe they learned over break. These open-ended prompts enable students to work on their writing and literacy skills in a low-key and fun way. Additionally, it gives teachers the chance to stay connected with their students and provide any necessary feedback.

For more reflection, students may be given prompts which ask them to take a look back at some of the work that they have done prior to the break. They can focus on a few specific skills they have gained as well as their strengths or weaknesses throughout the year. Using blogging as a journal, they may then write a personal blog to themselves addressing these areas.  The blog can be shared with the teacher as a reflection, to explain how they perceive their progress in class and offer some ideas for personal goals or describe areas where improvement can be made. This prompt can be a great way for students to prepare for the year ahead of them.

It’s about staying connected

Blogging enables the students and teachers to communicate through a comfortable medium. It gives students an opportunity to write, read, and practice any critical skills they have learned leading up to the break as well as some reflective writing.  Students are encouraged to be creative while they are engaged in the practice of reflection, setting them up for future growth and helping you as the teacher develop a better understanding of student needs.

Project Based Learning: Essential questions and Many Uses of Recap

Posted on December 7, 2016

Posted in Guest Post, User Stories, Why Recap

Excited for the upcoming school year, I decided to start with some new ideas, teaching methods and digital tools. I wanted to continue using some digital tools from last year, but hoped to find different and more creative ways to implement them into the classroom. My motivation for this developed as a combination of time spent over the summer reflecting on the previous year, learning new things at summer conferences and through webinars, and engaging with groups on Voxer. But possibly the most impactful for me, was by obtaining feedback directly from my students. I used Recap over the summer to ask them what they enjoyed in class, what helped or didn’t help, and what they were looking forward to in the new school year. Student voice matters.

A New Experience

The biggest change for my classes this year, was starting PBL (Project Based Learning) with my Spanish 3 and 4 students. When taking on PBL, educators need to have some guidelines set as to how to begin and what the process entails. Students will be taking on a challenging new experience, one which provides opportunities for choices, independent and inquiry based learning. It is a different experience, because the students are in charge of their learning. They are studying something of a personal interest, or a passion to themselves. It is quite liberating and can lead to tremendous, authentic, meaningful learning opportunities, which will be highly beneficial for the students. It can also be a bit scary, because of the amount of independence involved in this method. So there are guidelines and resources available to educators that can help with implementing PBL in the classroom, and guiding students to develop their “Essential Questions.”

Getting Started

There are many great resources available for educators to learn more about and implement PBL (Project based learning) in the classroom. To begin this with my students, I first did some research to prepare myself for this new learning experience. I started with the Bucks Institute for Education (BIE, http://www.bie.org) for guidance before implementing it in my classes. I wanted to be prepared so that I could help to guide the students, even though I knew that I would also need some support along the way.

I carefully read over and took notes from the “8 Essentials for PBL” from BIE and also referred to several publications from ISTE for PBL. Other helpful resources were the weekly blog posts by Ross Cooper and Erin Murphy, offering advice focused on #HackingPBL, to be included in their upcoming publication, “Hacking Project Based Learning”, which will be published this month.

Another helpful book was “Dive Into Inquiry” by Trevor MacKenzie, through which I enjoyed hearing his experience and sharing the helpful images of rubrics with my students. During this process, I was also fortunate to have conversations with these educators, and early on, Don Wettrick, author of “Pure Genius”  spoke to my students about PBL and how to get started, giving them great information and asking thought-provoking questions to challenge them. We had a Skype call with Ross Cooper, who listened to and offered advice to several of my students on crafting their Essential Questions. The students even later got to meet Ross and Erin and talk about the Hacking PBL book.

Next Steps

Taking all of this information in, I guided my students through each step in the process, with focus on the beginning stages of PBL. The first step is to decide upon the Essential Question. What is an Essential Question? From my research, I have learned that it is not something that can easily be answered by conducting a quick Google search or with a Yes or a No. An essential question requires more. It leads students to research and critical thinking, problem solving, independent learning, progress checks and reflection along the way. When focusing on the Essential Question, it is not readily apparent what the end result of the student learning experience will be. My students initially struggled with not knowing where their research would lead. An essential question requires more, leads to more student inquiry and should be something that will sustain student interest along the way.

img_20160926_104209100

Using Recap to focus on the Essential Question and PBL

Rather than have students write their Essential Questions, I asked them to think about what they wanted to study and to share their responses through Recap. I found this was beneficial because they could think through and explain their thoughts, and I could provide feedback directly to them. Having the opportunity to see and listen to the students as they shared their interests enabled me to understand the motivation behind their Essential Question. This method was very beneficial for me.

When we started our PBL, we decided to set aside Fridays as their “PBL” day, and they worked on it independently for the first 9 weeks. We had regular check-ins for updates and at the end, each student shared the product of their PBL experience, which could have taken any form, depending on where their research led them.

One very unique way that one of my students decided to share the information was by using Recap. Recap is a great tool for having students respond or reflect and gives them a comfortable method for sharing information with their teacher and also peers if they choose. One particular student suggesting using Recap to record separate videos of the results of her PBL study on Argentina and the tango. Using Recap for this purpose was a really great way for her to not only share her information and the reasoning of how she crafted her Essential Question, but also her thoughts and steps taken along the way.  Using Recap made  it very obvious to the audience how excited and engaged she was as a result of having the choice to pursue learning  about an area of interest and passion. Even without the video component, the audio itself was enough to inform and engage the listeners in her topic. I could tell that she had chosen an Essential Question which led her through a tremendous learning experience,with sustained inquiry and engagement, and had truly gone through the Project Based Learning process. Selecting this as the “public product” was a great idea, and it also provided her with something to reflect upon as well.

***********************

Using Recap to share the results of PBL

Marina: For my recent Spanish PBL project I decided to use Recap! PBL stands for Project Based Learning which means we come up with a topic that we are interested in learning more about. The first step is to state our essential question, the focus of our research and then being to explore and expand our knowledge. Along the way we might have more questions come up that we may not know how to answer, so we keep searching, learning and expanding our knowledge to find answers  to them. At the end of the PBL project we are basically an “expert” and we can share our findings with our class, in any way that we choose.

image

For my presentation, I decided to use Recap. Recap is like no other tool we have ever used in our classroom and it is by far one of my favorites. Recap is a tool that allows you to record a two minute long video, to answer a prompt, share information, or anything you want. It allows you, as the student, to answer questions that your teacher or professor sends you and you can record yourself, with as many tries as you want and then send it right to your teacher. As a teacher you can create questions and send them through Recap to your students, allowing them to respond in the comfort of their home or anywhere to answer your questions and have a continuous chat with feedback. Or like I did with my PBL, you can just make videos by yourself,  you don’t even need a question to be sent to you to be able to make one.

I love using Recap because I feel comfortable at my house recording my thoughts and then having them on my account to show and share with my whole class.

For my Spanish PBL product, I used Recap and recorded myself at home. I spent the time studying the Argentine tango and I was able to research my topic and prepare to make a couple of two minute videos to talk about and share what I had learned during our PBL. I didn’t have to worry about having to talk in front of the whole class and forget what I was going to say. With Recap it was stress free to present in front of my class because I pre-recorded it.

My class absolutely loved it because it was so different than just using Powerpoint or some other web tool that they had seen before. So not only did they learn about the Argentine Tango, they saw they could use Recap in a different way.

Recap is an amazing tool that can bring a whole new element to classrooms everywhere, at any time, because it is so simple and easy and not to mention a lot of fun! I really suggest it to students and teachers because trust me, they will love it!


Check out Rachelle’s Pioneer Page

Post on Storyboard That

Encouraging Creativity and Innovative Designs

Students Share Their Stories

By Rachelle Dene Poth


Thank you Storyboard That for the opportunity to share our story!
Find this and other great teacher resources in our Education Blog!

Storyboard That is a tool which offers many opportunities, not only for education, but for anyone looking to share information, tell a story, or produce a product in a more visually engaging way. It is a very authentic tool that promotes critical thinking, communication, and creativity. It fosters innovation in designing and empowers students in the learning process. Students take control of how they show what they have learned and can now do with the material, in their own personal way. Each of these opportunities help to promote the integration of the new ISTE Student Standards.

By using Storyboard That, students are able to select from so many templates with diverse options for themes, backgrounds, characters, text, props, and more. The tool applies to any level and any content area quite easily. It offers so much, that providing students with opportunities to express themselves and apply their learning in a unique way that is more meaningful, is easily done.

Some Options for Classroom Use of Storyboard That

There are so many possibilities for having students complete a project with Storyboard That. Teachers can use one of the many lesson plans available to implement with their classes. Whether you teach History, English, Foreign Languages and more, Storyboard That is a great option to provide to students, it will appeal to students because of the variety of options available to express creativity and promote student choice and voice.

Deciding how to best use digital tools can be challenging at times, but a good place to start is to hear directly from the students. Involving the students in the classroom decisions and then asking for reflections on their experience with using the tool helps educators to understand if and how technology is enhancing their learning process. Asking students to share the ease of creating with it, how it enhances or amplifies their learning and in general, what their perspective is about this particular tool, are important to include in teaching practice.

Students as Advocates

Several of my students have used and become advocates for the use of Storyboard That and share the impact it has had on providing more meaningful learning for them and their classmates. Celaine and Emma have created with it and produced visually engaging projects that have enhanced their learning.

Celaine has used this tool for many projects as well as for conference presentations over the past few years. She has become an advocate for its use, for teaching others how to use it at conferences and at school, and serving as a role model for other students with a positive message of the benefits of technology for learning. Here are her thoughts on why you should try Storyboard That and what you can expect from its for learning in your classroom:

Before I started using Storyboard That, my school assignments were rather dull. I tried to put my own personal touches into every slideshow presentation that I made, but after a while it got boring just typing text onto a slide, adding photos and animations etc. When I found Storyboard That, my educational mindset flipped 180 degrees. Now I could finally have some say in my assignments and showcase my personality by creating something that showed exactly what I pictured in my mind. Plus, I actually enjoyed doing my school work again because there were so many ways that I could personalize my assignment. I could choose characters and make them look any way I wanted them to. I could even choose from a variety of backgrounds that date from medieval times to mythical times to the present. That is what I love about Storyboard That: it allows anyone to create a visually appealing presentation in a unique format that will engage students in their learning and allow teachers to learn about/from their students.

In Spanish 3, students were to create a project using chapter vocabulary related to the medical field and had the task of telling a story, using any tool for their project creation. Emma has also participated in several technology showcases and is an advocate for having choices in project tools and how beneficial these tools can be for learning. Emma decided to use Storyboard That to create her medical story, selecting from the diverse backgrounds to really bring her story to life. Emma shares her thoughts on Storyboard That:

Storyboard That has given me the opportunity to truly personalize and create projects exactly the way I would like. It has endless possibilities for creativity and imagination. I really enjoyed using Storyboard That because it enabled me to put so many different things into the medical project. I was able to type anything into the search box and get back some great options, that were exactly what I was looking for. For example, I searched the word “pumpkin” and I got back multiple pictures of pumpkins and jack-o-lanterns so I was able to have choices and find the perfect picture. I found Storyboard That to be the perfect choice for the medical project because, as with most of our projects, this one did not require too many specifics. The requirements were mostly just to be creative and have fun as long as we use the proper vocabulary and verb conjugations.

I have noticed that other web tools do not offer the same amount of options that Storyboard That does for project and presentation making. Some other web tools seem to be limited in the offerings for backgrounds and templates that you can use. Also, I have noticed that it can be a little confusing and difficult to understand some of these other tools. With Storyboard That, it is very easy and simple to figure out how to put in your own backgrounds, characters, images, animations, etc. Storyboard That has made project making a lot more fun.

Implementing an App in the Classroom in 3 Steps

Thank you to Meghan and EdTech: Focus on K-12:  Glad to be a part of this discussion.

Two education experts offer up best practices for utilizing mobile technology.

With more and more K–12 students owning mobile devices, and with Pearson Education reporting that 72 percent of elementary students and 66 percent of middle school students want use mobile devices more in classroom, now might be the best time to add an app as a regular part of school work.

However, as EdTech reported, a survey done by Kent State University’s Research Center for Educational Technology (RCET) found that 30 percent of general education had received training on apps, and 87 percent wished to receive some sort of training on mobile apps.

We’ve consulted with a researcher and an educator who have expertise in adding mobile technology — particularly apps — into the classroom.

Step One: Identify What Kind of App You’d Like to Use

For Rachelle Poth, a Spanish teacher at Pennsylvania’s Riverview Junior/Senior High School, using mobile technology in her classroom came out of a desire to provide easier and more accessible communication with her students. For Poth, the messaging app Celly was the perfect fit to remind students of assignments and provide a place to put class resources.

“[Using an app] can seem overwhelming for a teacher who isn’t necessarily using technology at all or not using it much,” Poth says. “The key is to look at your classroom and ask, ‘What is one thing that is bothering me or taking up too much time?’”

Poth, who is also an education technology mentor with Common Sense Education, says that finding an app that will work with your class is dependent on what category you might need. She recommends the following:

  • For messaging: Celly and Remind for communicating with students, and Bloomz for parent-teacher communication
  • For assessment: Quiz creation tools like Quizlet and Kahoot!
  • For classroom organization: Learning management tools like Edmodo and Google Classroom

Another way to figure out where an app might be helpful is by asking students, Poth says.

“Pose the question to students, like, ‘If you could change one thing about homework, what would it be?’” she says. “You might hear no more homework at first, but if you dig deeper, you’ll find issues.”

Step Two: Find a Quality App and Test It

Once educators have decided what they want in an app, they might get overwhelmed by the sheer number of options.

Poth recommends reading teacher reviews and sample uses on a site like Common Sense Education or EdShelf. She also says you can chat with the communities on those sites or on Twitter to get feedback from other educators.

At Kent State’s RCET, Karl Kosko, an assistant professor, and others are evaluating apps specifically for special education teachers as part of the SpedApps project. Their database can be accessed by all educators.

Once a teacher has found the right app, he or she will need to do one more thing before introducing it to students: Test it.

“It seems like a very simple thing, but it is the first and foremost,” Kosko says. “Educators should play through the app and think about how their students will use it and misuse it.”

Step Three: Make Sure the App Connects with Your Lesson

Perhaps the most important step of all for educators is choosing technology that supports their teaching and their curricula.

Kosko suggests that teachers really think about how they are going to teach their students to use the app, and then use it for a purpose that will work in the classroom.

“Don’t just use it randomly,” he says. “The apps should be related to something students are currently learning.”

Also, if using anything that needs technology at home, Poth says teachers need to be aware of what students have access to.

“At the beginning of each school year, I give my students a paper and ask them what kind of device they have, if they access at home and what kind of tools they know how to use,” she says.

WAVEBREAKMEDIA/THINKSTOCK

Flipping Roles: Students Move From Edtech Learners To Leader

Student reflections

Published on November 30, 2016

By Formative Educator Rachelle Dene Poth

Technology has created so many ways for teachers to provide choices for students, enable learning to occur anytime and anywhere, and to also be able to further differentiate instruction for the students. In addition to teachers being able to take advantage of the resources available to deliver instruction and assess students, these digital tools also create the possibility for students to take more ownership in their learning and become empowered learners.

Rachelle and her edtech leaders!

Rachelle and her edtech leaders!

We need to offer diverse learning opportunities for students and to provide the support needed to encourage them to take more ownership in their learning and to become the leaders in the classroom. Students have to be more than just consumers, they need the chance to create, to experience learning from different perspectives and take this new knowledge and apply it in different ways to meet their needs.

How do teachers know what is working in the classroom? Teachers can use assessment tools and monitor student progress, but it is far more valuable and important to classroom culture and growth, to work on relationships and build collaboration by asking students to be a part of the conversation and creation of class materials. When teachers do this, they understand what helps students to learn better, be more engaged, and have a more authentic learning experience.  It also becomes a way to build student confidence and transform them into classroom leaders and advocates, who can then share their knowledge and experience with others in their class and then the community.

Give Them Choices And Let Them Lead

At the end of last year, I wanted to see what students thought about creating these assessments using tools which were traditionally used by teachers to deliver instruction.  Cassy shared her experience in the prior post and emphasized the importance of including students in the decisions of when and how to integrate technology.  Because reflection is key, I took this information and thought about the logical next step.  How could I share the message about Formative, or even more importantly, how could the students share their input with others, especially educators?

Students Take Over

Last month, Cassy had the opportunity to take the lead and present to a group of educators at a technology conference in Pittsburgh, and show how Formative can be used in their classrooms. Cassy had become the teacher, she created a lesson with Formative and offered her perspective on the use of edtech.  This time, I asked several students to participate in an edtech conference, and to present the session. Cassy taught the attendees about Formative. Here are her thoughts on the experience…

Student Perspective On Edtech: Cassy Becomes The Teacher

9th grader Cassy presenting Formative to teachers!

9th grader Cassy presenting Formative to teachers!

Cassy: “On November 8th, 2016, I participated with two other students in TRETC (Three Rivers Educational Technology Conference) where educators and technology directors from the Pittsburgh area presented sessions on uses of technology.  I am extremely grateful that I had this opportunity to share what I learned about and what I have created with technology. Formative was the perfect choice of a tool to share with the group of educators. I feel Formative is a wonderful, interactive and creative way to teach, complete assessments and increase engagement in teaching environments. I was very excited that I was able to inform others about this web tool because it means other students can have the same great opportunity I have been given, which is to use technology to learn and be creative.

Cassy had teachers respond to a Show Your Work question and draw their own flowers!

Cassy had teachers respond to a Show Your Work question and draw their own flowers!

    For the presentation, I created my own Formativewhich included a video, a true/false question, a multiple choice question, a short answer question, and a draw your response question. I included all of these so the group could see how many different options and aspects there are to Formative. I also explained the other possibilites with Formative, how to assign the Formative and answered any questions from educators or technology directors. One teacher asked if we (meaning my Spanish 3 class) have used Formative in the classroom. I told her that we have used it very often and I enjoyed it every time. I also explained how it is possible to see all of the responses of those participating in the Formative. While I talked about all of these great aspects of Formative and more, the group participated in the Formative I created and were able to see all of each other’s’ responses.

The dynamic teacher-student duo showing educators how to act on live responses!

The dynamic teacher-student duo showing educators how to act on live responses!

    I was very pleased with how the group reacted. I felt I had explained Formative well enough that everyone had a general, if not advanced understanding of how Formative worked and the advantages of using it. Seeing the smiles and hearing the laughter of everyone in the room meant that I had accomplished my goal of informing and sharing what I was so passionate about and making an impact with technology.

I am so lucky to have had the opportunity to present at TRETC with my fellow students and my extremely talented and intelligent teacher. Mrs. Poth has opened so many doors for me and has taught me so much. Learning about tools, like Formative, has made me realize how useful technology is for learning. It was wonderful to hear what Mrs. Poth had to say about Formative on top of what I had to share about it. The group was able to see two perspectives on how Formative has impacted the classroom, which I felt made a very big impact.  I admire her opinions and her comments. I am very appreciative that I could hear and see my fellow students and teacher talk about what they love so much about technology.

Being able to present with Mrs. Poth, was a great opportunity. I am very pleased I could share what I love so much about technology. Formative encompasses everything I love about technology: maximum creativity, endless possibilities and strong usefulness. I can’t think of a better tool I would have wanted to present than one that shows and encompasses my passion for technology: Formative.”

Want to learn more about giving your students ownership over edtech and opportunities to present tools to teachers? Tweet to @Rdene915  or @goformative !  

Technology Can Make The Learning Process More Transparent

TeachThought: Thanks to Terry Heick for publishing part two of this post.

Technology Can Make The Learning Process More Transparentby Rachelle Dene Poth

In my last post, Finding Out What Students Are Thinking: 10 Tools To Get Them Talking, I shared tools that can help promote student communication.

The additional benefit for using tools like these is that you can take what you hear and learn and the next day in class anonymously share some ideas to get the discussion going.

Even if you try to keep things anonymous, you will have the students who immediately fess up and say “yeah that’s mine,” because that’s just what the students do, which is okay because they are willingly sharing what they said.

And if it does come down to a right or wrong kind of question and that student is in fact incorrect, that’s an even better lesson–a better example for the other students in the classroom to show that it’s okay to answer something and to be wrong.

These are the experiences that build character and growth mindset and help students become more involved in their own learning path.

A Few More Tools: Communication Through Collaboration

If you’re looking for a way to have students speak more regularly about different topics, share their ideas, or be more involved in class discussions, you may want to consider some other format for “talking.”

Having students write in their own blog, where they can keep their responses private and you can respond directly, is a great way to learn about the students and what they are thinking. Having this communication format is also helpful with relationship building.

Through blogging, you can give feedback which helps to provide support for students and can help them to gain confidence. By building confidence in this way, they have a chance to become more open to and comfortable with sharing their ideas in class.

As teachers, any opportunity to share our own experiences, especially when we share experiences that reflect our fears of making mistakes and taking risks, is helpful to our students.  Showing that we are sometimes wrong is okay, because we are all are constantly growing.

Writing Spaces

So what about some tools?

Wikispaces is a social writing platform for creating an online space for collaboration. Creating a wiki might be a great way to have students collaborate together on a topic if they are working in small groups. Some options for collaboration are creating a page for a discussion, set up a pro/con debate, or a even class website. Students can build confidence and comfort by collaborating in this way.

Padlet is a virtual wall for posting thoughts, discussion, and more. It could also be another way for students to work together and build some of these skills for collaborating any time and anywhere.

Tools For Reflection & Feedback

Choosing the right tool comes down to what type of conversation you looking to involve students in.

Is it open-ended?

Do you want the students to speak out in class or do you want them to think about something, have time to process it and answer after class?

That’s the benefit of offering blended or flipped learning experiences. The conversations don’t have to end when class ends. The questions don’t have to be asked during class because teachers can set up questions after class using tools like these I’ve shared, or Let’s Recap.

Let’s Recap is a way to record a prompt, ask questions, and then have students respond through video. Teachers can then view the response or see the daily reel, and provide feedback to each student.

A tool such as TodaysMeet can be useful for a “backchannel” chat in class, or to open up discussion after the school day ends. Either way, it is another quick option to get the conversation going or to use as a way for students to ask questions.

The goal of all of these tools is to get them talking–to know what their thoughts are–so that we can help them grow.

Why Does Student Feedback Matter?

Teachers need student feedback to help guide our next steps and provide learning experiences which are meaningful.  We want our students to feel comfortable. Depending on the age group being taught, the content being covered, and whether the technology is available and accessible to the students, you can determine which of these tools might facilitate learning the best.

Using technology just to use it doesn’t make sense. But using it to help students find their voice, learn more about what they want to do, what they can do, and what they are having trouble understanding does.

These tools and others like them, can help to connect those ends. And since learning feedback is critical to student growth, sometimes we need other methods for connecting with the students; this is when technology has a purpose.

Technology can expedite the feedback process and gives us real live results. We can give feedback to the students, the information is saved, and we can use it as a way to give a voice to those who would not necessarily be willing to use their voice in the classroom.

For now, maybe keep it simple. Start with the question, “What do I need to know about my students?”

Then look at these tools and others like them and start experimenting.