Keeping the Learning Going

Over the past couple of weeks, there have been a lot of conversations about what educators will do if schools need to experience school closures or move to a hybrid model in the upcoming school year. With so many uncertainties when it comes to the pandemic, it has definitely been a challenge to figure out how to provide the best learning experiences for our students and to keep them engaged and motivated during this time. I miss being in my classroom and the interactions with my students, greeting them at the door, working with them on activities and projects in that classroom” space” although the time we had never seemed to be enough!

Finding ways to extend the “space” of learning for our students has been a popular topic of discussion for many years, and something that I have worked on, so it is not entirely something new. However, with our current global situation, educators and schools are seeking to find the right resources that can be put into action right away and that will work for transitioning back into the classrooms too. I love that I can create a message to share with students, to check in and  for them to connect with each other.

Screen Shot 2020-05-27 at 9.19.48 PM

We must look for ways to provide rich learning experiences through versatile tools that students can access and work on independently wherever they are and regardless of time. What I have suggested to many educators is finding one or two tools that enable them to do many of the same things they would do in the classroom and even more. With Buncee, we can work remotely and provide meaningful learning experiences that engage students in the digital space as well as our physical classroom spaces. As students create, they can work from school, at home, or anywhere, and be able to share their work with classmates and teachers, even globally.

Endless Possibilities with Buncee

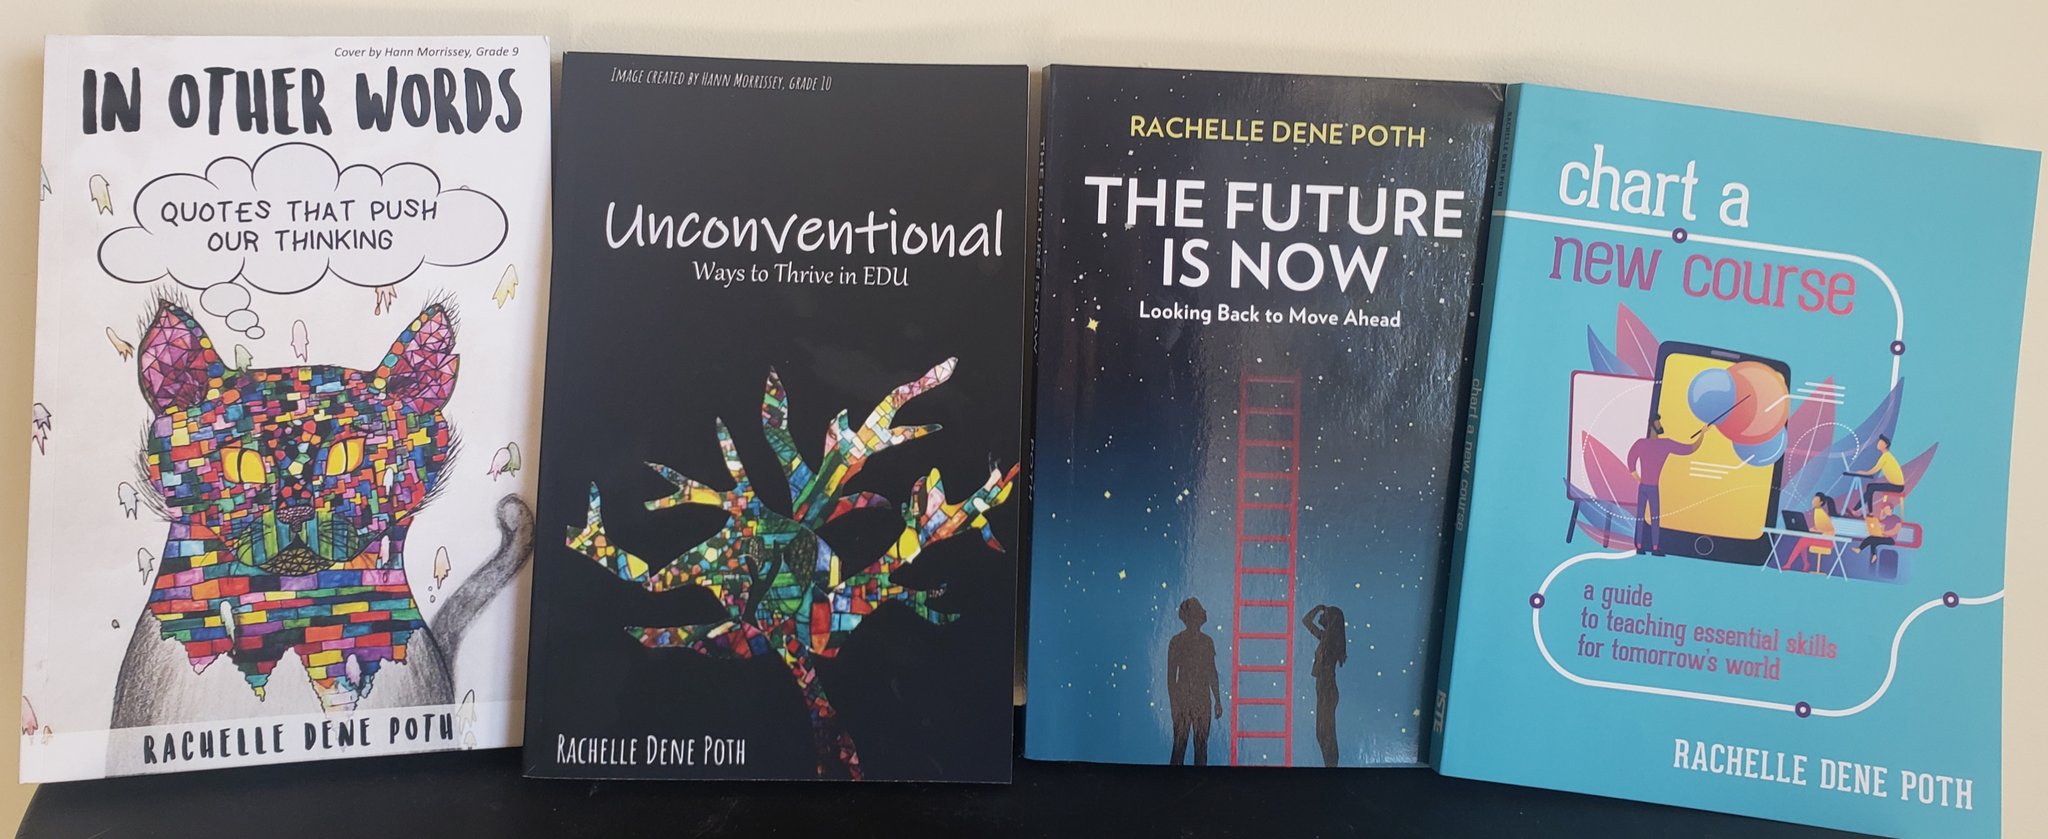
One of the things that I love the most about Buncee is that it can be used in so many different ways, not only for instruction in our classrooms but also in life. I tell the story often that I have used Buncee personally to create cards for family and friends, personal business cards, design engaging graphics for Twitter chats and presentations for webinars, or to make quote graphics for my books. There are so many ways to use it and for me, it always comes down to the why, or the purpose for choosing a specific digital tool. What can I use it for? What are the benefits? How does it help students to learn, to be more engaged in learning and to build skills?

When I decide to use digital tools in my classroom, I want students to practice the content in a more authentic and engaging way, while also developing essential skills such as collaboration, critical thinking, problem-solving, and creativity that will benefit them in the future but that are necessary now too.

Having a specific platform or digital tool in place that all educators can use and making sure that all students will have access is very important. As teachers, we have so many choices for how we can use Buncee in our classrooms and we can share ideas for families to use it for activities too. It is a versatile tool that provides multiple ways for people to learn and to express themselves.We’ve tried a lot of different ways for using Buncee in the classroom, many of which have been a result of the creativity and out-of-the-box thinking of the students.

Unlock the Power of Creativity

It just takes logging into Buncee to unlock the power of creativity once you see a library of more than 31,000 graphics with new assets added every day that connect with what is happening in the world. Regardless of what you want to create, there are more than enough choices for what to add into your multimedia presentation. Students (and anyone) can quickly create a multimedia presentation full of animations, drawings, stickers, emojis, 3D objects, Buncee messages, 360 images, audio and video embedded and even student artwork!

Beyond the potential for creativity, collaboration, critical thinking, and communication, using Buncee, students can build skills in digital media literacy, technological proficiency, and digital citizenship. Students have the opportunity to use technology as a tool for solving real-world problems or making real-world connections.

Buncee is so invested in providing a lot of options and opportunities for students and educators to enjoy learning, creating and growing together. I have been proud to be a part of this growing educator community and have learned so much from the connections that I have made and from the relationships that have formed with the Buncee team and Buncee Ambassadors.

I looked for some examples and asked for some feedback from ambassadors and Buncee educators.

Buncee has been a wonderful asset during this time of remote teaching/learning.  I used Buncee every week to create my lesson plans.  I would make a copy and adjust my template to what I needed for that week. I also used Buncee to create flyers for our school-wide virtual spirit days.  
Buncee provided templates that I was able to use both for paper packets as well as digital templates for the students who were able to connect digitally (even if that number is small).
One big way that Buncee was a help was the sense of community and support that it provided during this time.”   Jessica Chandler 


Screen Shot 2020-05-28 at 12.33.43 PM

“It is such a special time for my students and for me as we look back.” Barbie Monty.

Barbie worked on the Hugs4Heroes initiative with Kristina Holzweiss and Amy Storer and there was also the #WithHeartWhileApart.

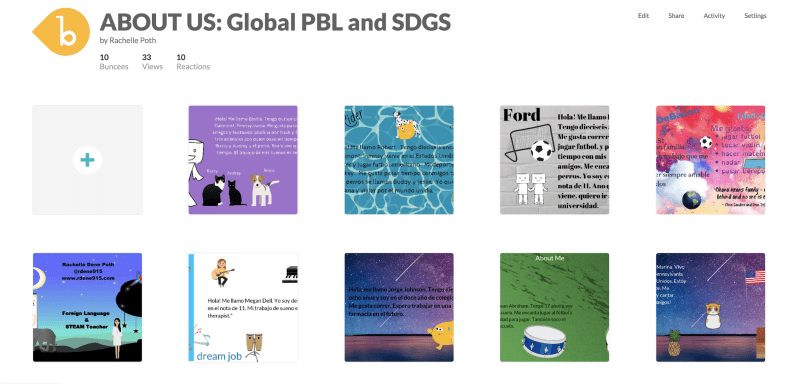
Check out this Buncee Board with more than 10,000 views!

Check out Buncee’s posts on Ideas for the end of the year and Summer Fun!

10 activities for a productive summer

Here are some of the latest ideas that have been shared.

Explore virtual classrooms.The Merrills shared a template and I created several virtual classrooms for my students!

Check out Marie’s virtual classroom where she lost her Bunceemen!

Explore Summer fun for early learners

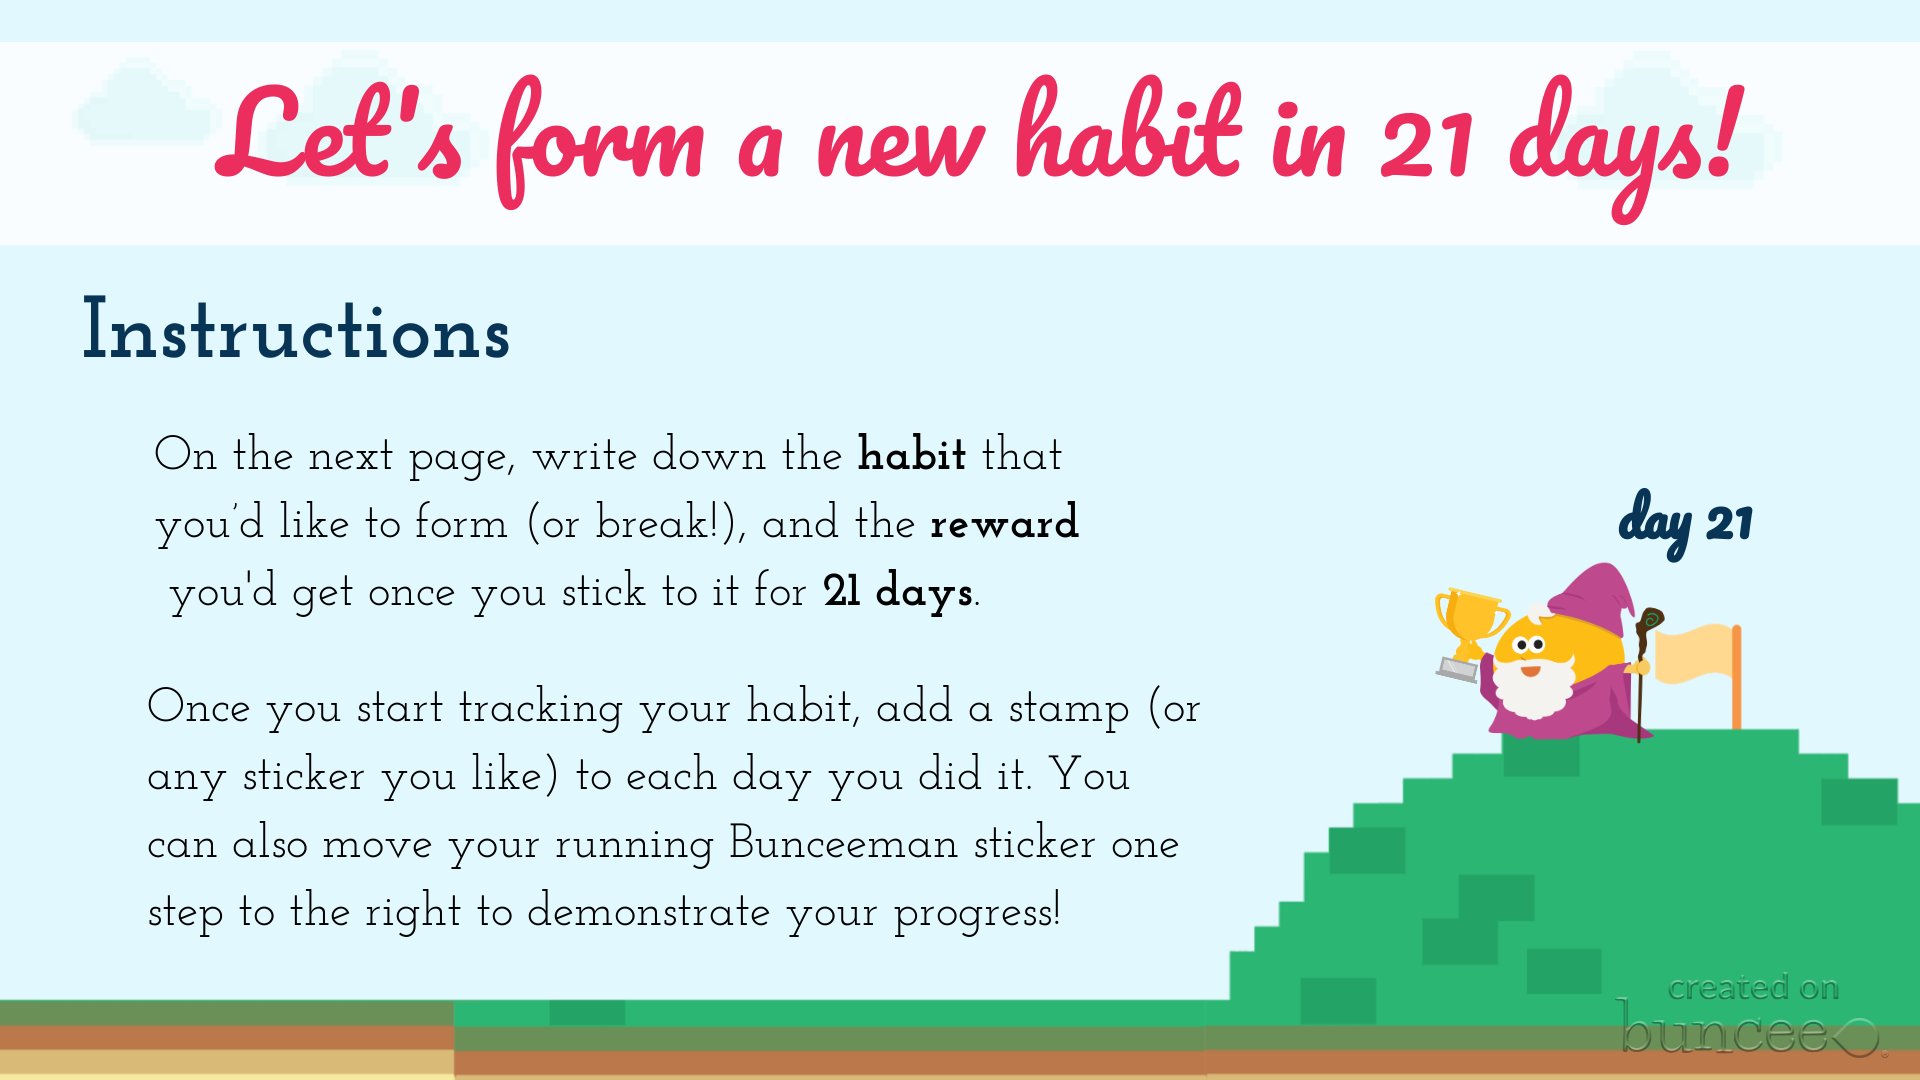
A new habit in 21 days activity

Image

My Spanish I virtual classroom

Art Classroom by Colette

Image

Image

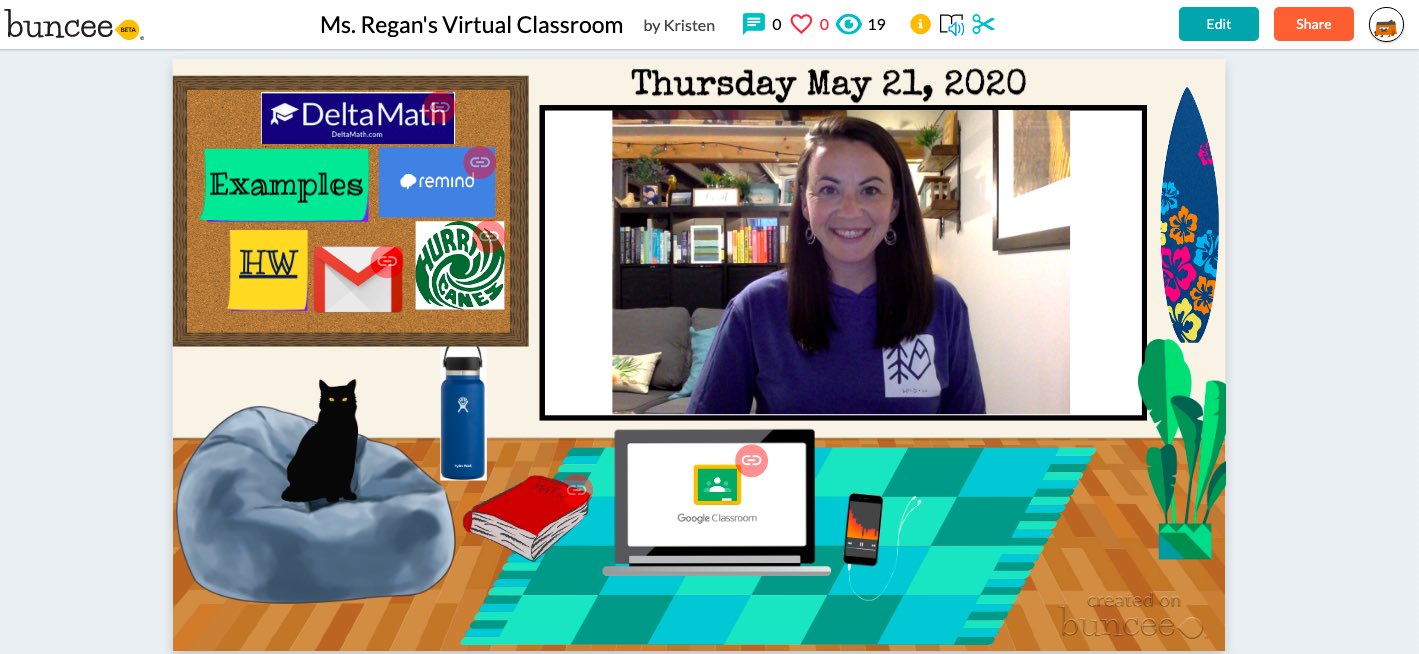
Kristen Regan’s Classroom!

Check out Parent Newsletters from Laurie Guyon

Barbie Monty said, “My favorite is having my students create a Buncee end of the year reflection.

Bonnie Foster created a Covid-19 Survivor certificate

.

Ide Koulbanis is having students plan a trip! Bunceeman Adventure

Daily Reflective Thoughts by Don Sturm

Test Prep and Motivation: Amy Nichols

Self-care suggestions

End of the year celebrations and certificates or make a Buncee Card! 
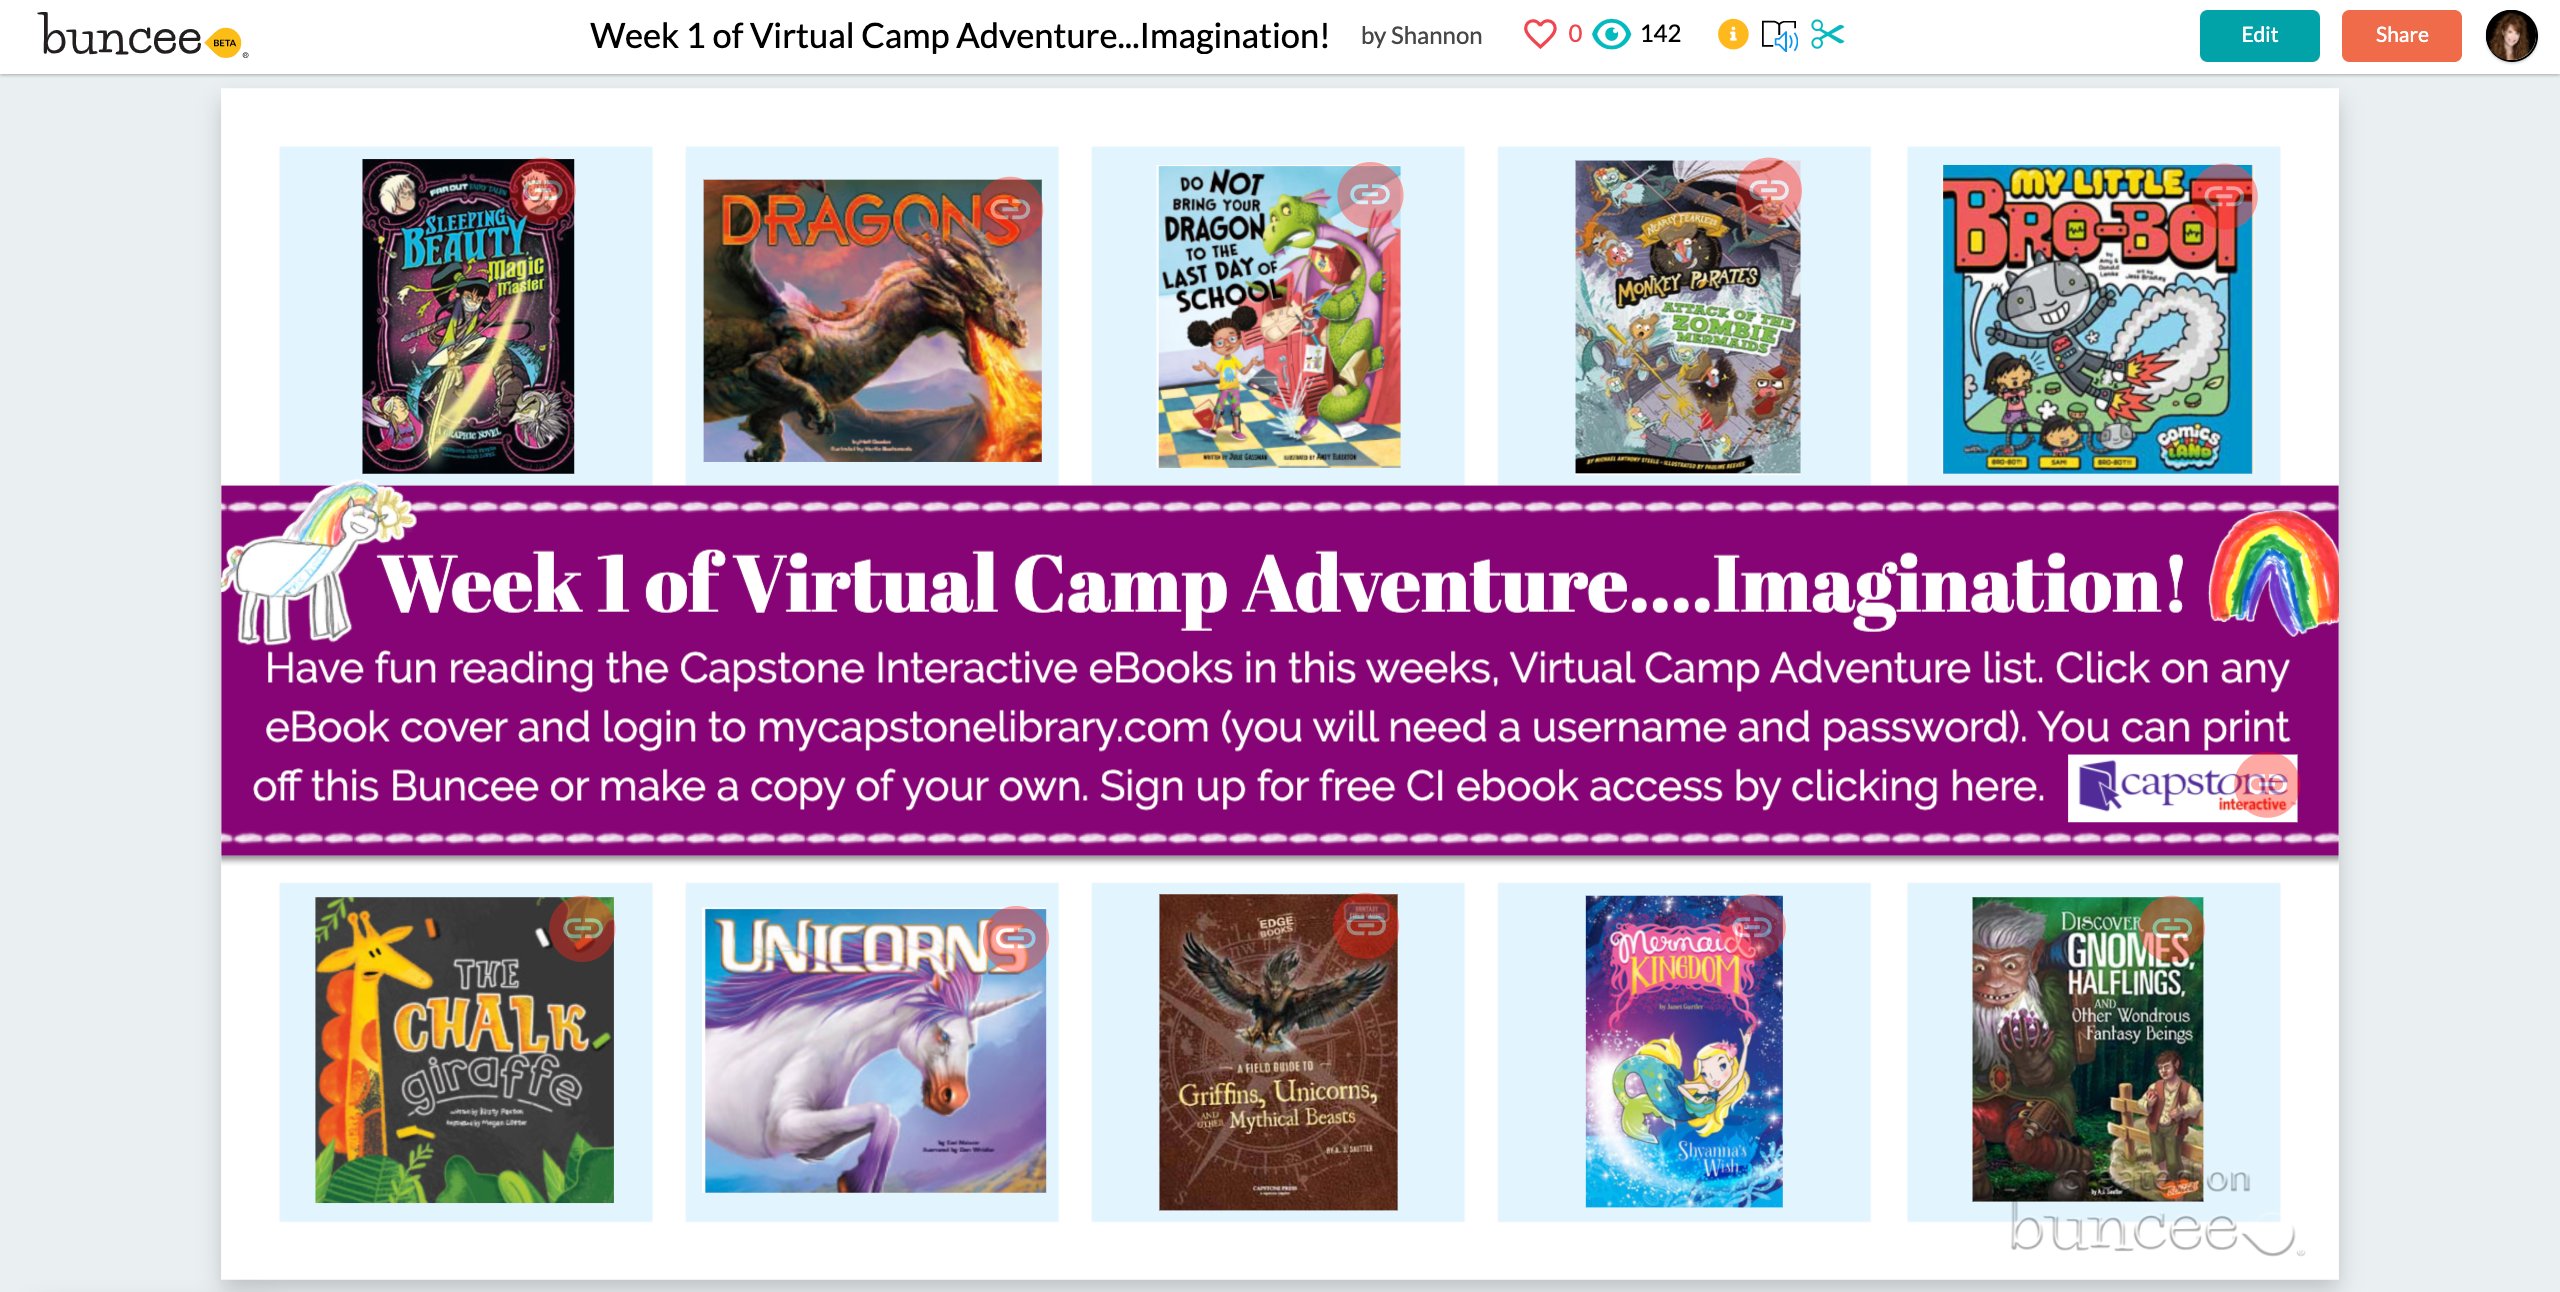
Image


Virtual Camps!

Image

To learn more, join in the daily live webinars with Buncee at 12 and 3pm eastern. I also have webinars on Tuesdays at 4pm!

Check out the Ideas Lab!

Image


Fun badges and learning opportunities!

Image

A focus on Learning… in a “Remote World”

Guest post by: Whittney Smith, Ed.D. (@whittneysmith_) is the Principal at Mineola High School. You can follow the work done by our amazing students and teachers by following us at @mineolahs on both Twitter and Instagram.

In high schools across New York State there is always talk of the Regents Exam. This exam has been the focus of teachers since 1878 when the first high school exams were given. On April 6, 2020, that changed… at least for the time being. 

Now what?  I think we now have the unique opportunity to focus on learning, not the test anymore.  While we rely solely on remote learning opportunities… our ability to leverage technology will certainly accelerate our ability to focus on student agency. Some cynics will say that without a Regents Exam, the students will not be motivated anymore, they’re going to “check out.” I don’t think so. Instead, I believe we need to seize this opportunity and engage our students.  Remember that first and foremost we teach students, then we teach content… and remember, children are naturally curious, want to make connections, and desire learning things that are relevant to them; things that are real. 

When we were thrust into this remote world as we walked out of our schools on March 13, 2020,  I sent an email to the faculty. I will never forget that email. Along with a remote learning planning guide, I sent teachers my phone numbers and those of my assistant principals’, so they could reach us at any time.  I wanted them to know that we cared about them as people first; we cared about their social and emotional well being just as we wanted them to care for our students and their families.

In the educational world we hear a lot about “Maslow before Blooms;” in other words, we need to take into account the hierarchy of human needs before the hierarchy of human learning. 

Next, I asked our educators to reflect on remote learning and consider the following while they focused on what remote learning would look like in their ‘new’ classrooms.

  • Emphasize Choice – allowing students to choose how they demonstrate their learning will increase completion and help them navigate misconceptions
  • Emphasize Learning and Not Grades – when students are not concerned about “the grade,” they are more likely to learn the material on their own, rather than “collaborating” with others (unless that is what you intend them to do). 
  • Direct All Student & Teacher Tech Related Issues to Bonnie and Katie (they are our Coordinators of Information Technology (CITs) and can do just about anything… and know who to reach out to when they can’t)).
  • Last but not least (for now) —> If you are having difficulty reaching a student (e.g. they are not responding) please reach out to our mental health team. They are counseling students and are ready to assist in any way possible.

Never did I think that I would be writing this post on April 30, 2020 (30 days into an extended school closure) telling you that the Regents exams have been canceled. 

Now is the time to tap into student interests and passions.

Now is the time to focus on strengths.

​Now is the time to give choice.

Now is the time to leverage creation tools. Whether it is a product to create or a problem to solve, allow students to determine how they demonstrate and share their learning. 

Now is the time to shift the paradigm  as we are  not going to take high stakes, multiple choice tests! Let’s do what we’ve always wanted to do… make learning fun!


Bloom’s Taxonomy graphic taken from: https://mylearningnetwork.com/blooming-as-a-learner/ 


**Interested in writing a guest blog for my site? Would love to share your ideas! Submit your post here.


Looking for a new book to read? Many stories from educators, two student chapters, and a student-designed cover for In Other Words.

Find these available at bit.ly/Pothbooks  


Guest Post: 5 Ways to Empower Your Students with OneNote

Guest Post by: Jeni Long & Sallee Clark, @salleeclark @Jlo731 @Jenallee1

Instructional Technologists from Eagle Mountain Saginaw ISD, Ft Worth, TX

#Jenallee #MIEExpert #MicrosoftEDU #Onederful

https://linktr.ee/thejenalleeshow

As you probably know by now, #Jenallee LOVES OneNote! We feel it is one of the best educational technology applications for our students for many reasons. (Check out the original post here).

  1. When we look at using technology, we do not look at the technology first and then decide what to teach… We look at what our learning objective is and then we select an application to fit our goals. Because OneNote offers a vast amount of educational benefits, we like suggesting it for teachers to utilize. Through using OneNote, teachers can help their students master their learning objectives first, while also utilizing one application versus a new app each week.
  2. One phrase we use a lot with teachers is to “Select an educational technology application and own it”. Meaning, don’t get overwhelmed with all of the different applications available, yet select one and learn how to use it in your classroom well. Own that one app and then move on to another when you are ready.
  3. With OneNote, students have the opportunity to learn through research based strategies including the ability to:
    • Justify their work both verbally and through writing
    • See worked examples in action
    • Listen to direct instruction or videos of instruction
    • Collaborate with their peers
    • Receive timely feedback from their teachers
    • And so much more

All of this is great but the real question is how? Here are 5 ways we use OneNote to empower our students.

#1 Student Portfolios

Student portfolios offer students the ability to create products, evaluate their creations, revise their products, and curate their best work throughout the year. It allows the students time to reflect upon their growth, set goals and truly see the evidence, purpose, & benefit of their learning. Read this blog post to see step by step directions on how to create and implement student portfolios in the K-3 classroom.

#2 Worked Examples

Recently we ran across a great article online written by Shaun Killian, “8 Strategies Robert Marzano & John Hattie Agree On” We really enjoyed reading this article because it showed the strategies both researchers found in their study of how students learn. One of the strategies both agreed upon was utilizing direct instruction.

Robert Marzano claims, “It is important to explicitly teach your students,” while Hattie says, “Direct Instruction involves explicitly teaching a carefully sequenced curriculum. And, it has built-in cumulative practice.” Hattie also highlighted the power of giving students worked examples.

OneNote makes it easy for teachers to implement this strategy into their daily instruction.

Here’s How:

  • Teachers can directly teach their students specific content from OneNote. It is an infinite white board! It goes on and on and on. The draw feature offers teachers ease in writing content (space pen is our favorite), highlighting content to be learned, and it automatically saves and updates in student notebooks or shared OneNotes! Boom! You just provided your students with class notes so that they can refer back to your content at any time.
  • We love the replay feature. Work out a math problem, label a diagram, fill in the blanks, and students can “replay” those steps at a later time. Once class is over and students want to review the content taught, they can simply click on View > Replay and see the steps replayed as many times as needed!! Did you catch that? As many times as needed! This is powerful and empowering for students! Check it out in action below

Replay ink strokes in OneNote for Windows 10

  • Don’t want to write? No problem! OneNote allows you to insert a printout of any PDF, Word, or image into OneNote. Why is this beneficial? Well, now students can follow along and make their own notes, highlight, and learn as you directly tell them the content to be learned with examples of what to do and what not to do.
  • According to Sebastian Waack and his Visible Learning chart of Hattie’s strategies, video review of lessons has a .88 effect size! Wow! This is also a way to provide examples for students that explicitly teach the content. OneNote makes it easy to embed YouTube videos into your pages! Simply copy the link and paste it in the page. All students can view the video in your OneNote.

#3 OneNote Breakouts

Looking for a way to help your students engage in problem solving and bring a slightly competitive gaming aspect into learning? Try using a OneNote Breakout! In the same article mentioned above by Shaun Killian, “8 Strategies Robert Marzano & John Hattie Agree On” It is also mentioned that both Marzano and Hattie both agree that problem solving and collaboration are high yield strategies. OneNote Breakouts offer students the ability to engage in solving relative problems in a collaborative way. This allows students to apply their knowledge of concepts to solve problems. “They also agree that inter-group competition can increase the effect of cooperative learning even more.” Breakouts are the way to go!

How does it work?

Students work together to “Breakout or escape” a series of challenges all housed in a OneNote. We complete this by locking pages in a OneNote and students reveal the lock combinations through completing various challenges utilizing their knowledge of concepts. Find out more about how we create and use breakouts with our students in this blog post.

#4 Feedback

We also know from Visible Learning that offering feedback has .70 effect size! Wow! OneNote offers teachers a powerful and meaningful way to give feedback to students. While students are working on content, teachers can access and see their progress. We want to offer our students feedback during the entirety of their work, not just at the end of a project. OneNote allows teachers to see student progress in real time, leave feedback throughout the process, and truly impact learning.

#5 Differentiation

OneNote offers teachers ease in differentiating content and providing accommodations for students. With the ability to distribute pages, teachers can distribute specific content to specific students, groups, or the entire class. That means you can distribute articles to groups of students according to reading level, or chunk assignments for certain students, or provide graphic organizers to specific students, etc. This allows the teacher the ability to scaffold instruction for their students strategically and with ease.

Not only can I send out individualized assignments, I can also empower my students with access to content. Students that may struggle with reading, writing, have dyslexia or ADHD, etc. are empowered by the learning tools that are built in to OneNote! According to Visible Learning, we see that when students with learning needs utilize technology, the effect size is 0.57. Utilizing OneNote with these students is a great way to empower them to be able to access content on their own, read on their own, and to write on their own. Let’s just say… they own their learning. We think Mike Tholfsen, Microsoft Product Manager, says it best!

OneNote Learning Tools are non-stigmatizing, mainstream, built in, and free.

So what are Learning Tools? These are tools built into Microsoft OneNote, Word, Forms, and many other partner companies. See the list of partner companies below

These tools include:

Immersive Reader – Reads any typed text, PDF, or word documents to the students!

Features include:

  • Human like recorded voices in both male and female
  • Reading speed settings
  • Customization for background color
  • Font options
  • Grammar options
  • Line focus
  • Picture dictionary
  • Translates a word or the entire document into over 80 different languages (yes, it still reads many of these languages!)
  • https://youtu.be/3n5emMEm3

Check out these click by click tutorials by MicrosoftEDU!

Want to see how we use Microsoft OneNote to offer our students audio tests? Check out this Jenallee blog post.

Recently we shared all of these ways and more on an episode of Ditch That Textbook with Matt Miller and Holly Clark. Watch the episode to learn more.

https://youtu.be/HopiR25ZlH8


**Interested in writing a guest blog for my site? Would love to share your ideas! Submit your post here.


Looking for a new book to read? Many stories from educators, two student chapters, and a student-designed cover for In Other Words.

Find these available at bit.ly/Pothbooks  


10 Steps to Create Green-Screen Videos for Remote Learning

Guest Post by Allie Beldin @alliebeldin

I have always wondered how teachers on Youtube create videos that look so FANCY! I did some digging and found that several of these instructional videos use greenscreens. Green-screens are used to remove the background behind videos so you can replace it with another screen!

Why should you consider creating a green-screen video for your students?

If you want to show practice problems behind you, talk alongside a PowerPoint presentation, or add a picture of your classroom in the background to make students feel as if they are still learning in your school, consider trying the green-screen video method!
I recommend making your videos SHORT and ENGAGING. Try to shoot for making your video under 5 minutes long. Shorter videos will increase engagement and students will be more likely to watch all the way through.

10 Steps to Create a Green-Screen Video

Step 1: Buy a green screen. You can buy a fancy one online on Amazon OR you can do the cheap version like I did. I bought two yards of green, non-reflective fabric from JoAnn Fabrics craft store.
My grand total? A whopping $9.15.

Step 2: Tape or push pin the fabric in a well-lit room. Find some floor lamps or lights in your house to make sure there are no shadows behind you when you stand in front of the green screen. You do not want shadows because it will lower the quality of yourself on your video.

Step 3: Use your personal device, an iPad, or a video camera to take a test video to make sure your lighting is working. I did a test video just to see where the best place to stand was in the frame.
[Please excuse the dance party.]

Step 4: Figure out which lesson you want to teach. Teach your lesson in front of the green screen. Refer to examples from a PowerPoint that you have used in your classroom or create new examples. It is okay if you mess up! Don’t stop the video, just keep recording and start over.

Step 5: Decide what you want the background of your video to look like. Open up Google slides and put up notes or practice problems that you want to pop up behind you in the video. This is the important part. Use Screencastify or another screen recording app to record the presentation of your Google slides. This video will be the video that is played in the background while you are talking!

Notes created by 6th Grade SIMS Science team: John Goldberg, Kimberly Wahus, & Brook Andrews

Step 6: Open up a video editing app. I highly recommend using iMovie because it is extremely user-friendly for editing purposes. Drag both videos to the top of the screen.

Step 7: Drag down the background video first. This is important. Then, drag the green screen video and place it on top of the background clip.

Step 8: Click on the green screen clip. On the top right panel, click on the drop down menu that says “cutaway.” Select the “green/blue screen” option from the drop down menu.

Step 9: Edit the green screen clip during the parts that you may have misspoke or messed up. Add music at the beginning or end if you want to make your presentation more engaging.

Step 10: Watch the video and if you are happy with the final result, click the share button on the top right of the screen. Select “file,” “next,” and “save” to your desktop. It will take a little while to download. Once it has dowloaded, you can upload your video to Youtube and share the link with your students!

I hope this helps some of you during the remote learning process.
Please reach out to me here or on Twitter if you have any questions or ideas about creating green-screen videos for your content.

@MrsBeldin

**Interested in writing a guest blog for my site? Would love to share your ideas! Submit your post here.


Looking for a new book to read? Many stories from educators, two student chapters, and a student-designed cover for In Other Words.

Find these available at bit.ly/Pothbooks  

Connecting Students through Buncee

Leveraging  the right tools for remote learning

By Rachelle Dene Poth, Spanish and STEAM Teacher, @Rdene915

One of the things that I love the most about ​Buncee is that it can be used in so many different ways, not only for instruction in our classrooms but also in life. I have used Buncee to create cards for family and friends, personal business cards, graphics for Twitter chats and webinars, quote graphics for my books, invitations, and more. When I decide to use digital tools in my classroom, I want students to practice the content in a more authentic and engaging way, while developing skills such as collaboration, critical thinking, problem-solving, and creativity that can be transferred to their future. In using digital tools like Buncee, my hope is that they will also use them in other classes, for personal use, and will share them with family too.


Buncee is more than just a creation tool, it is a supportive educator network that is invested in fostering connections, expressing kindness and gratitude. There have been  many initiatives for classrooms and families around the world to join in, most recently Hugs for Heroes. This is an amazing project worked on by Kristina Holzweiss, Barbie Monty and Amy Storer. Learn more about itand create your own!

Why Buncee?

Now with the shift to remote learning and educators looking for ways to connect with students and provide authentic and meaningful learning opportunities, I have been recommending Buncee more. As a multimedia creation tool, it offers so many possibilities for educators of any  content area or grade level, and provides resources for students, families and educators to get started right away. For ideas, check out some of the  Coffee Talks!

Finding time to explore new resources can be a challenge because our lives as educators become quite busy and we may find ourselves lacking in time to really explore a variety of options for use in our classroom. With the sudden transition to remote instruction, this is another one of the reasons that I recommend and choose Buncee and appreciate the team’s investment in providing exactly what educators, students and their families need. It truly has become a go to multi-purpose platform that can do so much, that I feel pretty comfortable in saying that the possibilities really are endless when it comes to creation with Buncee.

null

Fostering the SEL skills and making connections

At the start of each school year and throughout the year, I focus my efforts on student relationships, learning about my students and also providing opportunities for them to learn about one another. In the past I have done this by using activities in our classroom such as ice breakers or having students work together on different review games and other in class collaborations like that. Earlier this year I created a project for students to learn about the Spanish language and culture and also to engage more in learning about one another. I came up with a project focused on using the “About Me” template in Buncee. I wanted students to share who they were and create one slide to show this using words, animations, stickers, and other add-ins. My hope was that by looking at each student’s slide, we would understand one another better and relate to each other based on similarities and differences.

I also thought this would be a good opportunity for them to choose and learn a little about a place where Spanish is spoken and create an “About_(​country​)_____” to share that information with the rest of the class. But I also realize that there are many students who are visual learners like me and I wanted to encourage students to be able to quickly look at and process information and represent it in a different way. Rather than simply restating the same content, push them to apply it at a higher level or find a different way to demonstrate an understanding of a concept.

null

I also wanted students to choose a Spanish speaking country and I placed a limit on the number of actual words they could use because I wanted them to represent what they had learned about the place that had chosen using the Buncee features. The topics they had to include were: languages spoken, school subjects, foods, activities, and other information like that that they could display using Buncee.

How did it go?

It was a fun activity and I learned so much about them and they learned about each other and what life is like in countries where Spanish is spoken. We shared them on a Buncee board ​which made it easy to access and created a colorful display of students and their creativity. Students shared their slides and gave a brief description in Spanish about themselves and made connections with their classmates. We had good conversations exchanging our likes, dislikes, and learning about our backgrounds.

For the second slide, students were able to get a quick glimpse of different Spanish-speaking countries and begin to understand the culture of some of the places they would be studying. It was fun that they could only include 3D objects, animations, stickers or emojis, to represent the information for each country. So for visual learners, being able to choose the right object to use to share this information made the learning stick a little bit more. Students who enjoy creating but not drawing really enjoyed the activity.

A recent feature is the ability for students to comment and give feedback on the boards. This is a great way to encourage online student interaction whether through comments or emojis!

nullOne other feature that I thought was important to share with students was the new Immersive Reader and how it works. We enjoyed looking at all of the capabilities with it and using Buncee for learning!  Check out the video to learn more here!

Check out  the information from Buncee for Remote Learning and everything you need to get started here.  Want to learn more about  Buncee? Sign up for their live webinars happening each day, Monday through Friday  at 12:00 and 3:00 pm EST. Sign up here.


**Interested in writing a guest blog for my site? Would love to share your ideas! Submit your post here.


Looking for a new book to read? Many stories from educators, two student chapters, and a student-designed cover for In Other Words.

Find these available at bit.ly/Pothbooks  

Immersive HyperDocs in Minecraft Education Edition

Guest Post by Matthew Nickerson, Instructional Technology Specialist, AACPS

Professional Learning Specialist, i2e, @dadxeight

Author: All the Microsoft Tools You Need To Transform Your Classroom


Are you familiar with HyperDocs?  You can learn more about them on their website, but essentially it is using one document (They specifically say a Google Doc, but it works the same with a document in Word Online.) that contains all the elements of your highly engaging lesson.   Although the “hyper” refers to hyperlinks, it is not just a bunch of urls pasted on a page. HyperDocs should have a blend of multiple ways to access content as well as a variety of activities for students to engage with the content in addition to alternatives for assessment os learning.  In short, a good HyperDoc addresses all of UDL– multiple means of engagement, multiple means of representation and multiple means of action and expression.

If a HyperDocs are supposed to be “visually engaging and packaged learning experiences as it says on their site, how much more visually engaging can you get than being fully immersed into a Minecraft world?


Let’s take a look at applying the principles of a HyperDoc within Minecraft Education Edition.  First, there is an immersive world to build a story in.  Any way we can build a story is a great way to get students engaged.  This has been widely known in business, particularly marketing, but as usual, education is a little bit behind.  (You’d think this is one trend education wouldn’t  be behind on!  The Minecraft platform has multiple ways to distribute content, but it can also be a portal to other content platforms.  Likewise, there are several ways of encouraging students to create or engage with lesson content, as well as ways to assess student learning.  Once again, it can also be the doorway to other tools that accomplish these tasks.


First, let’s build a story.  You can start from scratch with an infinite world in Minecraft and build what you need.  Well, maybe you don’t even need to actually build it. I recently had a request for a specific lesson topic, and I found a lesson plan on Education.Microsoft.com that addressed that topic, as a murder mystery.  It used some Word documents to deliver the lesson material.  I adopted the murder mystery idea, but used the /locate command in Minecraft to find an existing mansion, teleported my character there and turned the mansion into a hotel.  I then filled the hotel with NPC characters, and took each of the puzzles from the Word document, each of which was a clue, and “distributed” those to students through the NPCs.


Because there are multiple biomes to choose from in the Minecraft:EE library, it’s easy to select a custom setting for your story.  Another way I like to start is by taking an existing lesson from the Minecraft Lesson library and just replace the academic content.  Some of the lessons have great bones- the world’s have already been created for you, and you can swap out the questions and prompts with your own topics. 


Now let’s consider ways to distribute content to students.  The most time intensive way might be to build structures. For example, you can create the setting for a novel or short story.  If I need to do that, I pay my 9-year-old. He works for cheap, since, well, I’m paying him to play Minecraft. In the absence of a 9-year-old coworker, don’t fear.  Within Minecraft there are signs, slates, posters and boards 

that you can write on if you want to deliver instructions, guidance or questions via written text.  You can also grab a book and quill and write things there, and leave them for students to pick up.  Each of those items (except the “sign”) can also be edited so students can write their responses in or on those tools. 

All of them also have Microsoft’s Immersive Reader, an entire suite of reading accessibility tools, built in.  All text inside of Minecraft Education Edition has these accessibility features.


However, what makes Minecraft amenable to the HyperDocs model, is that NPC’s (non-player characters) can be easily programmed to send students to websites.  

You can essentially insert a Quizlet set of vocabulary in your world, or even an entire self-paced Nearpod lesson.  Looking for more collaboration? Remember that every Word document, Google Doc, PowerPoint or Google Slides slideshow have a unique URL.  You can give that url to an NPC so when a student clicks on that button, that document opens online. When multiple players, each playing in their own copy of the Minecraft world (or in the same copy if the teacher is hosting it), they can all collaborate in that same document or slideshow.


The same holds true for student work and assessment.  Within Minecraft students can build, then take a picture with the camera.  Pictures are saved in a portfolio, where students can type in a caption.  Or, they can choose pictures to insert into a book and quill, where they have far more space to write, or simply write without pictures.  They can also take pictures of any signs, slates, posters or boards they write on. Both portfolios and books can be exported as a PDF and shared with the teacher through Microsoft Teams, Google Classroom, OneDrive or Google Drive.  However, you can also use an NPC to send students to FlipGrid to record a video response, Padlet to brainstorm together, link to a quiz in Microsoft Forms or Google Forms, or an assignment in Teams, OneNote Class Notebook or Google Classroom, among many other options.


The idea of a HyperDoc is solid pedagogy in an engaging format that provides variety and student choice.  They can include a story component or not. They are usually visually compelling. By taking these same principles into Minecraft, it’s like a far more immersive HyperDoc, a Hyper-HyperDoc!


**Interested in writing a guest blog for my site? Would love to share your ideas! Submit your post here.


Looking for a new book to read? Many stories from educators, two student chapters, and a student-designed cover for In Other Words.

Find these available at bit.ly/Pothbooks  

Buncee: Learning Anywhere

Providing Ways to Keep the Learning Going

Over the past week, there has been a lot of conversation about what educators can do if schools need to close for a period of time, especially due to recent events related to the Coronavirus. Finding ways to extend the “space” of learning for our students has been a topic of discussion for many years, so it is not entirely something new. However, with the current situation, educators and schools are seeking to find the right resources that can be put into action right away.

Over the past few years, many schools have started to offer flexible learning days to deal with school closures due to weather conditions, environmental issues or something else entirely. Being able to keep learning going and have ways to collaborate without being in the same physical space is important. Having a specific platform or digital tool in place that all educators can use and making sure that all students will have access is very important. With so many choices out there, it can be tough to figure out exactly where to begin, especially when time is a factor.

As I’ve been talking with some friends this week, a large part of our conversation has focused on what to do if our schools were to close and even in the general sense, how can we also provide more for our students for times when we need to be out of the classroom? For times when I have not been able to be in class, whether due to illness or a pre-planned conference, I rely heavily on technology to be able to connect with my students so that they can ask questions and have the support they need. However, I also rely on it to provide them with rich learning experiences through versatile tools that they can work on independently wherever they are. With Buncee, we can work remotely and provide meaningful learning experiences that engage students in the digital space.

Buncee = Learning Anywhere

As I have been thinking about some of our recent Buncee projects, my 8th grade STEAM course has been working on a few activities. They have created an About Me Buncee, a few for gratitude and most recently, “Tech Over Time.” In the Tech Over Time project, students have been exploring the transformation of some digital tools or electronic devices over the past 10, 20, 30+ years and also making predictions for the future.

As students create, they can work from school, at home, or anywhere, and be able to share their work with me wherever I am. Teachers can assign fun projects for students or choose from the many ideas in the Buncee Ideas Lab.

We have used Buncee for years in all of my classes and through it I have been able to provide opportunities for my students to engage in more authentic and meaningful learning, to be creative and to drive their learning experience. Whether students use it to design a Buncee to share their experiences, engage in project-based learning, summarize a book they have read, explain a concept in math or science, for a few examples, the possibilities are endless for what students can create.

As teachers, we have so many choices for how we can use Buncee in our classrooms. It can be used to have students work through a Hyperdoc, or used as a model template for students to then create their own Buncee, make a timeline, solve word problems, and more. The idea is that we can leverage the tool to provide something that will connect with each student and it can be done from anywhere.

Ideas for your Classroom

1.Make an interactive book

2. Create a timeline

3. Design a digital business card

4. Explain steps in a process

5. Teach a lesson, add audio and video

6. Book summary

7. Design classroom signs

8. Create study aids

9. Create an ebook

10. Recreate a moment from history, personal experience, or make a future prediction

5 Ideas for Learning About Digital Citizenship

Digital citizenship is a topic that educators must continue to be mindful of within their classrooms and our schools. Because so many tasks involve the use of technology, it is our responsibility to embed digital citizenship into our lessons so our students are prepared and knowledgeable about the responsibilities that exist and also expectations of them when it comes to digital learning. There is an increase in technology being used in our classrooms, students have more access to digital resources and global connections than ever before, so regardless of our roles in education, we must stay current with issues, trends, and resources related to this topic. Digital citizenship skills have to be a part of what we teach and model for students, especially because we ask our students to do research, to collaborate online and perhaps even use social media as part of our coursework.

There are many resources available to learn more about digital citizenship, ranging from participation in virtual or in-person learning events held throughout the year to websites, books, blogs, and more that bring attention to and inform about this important topic. When I first started teaching about digital citizenship, I recall myself telling students the things that they should not do rather than focusing on how to use the tools safely and responsibly and showing how they could enhance learning. I recognize this now as I’ve researched more and become more aware of the different resources available for use in education today and following the conversations happening in different educational networks. And along with what’s being done out there, I believe that we need to convey the message to our students of how to use digital tools, to interact responsibly, and also share the importance of knowing how to use these tools for good.

Building these skills is critical because they will transfer to the real world space as well. For some students, they build confidence and comfort by interacting with peers and become better collaborators in an online space first, then apply these to the physical classroom setting and the real-world.

Here are five resources to explore and which offer activities for students to explore on their own and construct their own knowledge and apply it.

1. Events Educators can participate in Digital Citizenship Week, happening from October 14th through the 18th online. During this week-long event, educators can participate by connecting with other classrooms globally, joining in a panel discussion organized through the DigCit Institute and EduMatch Tweet and Talk, or listening to a DigcitIMPACT talk. Sign up on the website and stay connected by following the #digcitsummit hashtag on Twitter.


2. Online resources There are many interactive ways for students to explore DigCit topics. Common Sense Education’s Digital Compass provides interactive lessons, tutorials, and fun activities for students to engage in to learn about digital citizenship. One of the many benefits is that students choose how to proceed through the interactive lessons, and can see the positive or negative effects of these choices. Digital Compass addresses topics such as cyberbullying, fake news, social media, and more that are in alignment with today’s trends. Be Internet Awesome by Google has students explore four lands and complete activities and games to build their digital citizenship skills. This is another good way to let students drive their learning, to become curious and develop their own understanding in a space that is safe and that we can support. 21 things for students offers 21 different lessons on topics related to digital citizenship, technology skills, cyberbullying and more. Nearpod offers interactive lessons on Social Media use and topics related to Digital Citizenship in addition to many other content areas and levels.

3. Books Three books that I recommend are Digital Citizenship in Action by Dr. Kristen Mattson, Digital Citizenship in Schools by Mike Ribble, and Digcit Kids: Lessons Learned Side by Side to Empower Others from Around the World by Marialice Curran and Curran Dee. Each of these books offer a wealth of resources for getting started with lessons on digital citizenship and they provide activities for use in our classrooms. Dr. Mattson’s book is also used for the ISTE U Course on Digital Citizenship.

4. Social Media Students are using more social media, especially Instagram and Snapchat, and need to develop an understanding of how to post, the type of information that is okay to share, and how to interact responsibly and respectfully in these spaces. Depending on student grade level, it can be helpful to have students participate in a simulated Twitter chat, create a Padlet wall, or use post-it notes and a space in the room to have students create posts and write responses. It is important to help students understand how social media works and how to properly post. We want to emphasize the safety of our students and knowing how to distinguish between reliable and unreliable sources.

5. Organizations ISTE (the International Society for Technology in Education) offers a Professional Learning Network (PLN) focused on Digital Citizenship for members. In PLNs such as this one, educators can find many resources for teaching about digital citizenship that match the grade level, content area, and specific needs of their students. Individuals can sign up to be a part of the #digcitcommit movement. DigCitCommit is a coalition with the mission of providing educators with the right resources for teaching students about digital citizenship. Educators can sign the pledge and become more involved in promoting digital citizenship around the world.

To provide the best possible opportunities for our students to learn their roles and responsibilities when it comes to digital citizenship, we simply need to start with one of these resources and include it in our daily activities. The idea is not that it’s something extra added onto the curriculum but rather becomes woven into our classrooms each day throughout the year.

*Interested in writing a guest blog for my site? Would love to share your ideas! Submit your post here.


Looking for a new book to read? Many stories from educators, two student chapters, and a student-designed cover for In Other Words.

Find these available at bit.ly/Pothbooks  


3  books.png

Math Mentoring: The Struggle is Real AND it’s an Asset!

Struggling in math has been my greatest asset as a math teacher.  Remembering the pain of negative self-talk while feeling like giving up was my only option…well, math trauma is not easily forgotten. It’s why so many adults, decades after high school graduation, will still tell you they are bad at math. For me, the silver lining to that trauma has always been the ability to relate to my students, and even my own children, when they have math struggles.  One of the greatest compliments students and former students have shared with me is that math finally made sense to them when they were in my class.

One thing I’ve never said, and will never say, to my children is that I was bad at math.  Even as a new teacher, I asked parents not to say that to their children. Telling your children or students you are bad at math is like encouraging them to quit before they even begin.

Now, I have always told my students and children that I struggled in math.  We all understand what struggle means, and the good news is that there is always the possibility of winning in a struggle!  Every year, I tell them how I had to stay in at recess in first grade because I could not understand the concept of subtraction.  Crazily enough, my teacher had no idea how to teach it in a new way that made sense to me. She tried to explain it repeatedly in the same way…and it didn’t make sense to me for the longest time.  I also tell them about how in first grade I received a C in math and it made me feel terrible. I never wanted another C on my report card and made sure I never did again. That desire to make the Honor Roll (I was a middle child and wanted to stand out in some way, and academically was my route) kept me from quitting.  Math was a struggle, but I found a way to understand. As early as seven years old, I realized that quitting was not an option. Finding math success was never easy for me, but through my school years, I found what worked for me. This is what I share with my students hoping it will help them, too.

Addressing the Struggle at the Beginning of the Year

First week of school when I say the word “math”I look around to see who dreads the very word itself. It’s not just about reading expressions, but I look for patterns of misbehavior and any kind of drama that might commence when that dreaded word is spoken.  I always begin the year assuring my students that if they stick with me and trust me, as their math teacher, I will not leave them behind. I have promised that to my students for years, and I mean it with every fiber of my being. I explain that when they don’t quit, math can be fun like a puzzle.

What does it take to help children dig into math when they want to check out? It takes patience and time to do it to do it to do it to do it right, child, I got my mind set on math, I got my mind, set on math…

All singing aside (remember He gave me a melody *wink wink*), in a whole group lesson, the ones who get the concept easily, I normally allow them to begin the assignment and do it at their pace.  The students who have questions stick with me and the ones who are lost become a small group.

Helping my own child, a fifth grader review geometry!

What does helping kids through math struggle look like?

Sitting next to a child who struggles is important.  That nearness factor makes a difference. They know I won’t ignore them or allow them to pretend to work when really they are just doodling or trying to look busy.  See, by the time they reach fifth grade, they’ve pretty much given up. They don’t want the attention! One of my students, who was desperately struggling, knew how to look busy, so sitting next to me kept him from trying to con me that he was actually trying to solve problems.  He definitely tried to trick me, but I called him out. A few more times like this, and he knew I meant business. He stopped trying to look busy and started attempting the problems before him. Just attempting…finding a starting place to solve is huge when you struggle in math.  I remember this from my own childhood.

When students have progressed to where they begin solving problems more easily, I still encourage them to ask for help, but I do not let them come to me unless they have attempted the problem.  I can ask them, “What do you think you are going to do here?” or “Where do you think you should start?” They are so used to struggling and the teacher just giving them an answer that they often ask before even thinking about how/where they should begin.  Getting them to dig in and try to understand the problem is foundational in developing grit and sticking with the problem. When solving math equations or word problems, it’s truly important to have a place to stick information to, so beginning the problem and attempting to solve it gives them something to add or learn from. If they don’t think through this first part, a teacher’s lesson is like throwing darts into the dark without any specific target that will reach their students.

I also coach my students while giving notes. At some point, they may stop understanding. I coach them to keep taking the notes I give them, but make a note to themselves that this is where they have stopped understanding.  Again, I learned this from my own struggles. In fact, in my Algebra one course when the teacher was finished with the lesson and asked for questions, I was able to ask my questions clearly. To do this well, I had to turn off my negative self-talk.  If I allowed my negative self-talk to take over, the only thing I heard from that point on was me telling me how stupid I was and how I was the only person not understanding. In place of negative self-talk, I encouraged myself to take a deep breath and remind myself that even though I didn’t understand the concept just then, I knew I would eventually if I didn’t shut down.  That allowed me to keep paying attention and sometimes even cleared my confusion. When I shut down, this wasn’t possible.

Something else that helps students is allowing them to talk about patterns they notice.  Whether they struggle or not, when they notice a math pattern, letting them talk it out with the rest of the class will help everyone!! Worst case, it’s also a way a  teacher can help clear up misconceptions early on. The best math teachers for me were my peers. Sometimes students identify specific items that make a world of difference for their peers. My son is in third grade and has a more natural way of understanding math than his older sister.  Whenever he notices a pattern, he stops and we have an entire conversation about it. He truly amazes me. We can, and should, help our students learn the patterns because often times when they figure it out for themselves, they feel more confident and the knowledge isn’t dumped after an assessment. My son talking about the patterns he sees also helps his older sister and younger sister think through that math pattern, too.  That’s a win!!

It’s a Journey

For students who struggle in math, it is an emotional journey.  When teachers stop and say, “I know you are struggling, and I’m here to help, and I won’t go on until you understand,” it’s a balm for our students’ insecure nerves. When they are fifth graders coming to me, they usually have three to four years of feeling left behind.  Hoping to help my struggling students, my mindset is firm that their struggles stop with me and I do all in my power to get them to grow and decrease any learning gaps.

Over time, I have developed the wisdom necessary to see when students quit before even trying or when they are totally overwhelmed.  It’s important to know the difference because both situations require different responses. The quit-before-trying-learner needs a firm reminder of not giving up and figuring out a place to start, while the overwhelmed learner needs to know they can take a break or use another method to help them.

Helping students dig into math struggles is such a beautiful way to help them learn perseverance and purpose.  When they decide to lean into the struggle, they form a mental confidence that can’t be stolen from them. Can you see how facing their insecurity in math can help them in other areas of life, too? Having a teacher who will go the whole distance means everything for these students, and many times, changes a negative academic course into a new path of learning and goal setting!  I have seen the glory! I have seen the joy of confidence from the same student who broke down and cried with me at one point. So yeah…when my students have told me that my fifth grade class was the first time math made sense to them, I feel like I’ve earned an Oscar!

Resources 

Have you heard of the book written by Alice Aspinall called Everyone Can Learn Math? Recently, I read it with my five children and it sparked great discussion.  My oldest, who is currently in fifth grade, found the main character, Amy, very “relatable.” Amy feels the math struggle deeply and so does her mom! I would recommend this book for every parent and educator to keep in their home or classroom library.  I know we will be pulling it out to reread a lot. It’s also a good way to combine your academics. Author, Alice Aspinall also recommends Adding Parents to the Equation by Hilary Kreisburg and Matthew Bayranevand.

Also, have you heard of Nearpod and Flocabulary? When I went back into teaching public school a few years ago, they were the first technologies that I implemented in my lessons.  My students and children love it. They can be personalized or differentiated for the different level of learning going on in your classroom. These resources are engaging and will definitely make a difference in small group learning.  The coolest part is now they are together!!!

Before Christmas, I went to the Anchorage Barnes & Noble and bought some new books by Jo Boaler in hopes of helping me grow in teaching and understanding the math struggle: What’s Math Got To Do With ItMathematical Mindsets, and Limitless Mind.  There is another book calledMath Recess: Playful Learning in an Age of Disruptionby Sunil Singh that I hope to purchase and read. All of these books, and both of these authors, are mentioned frequently when the topic of math struggles come up–and they do frequently! We can also Google their videos!

What are resources that have helped you? Let’s work together to help our students learn through the math struggle!

**Interested in writing a guest blog for my site? Would love to share your ideas! Submit your post here.


Looking for a new book to read? Many stories from educators, two student chapters, and a student-designed cover for In Other Words.

Find these available at bit.ly/Pothbooks  


3  books.png

TeacherCast Educational Network | Developing Standards-Based Instructional Technology Integration

Technology Integration - Instructional Coaching - Productivity Secrets for Educators

Leadership Liner Notes: Sean Gaillard

Built on Connection. Tuned for Impact.

Stories by Thomas Oppong on Medium

Dr. Rachelle Dené Poth @Rdene915 Educator, Consultant & Keynote Speaker, Author, Attorney #THRIVEinEDU

Hooked On Innovation

When Innovation slaps you in the face, we slap back.

Teach Better

Dr. Rachelle Dené Poth @Rdene915 Educator, Consultant & Keynote Speaker, Author, Attorney #THRIVEinEDU

BrianKulak.com

Dr. Rachelle Dené Poth @Rdene915 Educator, Consultant & Keynote Speaker, Author, Attorney #THRIVEinEDU

The Principal of Change

Stories of learning and leading

Mandy Froehlich

Dr. Rachelle Dené Poth @Rdene915 Educator, Consultant & Keynote Speaker, Author, Attorney #THRIVEinEDU

Katie Martin

Informed by research, refined by practice

#RocknTheBoat

Rocking today's classrooms, one teacher, student, and class at a time.

User Generated Education

Education as it should be - passion-based.

Learning as I go: Reflections & lessons learned

Dr. Rachelle Dené Poth @Rdene915 Educator, Consultant & Keynote Speaker, Author, Attorney #THRIVEinEDU

Serendipity in Education

Join me, Allyson Apsey, as I stumble upon the fortunes of learning, laughing, and celebrating alongside incredible people.