3D Bear: Bringing Augmented Reality to Every Classroom

Sign up for a ONE MONTH Teacher Trial here:

There is so much discussion going on today about Augmented and Virtual Reality and how it can be used for education. I have signed up for a lot of alerts to keep me informed when new AR/VR tools come out or there is news about schools around the world and how they are using augmented and virtual reality to amplify student learning. Alerts arrive throughout the day and one thing is clear, these tools have tremendous potential to really engage students in a completely different kind of learning, giving them more control in the classroom.

Learning Curve

Because the concept of augmented and virtual reality seems so detailed and can be hard to grasp if you’ve not had experience with either of these, people tend to think that using these with students might be difficult or the learning curve might be too steep. Time is a huge factor when it comes to deciding what tools and methods to use in the classroom and I’m sure that there is not a single teacher who hasn’t occasionally said, if not on a daily basis, “I wish I had enough time to…” There’s always something they want to learn, something different to try that might have been on their to-do list for a really long time but they just have not been able to devote any time to it.

The great thing about tools like 3D Bear is that teachers don’t really have to spend a lot of time trying it out on their own or figuring out how to get started using it. This is what we want our students to do. We want to put tools that can engage them and more authentic and meaningful learning in their hands. Students learn more by doing and having opportunities to engage in hands-on activities, where they control the direction their learning takes. We cannot give students the answers or always show them how to do something, they have to experience some struggles. They will need to know how to problem solve, collaborate, communicate and to even create on their own as they are preparing for the future and life in general.

When thinking about adding some new technology into the classroom, we really need to focus on the why behind choosing a specific tool or method. What makes it different and what can it do differently for students, that can enhance the learning process and go beyond the traditional methods that are already being used in the classroom. What sets it apart from other options or methods you have been using? I think the answer is clear. We should select tools that help us move students to a more active role in the classroom rather than passively learning. By having students become the creators and immerse in a new learning environment, we will provide them with voice and choice in learning and lead them to explore through emerging trends in education.

Why 3D Bear

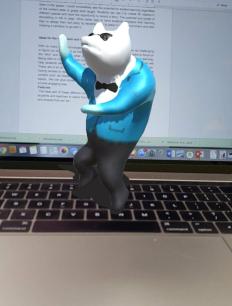
When I finally decided to get my new iPad this summer, I couldn’t wait to try out the different augmented reality apps. Actually, the whole reason that I bought the iPad was for this purpose. The first app that I tried was 3D Bear. I did not look for any tutorials, simply started clicking the options and found that it was very easy to use and a lot of fun. I was able to quickly figure out how to add items and manipulate them in the space I chose. Seeing the group of bears dancing around the middle of my table was fun. I could immediately see the potential for student learning regardless of the content area or grade level taught. Students can use it to create 3D objects in different spaces and have the opportunity to record a story to go along with it. The potential and power of storytelling in AR is awesome. What better way to have students represent their learning than to design their own story and deciding what to place in their environment and then creating a narration to go along with it.

Ideas for the Classroom and Getting Started

With so many new technologies entering the educational setting, it can be challenging to figure out which might be the best for your students. So we always want to focus on the “why” and determine what purpose will it serve that will amplify student learning. Being able to interact with and create a new learning environment through 3D Bear, will help students develop so many of the skills they need to be successful in the future. There are a lot of options for having students learn through 3D Bear. A nice feature is having access to ready-made lesson plans that can be used in any level which focus on content such as Social Studies, Math, Science, ELA and STEM, and STEAM-related topics. The lesson plans include different resources, worksheets, and links to other helpful reading materials. We can give students the opportunities to create, design and re-enact events in a more engaging way.

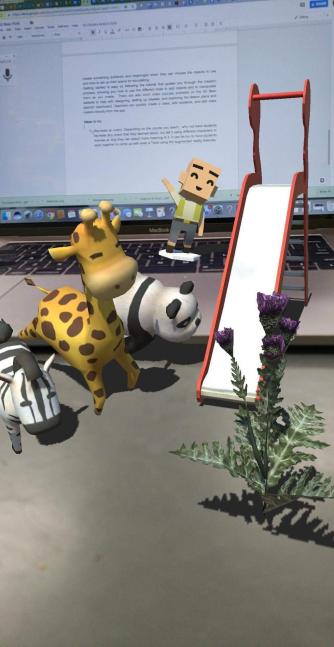
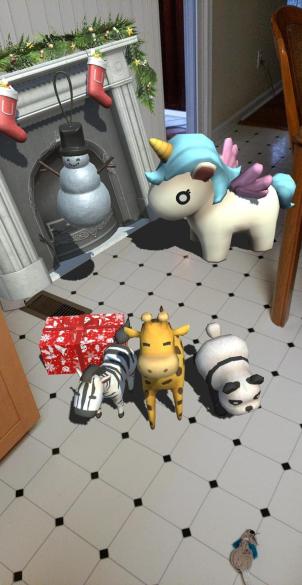
Features The best part of 3D Bear is the number of choices available for students and teachers to select from. There are a diverse group of objects that can be added in to create a story, making it easy to integrate this tool into any content area. Some of the object types are People, Garden, School, Animals, Holidays, Household, Emotions and even a category of funny items. There are a lot of possibilities for students to really create something authentic and meaningful when they can choose the objects to use and how to set up their scene for storytelling.

Once you log in, getting started is easy. Simply follow the tutorial that guides you through the creation process, showing you how to use the different tools to add objects and to manipulate them as you create. Or if you want to skip the tutorial, you can get started on your own. It is user-friendly and you can create something in a short period of time. There are also short video tutorials available on the 3D Bear website to help with designing, setting up classes, and exploring the lesson plans and teacher dashboard. Teachers can quickly create a class, add students, and edit class rosters directly from the app.

5 Ideas to try

  1. About Me: Getting to know our students is fundamental to our work in the classroom. Why not have students use 3D Bear to tell a story about themselves. With so many things to choose from, students can design something to reflect who they are, share their interests and even record a narration to explain. It will be fun learning about the students using AR to tell their story.
  2. Recreate an event: Depending on the content area you teach, why not have students recreate an event that they learned about, but tell it using different characters or themes so that they can attach more meaning to it and retain the content better. It can be fun to have students work together to come up with a twist using the augmented reality features. Learning about a famous historical period? Have students use the holiday theme or funny characters to explain key events or topics and then add narration to clarify if needed.
  3. Design a new space: Give students an opportunity to create a “dream house”, a new school, a new building for their town or even somewhere they would like to explore. With so many options available to choose from, students will be tasked with problem-solving, critical thinking, and collaborating to brainstorm ideas with their peers. It will promote creativity and give students the opportunity to dream big and use their imagination to come up with innovative ideas.
  4. Explain an idea or concept: Students can take a concept learned, maybe something in science class or in a math class and use the objects to create something like a biome or a diorama, or simply to visually represent something that is easier to understand by looking at it in 3D.
  5. Special events: Something fun might be to use 3D Bear to advertise an upcoming school event or a class activity instead of the traditional flyer or newsletter format. imagine what members of the school community would think if they were able to learn about a school event by exploring it through augmented reality. There are so many choices available that it just takes a little imagination to come up with a new way to use the tool.

As teachers, there are so many things that we are responsible for and have to keep up with, that it can be difficult to stay current and relevant with all of the emerging trends when it comes to technology. Fortunately, there are tools like 3D Bear that make it easier to get started with and that provide innovative ways for students to learn. It just takes a few minutes to get started and then give the students time to explore on their own and with peers. Sign up for the teacher trial at 3D Bear! Let me know how you use it in your classroom!

Why students should blog


What Are The Benefits Of Student Blogging?

What are some ways to assess students and engage them more in conversation? How can we help students to become more confident in expressing their ideas and more comfortable in sharing their ideas in and out of class? Good question.

As I have reflected more on my practice over the past couple of years, I have realized that I needed to make some changes. One of the most important areas has been finding ways to better differentiate and personalize my instruction and to empower students to take responsibility for their learning and have an opportunity to express themselves more.

Teachers have so many options to choose from when it comes to technology, and it can be a challenge to decide where or how to start. The best advice I can share is to find one area that you feel like you can improve upon, or maybe there is something that takes a lot of your time or does not offer students enough opportunities to participate in class, just to name a few.  A couple of years ago, I started to have my students blog. I had read blogs for several years, had only recently started writing my own, and thought they offered a great opportunity to learn about a lot of different topics in short passages.

While tremendously beneficial for the reader,  it seemed like a great way for the “blogger” to share ideas and even helpful hints to anybody who wanted to learn just a little bit more about a topic. Blogs are great for those who do not have time to read a book and want to follow or learn about specific topics.  It is also a great way to express oneself. With this in mind, I started having my students write blogs in Spanish and I chose Kidblog for them.

Choosing A Blogging Platform

There are many blogging platforms available, depending on your grade level, the specific platform needs and also funding if needed.  On a personal level, I have used Blogger, Word Press and Edublogs. These are great options and there are many other ways to share a blog, and depending on what your personal needs are and how you would like to incorporate blogging into your classroom, you may decide to use any one of these. But for my students when I started, I began with Kidblog in my Spanish II, III and IV courses.

At first many of the students were quite apprehensive about writing and worried about who would be reading their work and there was the fear of writing correctly and making mistakes. These are all common concerns for anybody when confronting something that’s new and different than what has been the traditional way of doing things, especially when it comes to the classroom setting.

I had never written a blog myself until I was asked to write one for a few Edtech companies and share how I was using the tools in my classroom. I was apprehensive at first, having no experience writing a blog at that time.  I was not sure where to begin nor how I would write so many words. However, it’s true what they say, once you take that first step you can keep moving. It’s just that getting started is the most difficult part, finding the right words, learning about your writing style, it’s all part of the process.

What Are The Benefits Of Student Blogging?

The blogger has the benefit of improving writing skills whether in basic grammar structures in English or learning foreign language skills as is the case for my Spanish students, or for other courses, learning to write in a specific way whether it be persuasive text or narrative for example. And the theme can be relevant to any course or personal interest topic. An additional benefit is the ability to share ideas and experiences, enabling people to learn from each other.

Blogging enables you to write freely about your ideas and thoughts, and you can choose to share them or you can keep them private, but the end result is that you have a way to express yourself, be creative and can then use it as a means for personal growth and reflection.

All of my students in Spanish II, III and IV have accounts for blogging and sometimes I will give them a prompt and other times I leave it up to them to write about whatever they feel like writing about. I do set guidelines for the blog to be a certain length, a number of words, or specific verb tenses, but I really want it to be a way for them to express themselves, be creative and have it be more personalized.

Getting Started

Before we begin blogging and throughout the year, I continue to emphasize that it’s really important to remember a couple of things. The purpose of the blog is to work on writing skills and that means their own skills and not those enhanced by trying to use a translator. They need to put forth the effort and try to write in Spanish, in my case, while keeping in mind some of the grammar, vocabulary, and verbs that we have learned in class. And finally, they need to read the feedback from me, or if they are paired with a classmate, peer-review and not worry about any errors.  I reinforce that we’re all in this together to help each other learn and grow and that it’s okay to make a mistake.  While my experience is with students studying a foreign language, you can apply these same parameters to any course.

I use the blogs as a way to have them work with a new vocabulary unit on their own. I let them get into small groups and take turns writing and then commenting on blogs, but either way, I read them all. I can learn more about what their needs are in terms of language skills, but I also learn more about them as a person and it helps to build relationships with them as well.

Final Thoughts

Blogging can be used for many purposes and can be a regular activity or maybe it’s something that you would do occasionally, depending on your class. It could be a great way for students to write their interpretation of something they read in English or in a history course for example. I have written blogs for graduate coursework and at times, I am still apprehensive because I am putting my ideas out there for somebody else to read and I think it’s natural to feel a little bit afraid of expressing yourself openly, but that’s what the purpose is.  We need to feel free to share our thoughts, to communicate with others, and to build connections.  These are all important parts of the learning process.

So think about blogging.  Whether it means you find a blog to read, start to write your own blog once a week, once a month or try it out in one of your classes. I will tell you that it can amount to a lot of reading when you have your students do it, but it’s completely worth it for you and for them. And don’t be afraid to take a chance with it, we learn from our experiences and we reflect and continue to grow.

Among the benefits of students blogging?

  • Student autonomy and student engagement
  • Promotes student choice and builds confidence in writing and in communicating
  • The natural “cognitive load” of the writing process. Writing is hard and writing that will actually be read by someone outside the classroom is another thing altogether. Students need to share their work.
  • 21st-century skills, collaborating, thinking critically, and publishing ideas with authentic audiences.
  • Opportunities to practice digital literacy and citizenship, very important to include in our classroom.

If you have any questions or comments I’d love to hear from you, happy blogging!

A better way to track growth and promote reflection

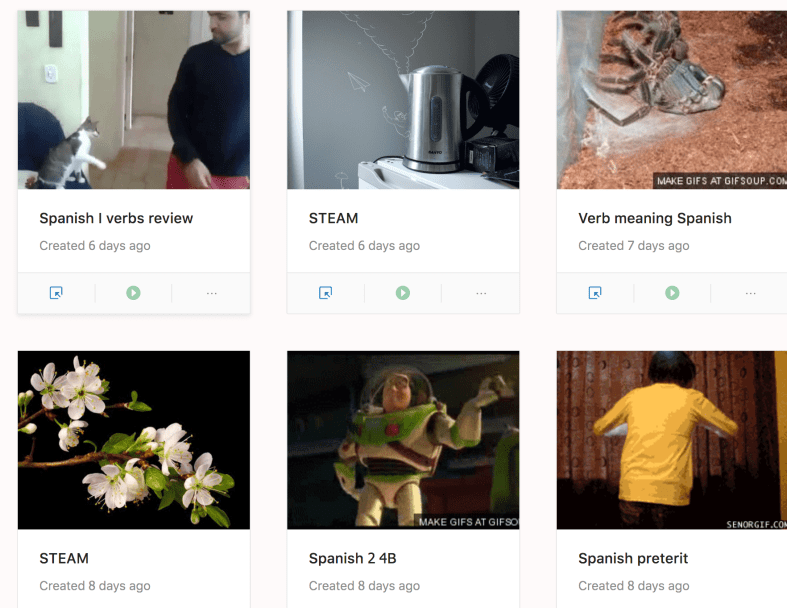
Assessments used to track student progress are certainly not new to teachers. However, it is important to consider that if you consistently use the same tool for assessment, these materials should be curated and referred to throughout the year. This ensures a conversation can happen between teachers, students, and guardians, reviewing  progress and growth.

Kidblog offers extended options for promoting student choice, giving students ownership in learning, and facilitating communication between home and school (family engagement in learning is critical for student success).  Over the years, I have tried to encourage students to keep prior assessments or writing assignments as artifacts of their work to share with families. It wasn’t long before these papers were misplaced and the opportunities for review, reflection and growth disappeared. Using Kidblog’s built-in digital portfolios empower students to self-regulate learning and develop their metacognitive skills. It also allows a conversation between student, teacher, and families happen.

Tracking growth in a more accessible way

There are many benefits of using safe student publishing that go beyond simply blogging and improving communication skills. Through Kidblog, students gain the tools necessary to prepare for their future with the skills they need to be successful.

  • Promotes digital literacy and citizenship: Blogging engages students in building their writing skills whether it be basic English grammar, practicing foreign language skills, or learning to write in a specific format such as a persuasive text or narrative. Students can share their posts with classmates and provide feedback to one another. Peer assessment builds student collaboration skills and promotes digital citizenship and the responsible use of digital tools.
  • Track their growth: Students build their online presence and create their own space unique to their needs. They develop confidence as they become more creative in their expression and learn to self-assess with each blog post they write. Because Kidblog offers a safe learning space, students can get started by writing posts that are private, visible by the teacher, and then continue to grow their audience, sharing their work with classmates, connections, and beyond. Using Kidblog across multiple courses provides students with an even greater opportunity to track their progress across the course of a semester, school year, or even year-over-year.


  • Build relationships and become confident learners: Receiving feedback throughout the learning journey is critical to student growth. However, some students may be hesitant in sharing their thoughts with their peers in the classroom. Through blogging, when students create their own online space, they can comfortably begin to develop their voice, express their thoughts in a personal space, and become more confident learners. The relationships that form by sharing their work at first with their teacher and then by publishing it to a larger community have a tremendous impact on student growth. Publishing work to a wider audience benefits the student through the additional feedback that can be provided. Students know their work is having an impact on readers.
  • Goal setting: When students consistently create through blogging, they can use their history (in digital portfolios) as a guide to push forward with goals. Each student can use Kidblog as a space to set personal learning goals. By publishing their goals in the class, they are held accountable and, in turn, will be motivated to hit those goals. Preparing students for their future requires that we provide opportunities for them to learn responsibility, to work within a schedule with different tasks and timelines.


  • Personal expression and growth mindset: Kidblog provides a space for students to explore their passions, be creative, and reflective. Students have the opportunity to share these passions with the world, and hopefully, make a connection with another student based off of these passions.


Consider adopting Kidblog as your tool for promoting student growth and formative assessment. Teacher premium memberships are a great way for an individual teacher to pilot Kidblog in all their classes, with benefits like automatic digital portfolio curation for your students, a class page, moderation tools to customize your audience levels per post, and so much more.

Digital Citizenship Week

5 resources to help students — and teachers — understand copyright law

Originally posted on ISTE 

As educators, we provide opportunities for students to research and create using new media and technologies.

When students create a presentation, make a video or write a report, it is important that they understand not only how to evaluate the sources of information, but also how to properly cite where they obtained the information. Students also need to understand how to access information, repurpose various media and create their own works while respecting the laws of copyright.

It’s our job to model responsible use for students and guide them to find resources.

Keeping track of copyright law can seem daunting, but it doesn’t have to be. There are quite a few quality resources to help you ensure that your students are practicing good digital citizenship. Here are my five favorite resources for understanding and teaching copyright law:

Common Sense Education.

This is the education arm of Common Sense Media. It provides resources and activities that help students develop a better understanding of copyright as well as topics related to digital citizenship. Some of the activities include self-directed activities, where students respond to prompts that help them to navigate through online safety and copyright issues. The site also offers a series of videos that can help students — and educators — understand the ins and outs of copyright.

The Center for Copyright Information.

The site provides information and resources to help students, parents and teachers understand how to access information and how to properly and legally use it. The site offers videos with explanations of copyright infringement, how copyright alerts work and many links for how to search for digital media, including movies, TV and music.

21things4students.

This site, which earned the ISTE Seal of Alignment for Readiness, allows students to learn 21 themes related to using digital media, several of which cover copyright and other ethical issues. Students watch a video and then work through a series of tasks to achieve a goal and level of completion. For some tasks, students can earn badges and print a certificate.

Internet Education Foundation.

This site provides resources and lessons to help students learn their rights and responsibilities under copyright and fair-use laws. The emphasis is on helping students become good critical thinkers and active contributors and savvy consumers of digital media.

Brainpop.

This paid resource for educators has an entire section on copyright and fair use. Educators can post assignments on movie making, coding and more that help students learn about copyright. Students then complete various activities, like making a video, that demonstrates their understanding of copyright and fair use while allowing them to express their creativity.

As educators, it is our responsibility to provide opportunities for students to interact online, to be creative and to develop the digital literacy skills they need for the future. To do this, we need to provide resources and teach them how to better understand copyright law.

Connecting with Students at the Start of the School Year

Recently published on DefinedSTEM

The start of each new school year is such an exciting time for educators and students. After the summer break, educators head back into their classrooms and schools, hopefully feeling recharged, excited for the new school year, and ready with a list of new teaching ideas. Planning for the first day and first week back to school are so important, we want to set up our classrooms but also need to focus on the environment and culture we are creating. Of course, there are classroom expectations and class details that we need to share with our students, but we need to do something first. In starting to plan instruction and methods, we first should focus on learning about our students and showing that we are invested in their success. By starting here, we begin to develop our classroom culture and set up a welcoming environment for learning.

Welcoming students in and learning together

At the start of the school year, and every day thereafter, we should be intentional about being present. We need to spend time greeting all students and welcoming them back to school. Beyond the students on our rosters, It is important to acknowledge all students as we see them in the halls and throughout the building.  The power behind creating a positive and supportive climate in the building and in each classroom starts with teachers. When we are visible and show students that we are excited about school, we will start making connections that will help in fostering a positive classroom culture.

It can be challenging to start a daily routine of school after a summer break, or any extended break during the year. We must set a good example by engaging our students in conversations, showing an interest in who they are, encouraging and providing opportunities for peer connections. These intentional strategies to get to know our students will positively impact the learning environment

There are many ways to learn about our students. There are icebreakers and other games that can be used as a way to learn about one another. As educators, this is our opportunity to take time to encourage students to share their thoughts and interests with peers, and also what and how they hope to learn in your class.

Making those connections

There are many tools available to set up methods of communication and collaboration and to help students develop these critical skills for their future. For learning, we have to determine how to make ourselves available to students when they have questions or need additional support or resources. The questions do not stop when the school day ends, or over the weekend break. Without a way to ask questions during these times, students can become frustrated and the potential for learning diminishes. In our increasingly digital world, we have access to so many resources, but we also need to know how to find the right tools. First, I recommend that educators find a tool that enables students to connect, to ask questions, and to access classroom resources. Among the digital options available today, it still can be challenging to select the right one. A few examples are setting up a classroom website, a messaging app or using an LMS.

A classroom website is great for having a centralized location for students to access resources, post questions, review content and more. Websites and using LMS platforms can easily be set up using EdmodoSchoologyGoogle ClassroomWeebly a Google Site, or even Padlet.  Communication is also easier with a messaging tool that enables the sending of reminders, links to resources, or that integrates with other digital tools for learning. A few options are Bloomz (for parent-teacher communication) and Remind. There are several other options available, depending on your needs and the level you teach. I have used Voxer with several of my classes, especially for talking about Project Based Learning and sharing ideas and reflections.  One thing to keep in mind is to find out about the kind of technology and internet access available to the students.

Learning about each student

Even the slightest interactions can provide so much information about a student. It happens through those quick conversations as students enter the room, or by including fun activities in the lesson, and creating a supportive, welcoming environment where students feel valued. Engaging in some of these practices will help to build and foster positive relationships. The beginning of the year is the perfect time to start creating connections with one other.

Some quick ways to get started are by having students create a collaborative Google Slides Presentation, or use another digital tool, like Buncee or even Padlet perhaps,  for students to create one slide or add some information. Encourage each student to contribute by adding in fun facts, share how they spent the summer, or the weekend,  to help each member of the class to learn about one another. I did this with my Spanish III and IV students and it was fun to learn more about each student and their summer experiences and we had some fun in the process.

A personal goal at the start of each school year is to learn about my students and help everyone start to feel comfortable in our classroom. We used some icebreaker games, a great game of Bingo, shared stories, and it definitely helps students to learn about each other and for me to learn about them.  Our classroom culture continues to develop each and with it brings new learning opportunities.

Another great way that I have found to learn about each student is through the use of project-based learning. When students have the choice to determine what it is that they want to study and can drive their own learning, we can connect more with each student and understand who they are and what their passions are for learning.  The students can learn about their peers as well as become more globally aware of what it is like to be a student in different parts of the world and to just really explore whatever it is that they want. For us as educators, it creates a way to extend our own learning and we can continue to improve and learn and grow with and from our students,  starting from the beginning of the year.


Why we all need mentors and how to make it happen

Published originally on Getting Smart 

One of the most important roles for educators today is that of being a mentor. As educators, we are often called upon to mentor the students in our classroom, as well as colleagues in our school. Throughout our lives, we have all had at one time or another a person who has served as a mentor, whether they have been selected for us or it is a relationship that simply formed on its own. Take a moment and think about the different mentors that you have had in your life. How many of them were teachers? How many of them were other adults, such as family friends or perhaps even coaches? How many of your own mentors have been the colleagues in your building or members of your PLN (Personal or Professional Learning Network)?

There may be a few that come to mind immediately, both because you remember having a specific time that was set aside to work with your mentor, maybe during your first-year of teaching or as a teacher who needed some guidance while working through some of the challenges of teaching. There is probably a mentor that comes to mind because you credit them with some aspect of personal and or professional growth. For myself, I have been fortunate to have some supportive mentors that have helped me to grow professionally and taught me what it means to be a mentor. These relationships are so important because it is through mentorships that we continue to learn and grow and become a better version of ourselves. In the process, we also develop our skills to serve as a mentor to someone else and continue the practice promoting growth.

Getting Started with Mentoring

Take a moment and think about your classroom or your school and the types of programs which may be already in place in your building. Are there specific times set aside for teachers to act as mentors for students? To their colleagues? In my school district, Riverview, we implemented a homeroom mentoring program a few years ago, as part of our RCEP (Riverview Customized Educational Plan) which we were making available for our students. A few years prior to that, we began with the Olweus Bullying Prevention Program, and our school was among the first schools in the United States to achieve national/state recognition for bully prevention. Through the program, we implemented a variety of learning activities, with the goal of engaging students in learning and collaboration, to promote a positive school climate and to create opportunities for students to build positive and supportive peer relationships.

For our Homeroom Mentoring Program, small groups of students in grades 9 through 12, are assigned to a homeroom, with a mentor. By having these smaller groups, the teachers are able to serve as a mentor for each student, working with them closely, to not only support them during their high school experience but also to prepare them for their future after graduation. It is a way to provide a more personalized learning approach for each student and for each student to know they have support available to them. These mentoring homerooms meet on a regular basis, providing ongoing opportunities for the teacher and students to interact in team-building and work on fostering peer relationships. During these homeroom meetings, some of the activities include pride lessons, goal-setting discussions, career exploration surveys and job shadowing, community service experiences and other topics which come up throughout the year. It is a good opportunity for the students to have a small group to work with and to develop critical skills for their future, such as communicating, collaborating, problem-solving, and developing social and emotional learning skills as well.

In addition to the planned activities, a key part of our mentoring program is the creation of a “portfolio” which includes samples of student work, a job shadow reflection, resume, list of volunteer experiences and additional artifacts that students can curate in their portfolio. The past few years, students have organized these materials into a binder, which has been kept in the mentoring homeroom. The materials become a part of their required senior graduation project. This year, we have started creating an e-portfolio, using Naviance, a program that promotes college and career readiness. Students begin by creating their online profile and sharing their activities and interests. Using the program, students can take surveys to learn more about their own skill areas and interests, learn about colleges which might match their interests, and also continue to build their digital citizenship skills. According to one of our guidance counselors, Mrs. Roberta Gross, the mentoring program was implemented to help students make transitions toward post-secondary goals and plans, and moving to the e-portfolio is creating more opportunities for students to explore their own interests and create their online presence.

There are many benefits of having students create an e-portfolio. Moving to an e-portfolio makes it easier to access the information for each student, it can be shared with parents and it opens up more conversations between the students and the mentor teacher. It is important to prepare our students for whatever the future holds for them beyond high school graduation, and working with them as they grow, in these small groups, really promotes more personalized learning experiences and authentic connections.

As a final part of this program, our seniors take part in a senior “exit interview”, a simulated job interview with a panel of three teachers, a mix of elementary teachers and high school teachers. It truly is a great experience to have time to see the growth of each student, learn about their future plans and to provide feedback which will help them continue to grow and be better prepared for their next steps after graduation. And for students, being able to look through their portfolios, reflect on their experiences, self-assess and set new goals, knowing they have support available, is the purpose of the mentoring program.

Resources on Mentoring

There are many resources available that can provide some direction for getting started with an official mentoring program.

  1. The “Adopt a class” program, founded by Patty Alper, who also wrote a book on mentoring called “Teach to Work: How a Mentor, a Mentee, and a Project Can Close the Skills Gap in America.” Alper talks about the impact of mentoring and how her view of it is towards an “entrepreneurial” mindset, preparing students for the future, with the skills they need. Alper breaks down the process into practical steps, with examples and encouragement for those new to the mentoring experience.
  2. The national mentoring partnership “MENTOR”, offers a website full of resources and ways to connect with other mentoring programs. MENTOR even held a Mentoring Summit in Washington, D.C., this January, where professionals and researchers gathered to share ideas and best practices for starting a mentoring program. Be sure to check out their monthly themes and presence on Twitter.
  3. The National Mentoring Resource Center offers a collection of different resources for mentoring include manuals, handouts and a long list of additional guidelines for different content areas, grade levels, culturally responsive materials, toolkits and more. The website has most of the resources available as downloads.

How you can get started

I would recommend that you think about mentors that you may have had at some point during your life. What are some of the qualities that they had which made them a good mentor and why? For me, I felt comfortable talking with my mentor, being open to the feedback that I would receive, and I knew that my mentor was available to support me when I needed. Another benefit is that we learn how to become a mentor for others, and when we have these programs in place, our students will become mentors for one another. I have seen the positive effects in my own classroom, and many times, these new mentorships have formed on their own.


A phenomenal mentor that taught me what it means to be an educator.

DSC00538

DSC00515

Thrilled to have an awesome mentor and professor, thank you Bruce Antkowiak

A fun way to learn, a great story

PBL and GimKit

So the tool was Gimkit and I only heard bits of a conversation in the #4OCFPLN group (Thank you Laura Steinbrink) and I honestly thought it was something only for elementary school. I decided last weekend to look it up, create an account and give it a try. At the end of the school year, I love trying new tools and ideas to keep students engaged in learning and finish strong. A few years ago, Goose Chase was a huge success, and so I was excited for the possibilities with Gimkit.

It was so easy to create a game, referred to as a “kit.” I created several “kits” for my classes and then noticed that I needed to upgrade to make additional kits. I reached out to the game’s creator to find out if I could have a brief trial period, so that I could make more games. Since the school year was ending, and I had conferences coming up, I really wanted to try out as many features as I could.  I was quite surprised to find out that this is a tool that has been created by a high school junior, as a part of project-based learning.

“Being uncomfortable is a great way to increase your skill of learning”

Learning the story behind the creation of Gimkit

When I asked Josh asked about his background, he told me that during the last school year, a new project-based learning high school opened in his district and he decided to attend.(See an interview done by Michael Matera, #xplap, where he interviews Josh).

In May of 2017, as he was completing one of his projects , he thought back to traditional school, where he really enjoyed using other game based learning tools, and thought he could create something to improve upon them. He started by interviewing different students and teachers, and compiled a list of the most common issues expressed, which became part of his focus in creating Gimkit.

GimKitHW

As an assignment

Last summer he worked on creating the first version of Gimkit, and ran a small beta test in October and officially launched the day before Halloween. He says they have spent “little to no time and money on marketing,”  and the user base is growing, over the past few weeks he has seen around 20x the usage he did from just a month ago. As for the team, for the most part, it’s just Josh who does all of the engineering and responds to customer support messages. He started to code between freshman and sophomore years, and then developed GimKit over the following summer. Josh also has a mentor who works with the customers and provides business advice. Listening to his interview with Michael, there are three questions that he asked himself which impressed me. “Am I working to improve the product every single day? Am I improving myself every single day? Am I doing something to push the product further everyday?” He clearly has a growth mindset and is reflective in his “challenges” that he has set up for himself.


I was so surprised when I received a response to my email to Gimkit  within about fifteen minutes of having sent it. I can’t recall the last time that I got a response so quickly.

GImkitCreate

Giving it a try

So last week I decided to give it a try in my classes without really knowing what to expect. I got started over the weekend by creating classes, entering the students’ names to make it easier in class. I created a few “kits”, which are games. It is very easy to create. You can start from scratch, upload your own sets of terms or connect with Quizlet to export a list of words directly into your game. The goal is to make as much money as you can, or for students to reach a set goal. Students can play individually or in teams and logging in is done through a code, where students can then either find their name if part of a class, or enter their name.. You can also set a time period to play, I have been using 10 and 12 minutes, just as a start.

I was very excited to try this with my classes and actually only intended to play during my Spanish I classes. To start, I told them that I really wasn’t sure how it worked and told them to just go for it.

Playing this reminded me of that day five years ago when we play Kahoot! for the first time. The students wanted to keep on playing more games every day and said it was their favorite. They were excited and having fun but more importantly I noticed that they were learning the words and their recall of the words became faster and faster with each time played. It was fun to observe them as they played, learning how the game worked, and hearing their interactions. Some students were yelling at their teammates “to stop buying things”, as they can “shop” and level up with extra money per question, buy insurance, bonus streak or other options. Eventually they all had fun buying things,  when they saw how quickly the money was being added to their account.

After the first round of games, I think the total won was around three million which seemed like a lot until the next class came in and had 17 million. The third group to play earned 37 million and when we decided to continue this the next day we were in the billions!

GimkitLIbrary

Gathering feedback and assessing the benefits of the tool

Once the game is done, a report is available which opens as a PDF. The summary shows the class results and the individual report lists each student, money earned and lost, correct and incorrect answers, followed by a list of the terms asked and the number of correct and incorrect responses. It is a great way to see what areas that the class as a whole needs some review with, but more importantly, something that can be shared with each student and used as a tool to study. Teachers can create 5 kits for free and edit each kit once. There are also paid plans that enable you to create more.


For the determining the benefit for students, I value their feedback very much and I ask them what they liked about the game and how they felt it impacted their learning of the vocabulary. They liked the game setup and the repeated questions, the music and the teamwork made it fun as well. Creating the kits was so fast and made it easy to keep adding more into my library. Another nice feature is the ability to assign kits for students to play outside of class for practice.

There are different options available for play in class as well as assignments. I love that students can work at their own pace and that they are learning more and feeling more confident with the material.  I definitely recommend that you check them out and follow them on Twitter, @Gimkit. Just in the past few days, there are already new features added, one favorite is the messages sent to teammates letting them know when someone on the team buys something.


No-tech, Low-Tech or All Tech: 5 new ideas to try


**Slightly updated from an earlier post, but some ideas to get that energy back up

Ending  the year with 5 random ideas: Going back to basics 

The end of the school year is a great time to try some new ideas. With summer approaching,  we have time to reflect on methods used this year and to seek out new ideas and tools, to come up with creative and innovative methods and ways to welcome to students back in the fall. Hopefully these new activities will help to keep students more engaged in learning.

Here are 5 ways to have students connect, collaborate and create. These are also helpful for building peer relationships and for reviewing content or assessing skills at the end of the year. These ideas can be no-tech or using something suggested by the students.

1) Random games or icebreaker style: There are tons of ways to create icebreakers, whether by using paper and pencil or even with digital tools. For example, with Buncee, Piktochart or Canva students can come up with four statements about themselves to share with classmates. These can be in the form of three truths and a lie, as a way to help students learn about their peers and for the teacher to learn about the students. It is beneficial for making connections with one another, finding things in common, but also to appreciate the different perspectives and backgrounds students bring into the classroom. It will be a great way to enhance communication and comfort in the classroom and also, if tech is used, to start teaching students alternative ways to present information.

Screen Shot 2017-12-07 at 8.37.18 PM.png

2) Categories:  Create a template with 4 or 5 different categories related to the content area and grade level being taught. After deciding on categories, select 5 or 6 letters of the alphabet, or use numbers, that students must use to come up with a word, topic or date, that ties into each category. Students can randomly be assigned to small groups and can then share what their group came up with. This activity will promote communication between peers and provide an opportunity for collaboration and some fun as well. It can also be a good way to have students review, be creative and brainstorm new ideas even. It will provide time for teachers to assess student needs and decide the next steps in the lesson, as we keep moving toward the summer break.


3) Word art: Students need different ways to practice the content and one way that helps some learners is through visual learning. Students can use vocabulary, verbs or any content material to generate word art. Students can create a word cloud using paper and marker or try using a digital tool like WordCloud, or WordItOut, or other similar word cloud generators available. After the word clouds are created, teachers can build on the learning potential by having students post their work in the classroom, having a gallery walk where other groups can discuss the terms, brainstorm new ideas, define or translate them (if a foreign language) and increase the authentic learning materials in the classroom.


4) Music: Music can really liven up the classroom and be useful for helping students remember the material. One idea is to have students create rhymes or a song using a vocabulary list, names of famous people, state or world capitals, monuments or anything related to the content area. Students can work in pairs or a small group and create a song which can be used as a mnemonic device, to help them retain the information in a more meaningful way. For presentation purposes, students can then have the choice of sharing live in class or perhaps trying a tool like Flipgrid or Recap to record and share with classmates. It can even be followed up by posting the video on a Padlet and encouraging students to comment in writing, or leave a reply on Flipgrid. These student creations will add to the authentic classroom resources and engage students more in learning.

Screen Shot 2017-10-28 at 9.04.12 PM.png

5) Creating games: Students can create a game as a way to help themselves and their peers practice the material. It can be a game made up using paper or any materials the students decide on or created using one of the digital tools available like Kahoot, Quizlet or Quizizz. Students will have a more authentic learning experience when they select the specific vocabulary they need to practice, which will will give more personalized learning opportunities.

In trying one or all of these activities, it presents an opportunity for the students to work together, to build their relationships, to collaborate and to engage in more authentic learning experiences. And it provides the teacher with an opportunity to step aside and become a facilitator, and to use the time as an opportunity to not only assess student learning but to interact more and provide feedback for students.


There are many ways to practice the content material and engage students more in learning, these are just a few of the ideas that I have tried in my classroom this school year, and they are a work in progress. Knowing that something works takes reflection and student input, and one thing I have noticed in the few short weeks we have been in school, is that students are asking more questions and thinking of new ways to extend their learning. I have more time to move around and work with every student and provide more individualized instruction and really understand each student’s progress.

They are asking, “Can we…?, What if…?, Is it okay to…?” and adding their creativity into our activities. They are also suggesting improvements, “Maybe we could…, It might be better if you…, and This has helped me to remember…can we keep doing these activities?”  And my answer to all of these has been “Yes, I think we should try it.” If it works, then great. And if not, we will try again!”


12 Tools to Try…before summer break!

Updated from the Original Post on Getting Smart, January 19, 2018

Looking for new ideas to try before the end of the school year? If you have not tried some of this, now is the time!

There are so many digital tools available today that offer opportunities for promoting student creativity, student voice, and expanding where and how students learn. I had my own list of the tools that I found made a big difference in my classroom, but decided to ask students for their input.

Here is a list of tools to try in 2018, (or to try before the end of the year, let’s keep learning!)

Each of these offer multiple ways for students to create, connect and engage in more authentic learning experiences.

Promoting Connected Learners

We were able to take our learning to a whole new level this year through Project Based Learning (PBL). Using these tools enabled us to connect with students from several Spanish speaking countries, which created tremendous possibilities for more authentic learning and broadening our cultural understanding.

1) Edmodo: Virtual learning space, where teachers can set up a digital classroom to connect students with the resources they need, in a safe learning environment. Edmodo can be used for assessments and integrates with Microsoft Office and Google, making it easy to share files with students. Students relied on Edmodo to connect with students in Argentina, Mexico and Spain for their PBL. One student said “these connections enabled me to sculpt my PBL, and learn in ways that books, videos and regular classroom lessons cannot provide.”

2) Flipgrid: Video response tool, which became one of the most talked about tools this past year after launching new features, making it even easier and more fun for students to share their ideas. Students can record up to a five minute response, add emojis to their photos and access the “grid” quickly through a grid code. It is a great tool for helping students to become more comfortable and confident in sharing their ideas and sparking curiosity with their peers.

3) Padlet: Padlet, a virtual wall, is a favorite in our classroom. Students can create a digital portfolio by uploading files and links to projects, curate resources for PBL, or have discussions with classrooms around the world. Other popular ways to use Padlet are to ask questions, post homework, or as a classroom website. Newer features include being able to “like”, “grade” or “upvote” a post and directly transfer posts to another Padlet wall.

4) Recap: Recap 2.0 is a free video response tool, which integrates with Edmodo, Canvas, Schoology, Google Classroom and Blackboard, making it easy to implement right away. It provides a comfortable way for teachers and students to ask questions by setting them up in a “Queue”. Students can submit questions and receive direct feedback, in a safe moderated environment.

Tools to Engage Students in Learning

5) Quizlet Live: Quizlet Live is a fun way to encourage student collaboration by playing a team game using a set of Quizlet study cards. Teachers select a set of study cards, launch a Live game by providing students with a join code, and students are divided into teams. To play, you need at least four players and a study set with at least 12 unique terms. Only one member of the team has the correct answer and answering incorrectly bounces the team score back to zero.

6) Quizizz: Quizizz has launched some new features, including integrating with Edmodo and Google Classroom, which makes sharing or assigning games and reviewing results much easier. When playing live, students can see the class accuracy reflected as it updates the leaderboard live with each response. There are thousands of games available in the library, making it easy to get started or create your own.

7) Kahoot!: Some big changes to the layout and options of the platform make it easier to navigate and review questions in class. Teachers can now assign “challenges” to students as a fun way to practice by sharing a code. The new “Nickname Generator” creates fun and unique usernames such as “Mystery Panda” or “Fantastic Bat” to students. It definitely saves time rather than waiting for students try to come up with their own “creative” names.

8) Kidblog: Blogging has many benefits for helping students to express themselves and begin to develop their online presence. Teachers can provide students with a variety of writing prompts to not only assess student learning, but promote creativity, communication, collaboration and digital citizenship skills. With Kidblog, teachers can even AppSmash (use two or more apps or tools together to complete a task) by embedding other tech tools into the platform, such as Buncee, Flipgrid or by uploading images and documents directly from Google Drive.

Creativity, Assessments, Interactive Lessons and More

9) Buncee: Buncee, a versatile presentation and assessment tool, is great for creating multimedia projects full of animations, graphics, audio, and videos. Choose from thousands of templates, backgrounds, animations and other graphics to create invitations, classroom signs, and unique “Buncees” for any purpose. Buncee enables every student to find exactly what they need to add into their project and to bring out their creativity.

10) Formative: An interactive tool for creating formative assessments, for use in class or as student-paced practice. Students enjoy using Formative because they receive feedback quickly, they are able to “show” their work and when done as practice, move at their own pace. Teachers can create Formatives with different question types, content and even the ability to upload and transform files. Try having students create their own Formatives as a way to have more personalized and authentic practice.

Immersive Learning, Coding and Problem Solving

11) Nearpod: Nearpod continues to be a game changer in our classroom. It provides so many options for presenting material as well as assessing students through diverse activities. The chance to be immersed in the virtual field trips and explore places around the world is of tremendous value for students. Educators can quickly create interactive lessons which include multiple question formats, the ability to upload content, BBC lessons, PhET simulations, and even add in GIFS! Nearpod integrates with Google Classroom and Canvas, and most recently with Remind, making it even easier to share lessons. Nearpod also added 27 “College Tours”, available in VR, a great way to have students experience different schools by immersing in the campus, without having to travel the distance.

12) CoSpacesEDU: CoSpacesEDU provides students with a way to not only create their own “spaces”, but to be able to walk in the spaces created by their peers. To explore in VR (Virtual Reality) and problem solve by figuring out how to code using Blockly, offers students a truly authentic way to learn, create and problem solve. The Gallery is full of examples to get you started with ideas for your classroom. Use CoSpaces to have students represent a scientific concept, a book report, or create a scene representing something studied in any content area. Talk about creativity, imagination, innovation and critical thinking, and more all in one tool.

In the End

These are just 12 of the many tools out there for education. The most important thing to remember is the “Why”? behind using these in the classroom. While these 12 tools made a difference in my classroom, they may not have the same impact in yours, but I do recommend giving them a try. Think about the tools you are currently using to amplify or facilitate student learning. What is making a difference in how, what and where students learn? Could one of these be used in place of another, as a way to engage students more in learning, or even better, provide opportunities for students to move from consumers to creators?

My advice is to simply choose one of these 12 tools and give it a try. See how it goes, ask your students for some feedback, and then plan your next steps.

Rubicon Summit: Classroom’s Journey To Student-Led, Interactive Lessons

A Classroom’s Journey To Student-Led, Interactive Lessons

Written for the RUBICON SUMMIT

About two years ago, I found myself struggling to find ways to keep my students engaged in the lesson. I tried to get them involved more in class activities by offering more choices and providing opportunities for them to be part of the decisions made about what we were doing in the classroom. Why did I do this? Partially because I saw – and could feel – a decrease in student motivation and engagement. It was approaching the end of the school year, and the focus had shifted more to “when does summer begin?”

So I tried to do things a bit differently, think creatively, and take some risks. I wanted to keep us all moving, to finish strong at the end of the school year and begin summer vacation with a sense of accomplishment, to celebrate all that we had learned throughout the year and also what we had gained from these new experiences.

Educational Technology and Digital Tools with Purpose
Educational Technology provides so many resources that enable students to learn anywhere and at any time, and at a pace that is comfortable for each student. We can instruct from inside the traditional classroom, ​”​the brick-and-mortar​” ​as it is called, or from anywhere around the world. Using digital tools provides more differentiation and personalized learning, and provides opportunities for the students to move from consumers to creators. When students have choices in how to show what they have learned, they are more likely to be engaged and excited for learning. They will feel valued​,​ and the lesson and learning will be more meaningful because it has been made perso​n​al to them.

Creating Interactive Lessons
What did I change? I started by having my students create some interactive lessons using educational technology tools like Formative, Nearpod, and EDPuzzle, or even games with Kahoot! and Quizizz. It proved to be a very beneficial learning experience for all of us. By doing this, we had extra resources available that could be shared with students who might need some extra practice. I thought it went so well that I decided to take it a step further and start a “teacher for a day” activity during which the students create a lesson based on a grammar topic or vocabulary.

I stepped back and had the students lead our classroom. It was a really good way to learn a lot more about the students, to better understand what their needs were in terms of the content material, and for the students to learn about each other. Giving students the control and the opportunity to become the creators and leaders in the class has tremendous benefits and it has been something that we have enjoyed.

Giving Students the Control
At first when students created interactive lessons, I would launch the lesson and control it on the SmartBoard, but find ways to involve the student who created it during the presentation. I eventually decided to move aside, and took a seat in the back of the room, having the student lead the lesson, give explanations, answer questions, call upon students for answers, and provide feedback. Having the opportunity to sit back and experience this was tremendous. The students enjoyed the activity, supported each other, collaborated, and provided some positive feedback to each of their classmates. I was very impressed with how well they taught, led, and learned during each of the “teacher for a day” lessons.

Empowering Students in Learning
The use of these digital tools means ​that ​the “time and place for learning” is no​ longer​ confined to the ​traditional time and setting of the physical ​classroom​. It opens up the learning environment ​to​ anywhere​, at any time and at a pace that is comfortable for the students as well. Learning and having timely, purposeful and authentic feedback is critical ​for growth to happen. When we shift our focus to creating opportunities, giving students the control, leaving the decision making to students to choose ​how t​o show what they have learned, or ​letting them​ design their own assessments, they are more empowered in their learning.

What are the Next Steps?
Have a conversation with your students and ask for their honest feedback. What did they like? What did they not like? Which lesson or format seemed to help the most? What did it feel like to be in control, decide how to deliver the lesson, and experience being the teacher? You can have this as a face to face conversation, students can respond on paper, or use one of the many digital tools available for communication. No matter which way you choose, look to your students for the valuable feedback to decide your next steps. Be sure to ask yourself these same questions and continue to reflect on steps taken and progress made!

For more strategies about integrating technology into instruction, read Overcome

EdTech’s Problems With Blended Learning!