Visme: Latest post “How Visme Helped me create memorable presentations in less time”

Thanks to Nayomi and Visme for publishing my latest blog post.  Enjoy the possibilities with tools like Visme.  Here is the copied blog post

Posted on December 18, 2015 by Rachelle Poth

How Visme Helped Me Create Memorable Presentations

image: http://blog.visme.co/wp-content/uploads/2015/11/visme-create-presentation-less-time1-1024×590.jpg

Have you been looking for a better way to make a presentation? Maybe you’ve been working with the same presentation tools and are interested in trying something new and different but are hesitant to make the change. Let go of those worries and try creating your next presentation with Visme.

What Makes Visme So Special?

image: http://blog.visme.co/wp-content/uploads/2015/11/18.jpg

1Preparing a presentation can be quite a time-consuming process. No matter what your purpose, the thought of having to create a presentation can be intimidating and even overwhelming.

In my experience, it made no difference whether I had to develop a lesson for my students, design a presentation for a conference, or create a project as part of my graduate course work.

Regardless of the need, the goal is to create something that conveys the message, engages the audience, includes a variety of media elements, and does this in the easiest, most efficient way.

So What Are the Possibilities?

3

There are many options available today for delivering the content you want to share with your audience and, depending on the amount of time you have to prepare, this can become quite an involved process.

However, with tools available through Visme, a presentation design tool I consider to be “all inclusive,” preparing something for use in any of these scenarios is actually quite simple.

I’ve had the opportunity to prepare presentations for both personal and professional use, for use in my classroom or in my graduate courses and, more recently, at a variety of educational technology conferences.

I always want to present something that keeps my audience’s attention and will inspire others to try it out for themselves. Of course, the most important part is getting your message across in a very visual way.

Coming up with new, creative and engaging content for each of these presentations can prove challenging at times. However, with so many choices available within this presentation software, there really is no limit to what one can create and share.

With Visme, I have been able to quickly create a presentation from scratch and build a very interactive, visually engaging presentation. I enjoy choosing from a wide variety of templates with colorful and diverse backgrounds, searching all the different categories of icons and other tools to produce a highly engaging, multimedia presentation.

I can also include any type of animation or transition to inspire curiosity in my audience, which also keeps me, as a presenter, actively seeking more opportunities to convey information in new, innovative ways.

What Else Can I Create?

5

Even if you do not need to create a whole new presentation, you can use Visme to create an infographic and display bits of information, facts or statistics or any other visual content.

There are so many templates available to choose from; and you can add your own personal touch and creativity to each of these by selecting from the numerous color choices, font styles, backgrounds, animations, and other visual and media tools available.

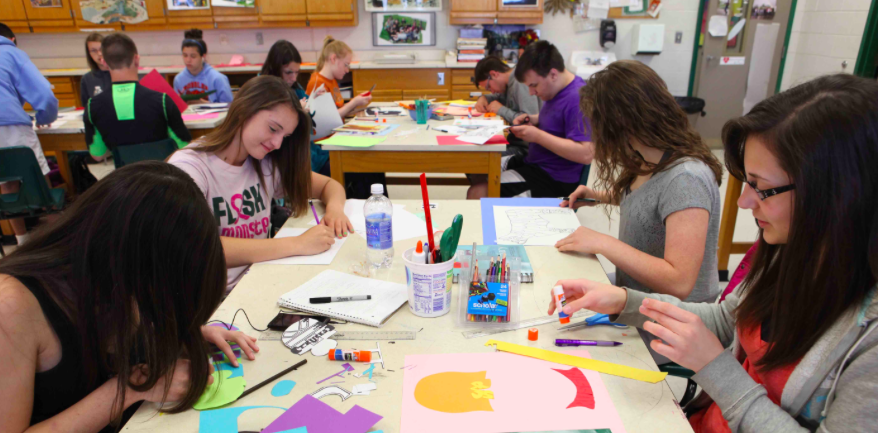
This is also a great tool for my students because they can easily create presentations using the templates, tools, icons, and images available to them, which are all part of the Visme package.

​Who Can Use It?

7

What makes Visme so versatile is that it provides many ready-to-use templates for professionals in any field or sector–even beyond business or educational purposes. Anyone can use it and because it is so user-friendly, you can create a beautiful eye-catching presentation in minutes.

Depending on your audience and time frame, you can prepare each slide with a variety of text styles, animations, and images; set times for them to appear and then exit, change the color scheme, background choices, incorporate thousands of icons or upload your own images, and insert video. There really are a great amount of opportunities for creativity.

So rather than spend time trying to flip through or juggle various resources during one presentation, why not try using Visme and store everything in one presentation? It really does make it quite simple to present your information and it leaves a lasting impression on those who view it.

First-Hand Experience

As a matter of fact, in my own experience, I have had students who truly did not want to create anything other than a standard PowerPoint presentation. However, after seeing one of my projects, these students took a risk and tried something new and found out that they really liked it. One, in fact, liked Visme so much that she created a project with it and presented at PETE&C, the Pennsylvania Educational Technology Expo and Conference.

I think this reveals the possibilities afforded by a tool like Visme. It has something to offer everyone. The presentations are visually appealing and its features and functions inspire curiosity and enable my students–or anyone for that matter–to really create something awesome and enjoy learning in the process.

About the Author

Posted on December 18, 2015 by Rachelle Poth

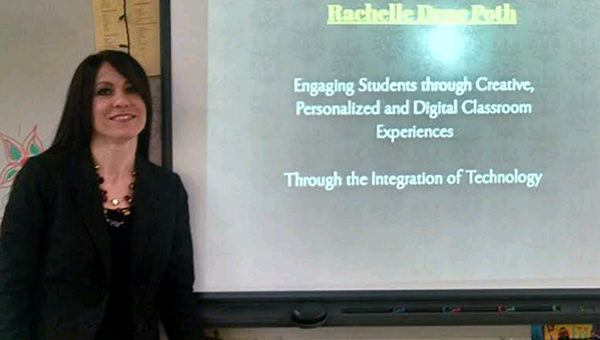
Rachelle is a Foreign Language Teacher at Riverview Junior Senior High School in Oakmont, PA. (www.rsd.k12.pa.us) She is also an attorney and received her Juris Doctor Degree from Duquesne University School of Law and is currently pursuing a Master’s Degree in Instructional Technology at Duquesne University.

Rachelle has presented at several conferences on technology and recently presented four sessions at ISTE in Philadelphia, sharing tools such as Celly and Visme, which help create a collaborative and innovative classroom for students.

Assessments: Some fast ways for classroom use

Here is my latest blog post for Edueto Magazine, published November 25, 2015


edueto1

Assessments: What are some fast ways?

Assessments are an area where you could devote a lot of time trying to find the perfect assessment that would enable all students to have an equal opportunity to show what they know and can do with the material. There are many forms available both in the traditional paper format, or perhaps project format, and now with all of the web tools available, there are many more options for assessing students. In prior posts, I mentioned a few of these assessment tools just to give you an idea of what some of the options are that are available to teachers for use in the classroom. I could tell you the ones that I use most frequently but that does not mean these same tools would be the best choice for you and your students. So it depends on what type of assessment you are looking for, formative or summative, and what do you want the students to show by completing it, that’s where I would begin.

Some fun ways to start

Do you want a way to get a quick idea of whether or not the students understand the basic concept or a group of vocabulary words for example? Then you could use something quick such as Kahoot or Quizizz. Or an even quicker way to ask one question possibly to start your class, is to use a tool like PollEverywhere and ask students one question at a time and then look at their answers.  Maybe you are looking for a different way to have students discuss something and need more options available for students to enter longer answers or even include images or other links as part of their answer. Those options are available now as well. But first, for the time being, let me tell you about two tools that I find to be quite useful on a regular basis in my classroom for quick assessments.

Kahoot and Quizizz

Since I have already discussed Kahoot! in my prior blog post, I will only state again that it is a great option for engaging the students, assessing their learning, having data quickly available and having some fun with the students in the process. A newer option that I have been using is one called Quizizz. Quizizz functions in a way similar to Kahoot and other tools like it in that students can access it by entering a join code, teachers can create their own quiz or search for some that are available on the public database. You can add images, provide a variety of choices, mark which answer is correct, but the only difference is that once you launch this assessment, the questions and answers appear on each student’s device.

You can set a timer so that the students have to answer each question within a certain time, but once they answer, they immediately get feedback and are surprised by the appearance of an image, a “meme” if you will, that pops up in between each question, which basically tells them they are either correct or incorrect. It is highly entertaining and the fun part about it in addition to these features is that when watching on the Smartboard you can see in real time how each question is being answered, tallied with correct or incorrect or not answered yet.  The display almost resembles a race and you can see each student’s progress across the screen.  At the end you can access the questions at the bottom, save the data and see how each student answered, look for trends, and so much more. Like some of the other assessment tools, you can have all of the results instantly and download a spreadsheet or a chart to get the feedback. The chart is even color coded to make it easier for you to see the areas that are in need of some additional instruction or use it for any other type of data analysis that you prefer. There are a lot of options available for you to analyze the results, so I recommend you just explore it on your own and find what benefits you and your classroom.

How do the students like Quizizz?

I always like to find out from my students how they feel about some of these tools, I find their input to be very important since in the end they are the ones that are using it.  I want them to be engaged in the activity, enjoy the learning, as well as have some fun in the process. I was excited to try Quizizz for the first time and my students were very excited while playing it, their surprise and reaction to the images that popped up and seeing their progress really did make for a meaningful, engaging experience.  By the way, the options enable you to mix the questions, remove the memes in between questions, and many more choices.

How about some discussion or online collaboration?

Another tool that you may consider if you have not already used it or heard of it is Today’s Meet. Today’s Meet is a backchannel discussion tool and is a great way that you can quickly create a question for discussion in your classroom or as I have used it in the past, set it up similar to online office hours where you are available for students to ask questions live, and it keeps track of the questions and you have a transcript available for others who may have similar questions. But it is a great way to discuss any variety of topics in class, perhaps during a video or another activity.  It also gives students an alternate method of responding which does not require paper but they can simply connect to the room through their phone or device and enter their name and their response. People can comment back and forth to each other and it really is a quick way to open up discussion in the classroom can be used at the start of class before even beginning the lesson to determine opinions or ideas that students may already have about a certain topic.

How does it work?

To begin, once you have created an account if you want, creating a room for your meeting is very simple.  All you need to do is go to the website, create a name for your room and share the link with whoever you need to access the room. You can choose to have it open for a specific period of time, you can even create an account and claim that room and use it as an ongoing basis. Whatever your needs are, quick answers or more extended discussion topics, Today’s Meet would be a very easy tool to begin using in your classroom. It does not require any of the users to have any login information other than the link and the transcript of all conversations can be saved and referred to later if needed.


So as I said there are many more choices available for assessing or having your students be more involved in a discussion, but if you want to start off quickly, these would be two really good ways that you can start. In my next discussion, I will add on a few other ways that you can use for classroom discussion, backchannel chatting and alternate assessments for your students. Thank you for reading, please contact me with any comments or questions I look forward to hearing from you. Twitter: @rdene915

The past week

This past week  MEDIUM

I love the fact that there is always something to be learned, every day, from anyone. New experiences, new takes on something, new perspectives, learning takes many forms. This past week has been no exception. With the start of #21stedchat last week and learning about Medium straight through the end of the week, I learned many different tools and concepts for use in my classroom.

It is exciting to have the opportunity to share this with my students and colleagues. I am thankful for all of the interactions I have with family, friends, my PLN and all who I come in contact with each day. Without these people, I would not have the same inspiration and motivation I have for continuing my learning journey. I am excited for new learning opportunities this week and for trying some new web tools and ideas with my students and getting their feedback. And I look forward to some time over the break to catch up with family and friends and to spend time working with these new great ideas I have learned from my Twitter friends, colleagues and students.

Recent post as part of EdSurge article, thrilled to be able to contribute

Thanks to edSurge for this opportunity. November 5, 2015EdSurge

Crowdsourcing Professional Development: Six Tips From Tech-Savvy Teachers

Rob GrimshawRob Grimshaw
Nov 5, 2015


Nearly all teachers are now using digital tools in the classroom, but according to a recent study from the Gates Foundation, most aren’t satisfied with the effectiveness of those tools. That’s not entirely surprising: the edtech community hasn’t historically been intentional about giving teachers a seat at the table. Rather than spending time in the classrooms or designing tools that respond to the needs of teachers, edtech giants design solutions that “work great, if only we could get teachers to use them properly!”

But teachers aren’t waiting for the tech industry to play catch-up. We’re witnessing the birth of “crowdsourced PD” as tech-savvy teachers share millions of resources online, exchanging tips and techniques to make edtech work for their kids and classrooms—and solving a few real-world challenges along the way.

Since launching our marketplace earlier this year, we’ve had the chance to meet dozens of inspiring, innovative teachers. We asked them for recommendations on how to best find and deploy tech in the classroom, and their responses could prove useful to other teachers and edtech companies alike. Here are some of the highlights:

Start with Your #1 Challenge

Rachelle Poth, a high school teacher in Pennsylvania, had this advice for tech developers: there is no point in tech for tech’s sake. Instead, start with the biggest—often overlooked—challenges like parent engagement, student engagement or classroom management. For teachers: Focus on integrating something new to address a challenge or opportunity in one area, then fully explore its capabilities before adding another tool. It’s easy to become overwhelmed if you try too many things at once.

Rachelle has seen this work first-hand with Celly, the first tool she integrated into her classroom. “Initially, I wanted Celly to eliminate the disconnect I often felt with students. I used the tool to send reminders to students about what they needed for class, or, if students were absent, to tell them what they missed.” Over a two year period, Rachelle’s use of Celly expanded. Today, she uses the tool to “answer student questions, send images of text and worksheets, provide helpful links, take a poll, organize activities and even have a scavenger hunt.” By starting with a specific challenge and expanding over time, a tool identified to address a communications “disconnect” wound up playing a much larger role in her classroom.

Safety First

Teachers are telling us that data privacy is a critical priority. Rachelle’s guidance: “Whenever I look for online resources I always ask myself two questions: is the resource secure and private? Can I monitor the activity of my students?” Look for the privacy policy, and don’t ignore the fine print. Ed tech privacy policies should be written in plain English. Freemium tools should not require detailed information, or a credit card up front. And if the website displays inappropriate advertisements, that’s clearly a red flag. Once the technology is implemented, many teachers work with students on using pseudonyms when they create logins and create a regular habit of resetting passwords.

Beta Test on Yourself

James Cho, a fifth grade teacher from New Jersey, told me that before he implements a resource, he always creates a student account first and interacts with the product as if he were a student. Cho gauges how user-friendly the product is by trying various settings and scenarios on different devices. When using something new, it’s important to understand how it can benefit all types of learning styles.

Ask Students for Input

If the resource passes your test, it’s time to ask the toughest judges: the students. The most successful tools are ones that engage and excite students, prompting them to ask if and when they can use them again. Joe Fosum, a seventh grade teacher in California, has nominated a small group of students in his class called “tech gurus,” who try new tools and provide feedback. This can be a great way to help teachers decide between two similar products, since students often give honest insight into what best helps them learn.

Consider the Long-term Cost

To make an impact, tech should not only work within a classroom or school budget–it has to work at scale, without imposing massive time or financial costs.

Cost-conscious teachers often take advantage of free trials, which buys them time to explore, research, and collect student feedback. Jessica Cobin, a third grade teacher in California, encourages teachers not to get discouraged if a company’s website doesn’t promote previews or free trials. She recommends emailing or calling customer support to ask for one; chances are, they’ll be eager to oblige.

Jessica also encourages teachers to scrutinize user reviews of new technologies, which could reveal hidden costs or fees over time and help you better understand if cost will be an issue in the future. Do products offer discounts as the number of users increase and usage scales? Or, are there hidden costs that kick in as more teachers get on board? Some products appear to have low costs but require an upfront investment in “systems integration” to upload the data that makes them useful. Don’t forget that your time has value as well – ask vendors whether their products can communicate with your student information system, or if they’re reliant on manual data entry to scale. Save yourself time by asking questions early. What might work well in one classroom might not work district-wide if the time or financial burden for teachers is too great.

Fail Early, and Often

Even if you do everything right, experimentations with technology could still fall flat. James Cho is a risk taker like so many tech-savvy teachers that we’ve met, and he told me that greatness can’t be achieved without a tremendous amount of trial and error. He believes that “failure should be seen as a wonderful opportunity for learning rather than a hindrance. True learning happens when students move beyond the boundaries of their comfort zone, so teachers should constantly find new ways to challenge students with the technology at hand.”

Understanding the education technology landscape can be a full time job—not easy when you already have one—and it involves changing lives in the classroom. As technology evolves and improves, I expect the education community will also find ways to streamline the research and implementation process. Meanwhile, teachers should continue leveraging the greatest tool in their arsenal: one another.

Rob Grimshaw is the CEO of TES Global. You can find him on Twitter @r_g.

Imagine Easy: Recent Post I wrote on Project-Based Learning, Published October 26, 2015

Available at: Imagine Easy

IMAGINE

Project-based learning (PBL) is something that I have integrated into my classes more over the past few years. I started thinking about alternate ways to have students:

  • produce authentic assessments,
  • enable them to use something that was interesting and engaging for them, and
  • would provide some real-world experiences.

Project-based learning not only provides opportunities for students to collaborate or drive their learning, but it also teaches them to problem solve, and helps to develop skills integral to their future, such as critical thinking and time management.

SUPPORTING ALL STUDENTS

As a foreign language teacher, I need to assess my students in a variety of ways on a regular basis. As we all know, not every person learns the same way or has the same interests. In terms of assessment, some students can learn the material really well, but when a traditional test is given, their information and knowledge somehow disappears.

When this first happened in my classes, I began looking more at ways to assess my students–but to provide assessments which led to more authentic and personalized work. I wanted to provide an equal opportunity for students to achieve success in showing what they know (and can do) with the information that they have learned.

A great way to do this is through project-based learning. There are an increasing number of tools available for use in the classroom that enable students to have a choice and be creative, while also learning valuable technology skills.  These tools give students options for showing what it is they have learned and can do with the material, but in a way that is comfortable and relevant and meets their interests and needs.

BENEFITS OF USING DIGITAL TOOLS FOR PBL

The options provide students with a variety of choices for showing their creativity, make learning more meaningful, and they become more engaged in what they are doing.

Many tools are available, both on the web and as apps, that serve to engage, motivate, and inspire students to learn more. The benefit of using web tools for PBL is twofold.

First, students can create something vibrant, engaging, and meaningful because they have put their personal touches on it and, as a result, attach the content material with what they have created. They retain the information better because they have created something for a real world experience.

It also teaches them the vital technology skills that they need moving forward, and gives them skills that can be used in other classes, and for their future. Learning to create multimedia presentations, quickly access resources, and communicate with others helps to empower students, and give them more control in their learning and growth process.

PAPER OR DIGITAL, PBL BENEFITS EVERYONE

There are many options available for project-based learning, whether it be in the traditional paper format style or through technology. Either way, giving students the opportunity to create a project to evidence the learning is beneficial. It not only leads to authentic products and meets the students where they are, but also gives them an opportunity to express themselves more, because it is more personalized and pertinent to their needs and interests. PBL leads to a more student-centered classroom and provides opportunities for students to learn from one another.

Latest blog: Assessments Published October 26,2015 Edueto

edueto1

Thanks to Edueto for posting my latest blog.

Integrating Technology: Fast ways to assess your students

Integrating Technology:  Fast ways to assess your students

Are you looking for a faster, more engaging way to assess your students? Do you like to use entrance or exit slips, or find out how students are doing or what they are thinking?  If your answer is yes, then try some of these assessment tools.

Why use technology for assessing?

Not all students are willing to express themselves in front of their classmates, and we’ve all been there when the question posed to the class, “Does anybody have any questions?” is then followed by silence. No questions?  Really?  While sometimes there really aren’t any questions, other times, or even quite possibly, a lot of the time, there are questions but students are afraid or uncomfortable asking them in the classroom. There is a fear or unease of showing vulnerability perhaps by asking a question.  So for any of these reasons, using one of the many assessment tools in class can be quite helpful for both teachers and students and for different reasons.  I find these can help to engage students more and enable us as teachers to really develop a better understanding of where the students are in terms of their learning and growth in the classroom.

A few tools to start with

I use a variety of assessment tools for different reasons in my classroom, but I would like to tell you about the first few that I found to be very useful. I started using Survey Monkey a few years back as a way to find out generally how the students were preparing, what kind of activities helped them the most and the least, what areas they thought they needed some additional help with, and I also added any extra question for them to add  additional comments or concerns.

Because I wanted them to all complete the survey, I gave them credit and to do this, I asked them to provide their Celly user name for identification.  I strategically placed the “identify yourself” question at the very end of the survey and I provided reassurance that their personal answers would not be shared and it was just information to help guide me in deciding how to best provide instruction for them in my class. It worked out great with all of its features, analyzing the data through summaries and also looking at their individual answers, really did provide a wealth of information to help me make my instruction better for them. It also gave me the opportunity to see what they needed in terms of personalization and I value this information the most.

As time passed, I found more uses for Survey Monkey such as short quizzes, entrance or exit slips and other formats for engaging them in the class discussion. And it was great because the answers were quickly available, no student login or sign up was needed and I could save the information to refer back to at any time. Now if you are like me, you like to try a variety of things and maybe you have a top 3 or top 5 list of your favorite tools for an area of your instruction.  I do as well and would like to share a few others with you.

Have you heard the phrase? “On my Soap Box”

The name of this tool immediately caught my attention because of its name, many times hearing the reference to “getting on one’s soap box” to discuss something.  So the next tool I tried, is in fact called, GoSoapBox.  GoSoapBox is another quick way to assess students and does not require students to create an account but rather have an event code to enter.  The event code is assigned to your specific created class or “event.” The expression “soapbox” does go back a long way but GoSoapBox is a great way for students to communicate and respond to polls, quizzes and discussion questions. And the nice thing is that students can respond openly, and their responses are saved and readily available. This is a great way to pose a question to a class and have students share their answers, and then they can be displayed on a SmartBoard for open discussion. As a teacher, I can always refer back to their answers and use this as a way to work with students individually and help them to enhance their skills.   My students liked using this format because it involves technology and it is quick and easily completed on their phones or other device.  And more importantly, it was something different than they had done in their other classes and other assessments they had done.

Kahoot! A “game” changer for sure

My next favorite came a little bit later in the spring of 2014 and that was Kahoot!. I could spend a long time talking about the numerous ways I have found to use Kahoot! in my foreign language classroom and the energy and enthusiasm that the mere mention of the word creates for my students is unreal.  However, just to give you a few highlights if you have not yet used it, Kahoot! is a great way to have students engage in a game, with questions ranging from vocabulary identification, to images or video, fill-in-the-blank and any type of question that you want with various answer choices. Students can play on any device, the question appears on your screen or Smartboard and students enter a game pin to join your game.

So how does it work? The game Kahoot! Is kind of set up like the trivia games you may have played at restaurants. After each question, students know where they rank, and at the end of the game there is a winner and the top 5 players are listed. And what’s even better is that you can have the feedback and results instantly.  You have the option to open the results directly or email a spreadsheet to yourself. So while it can be used for fun and is great for engaging students in the learning process, it is also a way to quickly assess students and provide feedback quickly as well. Even better, they can now play against themselves in the “ghost mode.”  And if time is an issue for you, there are many public Kahoots available that people share and you can borrow them and use them for your class.  Another way I have used Kahoot to enhance student learning is to have them create games for us to use in class. This way they are getting the practice that they need and the class as a whole has more opportunities for fun, engaging ways to learn. All you have to do make sure their questions have correct answers marked and advise students to set the timers for each question accordingly.

So for now, these are three different and quick ways you could try for implementing alternate assessments in your classroom.  Try one of them or all of them, they are easy to use and I think you will find students will be interested and more excited to learn.  By just having something different than a paper and pencil assessment and the ability to use their device to complete it, can lead to positive changes in how your students learn.

Until the next time, keep working on that technology integration and send me your thoughts. I would love to hear how it has been going so far. And if you want to see some examples, feel free to contact me at rdene915@gmail.com or @rdene915. Next time I will talk a bit more about some of these and other assessment tools. Thanks for reading!

VISME: Recent Blog posted on October 9th, 2015

How to Engage Learners With Innovative Presentation Technology

image: http://blog.visme.co/wp-content/uploads/2015/10/Header1-1024×530.png

Educators and students will benefit by creating and learning through the availability of vibrant presentation tools online. Stories come to life, students are more engaged through the variety of possibilities available through technology.

How do students show what they know?

It does not matter what level or what subject one teaches, we all assign projects, homework and other forms of assessments to our students. It is a necessary part of what teachers do in the classroom. While the topics of these tasks vary depending on the grade level or subject taught, quite often the end product comes in a very similar format.

As teachers, we have all assigned the creation of a brochure or poster, or required students to write a report, or some other form of presentation. All of these require specific guidelines and organization skills for both students and teachers.

In years past, before the rise of technology with all of its fantastic and eye-catching tools, student work was limited to only a few formats. Their work came in the form of paper or poster board, handwritten or with drawings, using anything ranging from pencils and pens to paint, markers or even typed on an old-fashioned typewriter.

Sometimes we would have to struggle to read their writing, or battle transporting and storing a massive student project that did not exactly meet the size specifications, but was really well done. Or maybe we had to remove the remnants of the paint, markers or glitter that had become attached to us from one of these projects.

Although these projects may not have exactly met our requirements, they were based on the student’s preferences and creativity, and taught us more about the students themselves. Having completed a project in a way different than instructed allowed students to show their creativity and even have fun with the project completion.

image: http://blog.visme.co/wp-content/uploads/2015/10/Captura-de-pantalla-2015-10-05-a-las-1.50.12-p.m..png

Captura de pantalla 2015-10-05 a las 1.50.12 p.m.

Why technology makes presentations better

Technology for creating presentations produces so many benefits in the classroom.  Students who once shied away from the word “creativity” or considered themselves to be less than artistic, understandably would have had some hesitation in the assignment of a project, knowing they had to exhibit these skills. I was one of these students.

Others who considered themselves to be skilled artistically, or who excelled in creating projects rather than taking quizzes and tests, would also relish the possibility of doing a project rather than taking tests or completing other types of class assessments.  Technology provides a positive experience and outcome for all students.

For teachers, while these types of assessments, in particular, projects and presentations, always provided a good opportunity for the individual talents and interests of the students to shine through, the one aspect that wasn’t as beneficial was the amount of paper involved.

We have all been there. Transporting and storing the varying shapes and sizes of student work. Students would not follow the specifications and rather than turning in a two-page paper, would submit 10 pages or instead of an 8” by 11” paper, the project was completed on a poster board or in a family photo album. The durability of the paper projects was not very good, which limited the ability for students to later share their work or use it as evidence of learning for a portfolio.

The fragility of these projects also made it difficult for teachers to keep them as examples to display or to share with future students. When projects were completed on paper, they served a limited purpose. Paper projects are hard to maintain and transport. The appearance of them diminishes over time as the colors fade and they get shuffled away, lost or forgotten.

image: http://blog.visme.co/wp-content/uploads/2015/10/Captura-de-pantalla-2015-10-05-a-las-1.50.55-p.m..png

Captura de pantalla 2015-10-05 a las 1.50.55 p.m.

Why change from paper to technology-based presentations

Throughout my career as a foreign language teacher, I have assigned and stored many student projects. I have transported menus, family albums, clothing catalogs, dream house drawings and travel brochures of varying shapes and sizes. While I loved seeing each and every project, especially with the amount of student creativity and individuality involved, displaying their work in class and transporting the projects was a bit tricky.

Now, with great tools available for students, creating a presentation and saving the work so that it can be shared later is possible. Any uncertainty of what is expected, the fear of not being able to draw or add enough creativity to a project, do not exist anymore in my mind.

In the educational setting, teachers and students have so many choices available to present information on any topic or share an idea, and there truly are no limits to what can be created.

It increases student independence and provides students a greater opportunity to express themselves and their personal interests. The learning becomes more personalized than ever before, which is the goal in education today.

It is easy to design a rubric and provide students with the information of what we, as teachers, would like for them to create. By giving them guidelines, a starting point and letting them have creative freedom, we empower their learning and enhance the possibilities for independence.

image: http://blog.visme.co/wp-content/uploads/2015/10/Captura-de-pantalla-2015-10-05-a-las-1.51.51-p.m..png

Captura de pantalla 2015-10-05 a las 1.51.51 p.m.

Making the change: Give them a choice

After some reflection, I have changed my practice when it comes to assigning student projects in that I want projects which represent the individuality and the diversity of my students, rather than having every project look exactly the same. So students are given choices. They can choose based on what they find interesting, engaging, funny or is within their comfort level as well.

Students can start with something that is comfortable and then build their skills as we progress throughout the year. Whether you’re creating a presentation for a business meeting or a lesson on photosynthesis, the great thing about these tools is that they are applicable to any area of society, whether it be for professional or personal use.

I am constantly looking for new and engaging tools that my students can use to create projects.I want to challenge them to try new things, take risks and learn how to present information in a different way, but I also want them to have fun and make it meaningful. I limit their use of each tool to one project so that they get experience using a variety of tools, can enhance their technology skills and learn from each other. It is important that they share their knowledge with their classmates and the rest of the school.

new-visme

So how do they make their projects come to life?

There are tools to create videos, comics, cartoons, animations, slideshows, brochures and infographics. In the end, it is all about giving the students choices. Students often ask me which tool they should use, and I give them some options but emphasize that the choice needs to be theirs because that’s what it’s all about. It is an opportunity for them to put on display their talents, abilities and knowledge.

Students have become so accustomed to being told exactly what to do that having a choice can be a little shocking at first. When we as teachers give  students a choice and enable them to guide their own learning, we empower them and, at the same time we also benefit because we learn more about each student.

Some of the tools that are frequently used in my classes are: Visme, Haiku Deck, Powtoon, GoAnimate, Emaze, Piktochart, Smore and WeVideo.

Each of these tools offers so many choices that every student can find something that appeals to them. When they have a choice in how to create something, it piques their curiosity and they become more engaged in the process. As they work on the project, the learning process becomes more meaningful, and they enjoy creating a project that is completely unique.

image: http://blog.visme.co/wp-content/uploads/2015/10/Captura-de-pantalla-2015-10-05-a-las-1.48.54-p.m..png

Captura de pantalla 2015-10-05 a las 1.48.54 p.m.

What can they do?

Students can create a family project in which they use celebrities, or cartoon characters with props, or import real family photos and learn to create a movie and edit their work. There are no limits to what students can do with their presentations.

All disciplines can benefit by using technology tools for student work. In any course where a student has to create a visual representation of a topic, or make a presentation or video, technology offers a limitless variety of engaging, vibrant choices, for all learning styles, levels and interests.

If I would have assigned the same paper-and-pencil project with the exact same requirements to each of my students, I would not have learned as much about their interests and skills. Visme and other web tools not only help students create and share what they have learned, they empower students by letting them drive their learning.

Read more at http://blog.visme.co/engage-learners-presentation-technology/#ACEQzRgL0lzoVvY7.99

Newest blog: Edueto magazine – Talking about Assessments

Published in Edueto, September 29, 2015rocks

Integrating Technology: Let’s Talk Assessments

We all know that we must assess our students regularly using formative and summative assessments.  Assessments are needed in order to determine what learning has occurred, what areas need to be reinforced, and as teachers, what our next steps must be.  We need this information to guide our instruction and help decide what additional opportunities to provide for our students.  We also must assess our students so that we can have the vital information necessary to provide feedback to them, in order to guide their learning. Providing them with timely, relevant feedback is essential to helping their growth and reflection on their learning and needs.  Assessments are an integral part of the learning process for teachers and students for these reasons.  So how can we make assessments more effective, informative and engaging too?

Why use technology for assessments? 

Depending on the number of classes we have, and the number of students in each class, creating numerous assessments in a variety of forms, grading them and providing feedback in a timely manner, can become quite time consuming. However, with the numerous tools available for technology integration, assessing students in a variety of different ways is now available. Teachers can now conduct quick entrance and exit slips, administer surveys, engage students in discussions both in and outside of class, create quizzes and other more formal assessments to determine what learning has occurred. And what’s even better than all of these possibilities mentioned, is how quickly the results can be obtained, evaluated and feedback provided to the students.

Some of the tools available provide instant feedback to teachers in several forms.  Teachers can select to receive downloadable spreadsheets, a quick email with the results and some offer other formats as well, all of which help to develop an understanding of where the students are in terms of their learning and what areas need a bit more focus and instruction.
What differences can you expect?

In my classroom, I need to assess my students on a regular basis because learning a foreign language, especially at the lower levels, requires ongoing evaluation of how the students are understanding the material.  Since I am teaching a language, feedback on a regular basis is critical so students can build their vocabulary and enhance the four language skills.  With the number of students I have in the lower level, providing assessments and giving feedback to the students in a timely manner has always been a priority to me. I wanted to grade quizzes and return them the next day, because that is when I believed it was most needed and effective.  The results of student assessments are necessary so that we can continue our learning plan. However, sometimes due to other time constraints, or the length of assessments, grading their work and returning it the next day, in spite of my best efforts, did not always happen, and for this I needed  to find a solution.

With the tools available through technology, many of these concerns have disappeared and made a tremendous difference in the efficiency of my classroom and my teaching procedures, and the types of assessments I can create for my students and meet their diverse learning styles.

Where to begin: What are some tools to start with?
Using tools such as Edmodo, Kahoot!, Responster, Socrative, Survey Monkey, Quizizz, Riddle and several others like these, I can quickly create discussion questions, quizzes, a survey, or combination of all of these and provide the link to my students to complete in class. There are so many options for creating a formative assessment using any of these tools and many more are available.  Once they’re all finished, I can see the results or even download the results directly to my computer, download the information to a spreadsheet or I can analyze the statistics in a variety of ways. Assessing students using tools such as these, makes the use of entrance slips and exit slips much easier and quicker.  By having your students complete an entrance slip using one of these tools at the beginning of a period, it enables you to have the results within only a few minutes and use this valuable feedback to help guide your instruction for the day or make changes as needed.  You can also use these results to provide valuable information back to the students, one on one, and help them to work on their personal growth and reflection.

The results of the assessments are stored and they can be shared with students in a variety of ways if desired, as well.  Teachers can refer back to the results to track growth, to note patterns in certain classes or students, and to provide individual feedback to students on their strengths and weaknesses. I find it beneficial to my professional growth as well and use these results to reflect on my instruction in class. With technology, assessments are fast and can be saved for later reference.  Paper assessments get lost but assessments created using one of these tools are stored and can be referred to as often as needed.

Benefits of using these tools
There are so many options for conducting assessments in the classroom and in addition to allowing teachers to conduct this type of evaluative work in a quicker manner, it lessens the paperwork involved.  It also benefits students because they learn additional vital technology skills as well.
All of these tools can be used in any grade level or subject area and they do not require students to create an account but can be shared simply through a shareable URL which can be posted on a class website or sent on messaging tool such as Celly, which is used in my classroom, or any other messaging app.  The ability to design, share and evaluate assessments using these and other tools is remarkable.
So if you’re looking for a better way to provide feedback to your students, to streamline some of the assessments that you do in class, and definitely to reduce the amount of paper used, I suggest trying one of these tools that I mentioned. There are many options available but these are just a few of those that I have used at least at the start of my integration of technology into my classroom and ones that have had a huge impact on the assessments conducted in my classroom. My students have truly enjoyed having these alternate ways to show what they know and can do with the material.   Thank you for reading.  I look forward to sharing more ideas with you about tools for student collaboration and sharing of ideas.  Next topic will focus on specific assessment tools and how to use them in your classroom.

Integrating Technology: My ongoing discussion on Edueto Magazine

?Integrating Technology: Taking another step with Blendspace

It takes time, there is no doubt, but we must persist when we take on any new venture. Sometimes it can take longer than we like, because we run into difficulties and roadblocks.  You have to expect new questions to appear while seeking the solution to the prior questions. That’s the nature of the game. But this ongoing cycle also promotes goal setting and makes us more driven as educators.

So if you have been gradually working toward integrating more technology into your classroom, in a way similar to how I started, I hope that you are seeing some results at this point. Maybe you started with a Messaging App.  If so, do you see improvement in the way you can communicate with your students and they can collaborate with one another? Or did you start using an LMS?  Have some of the frustrations which came about because of lost papers, forgotten assignments, or students who missed learning opportunities due to class absences, started to disappear? I hope so. Because if they have, then that means that the steps you are now taking are having a positive effect on your classroom and are enabling you and your students to experience a more efficient and beneficial learning environment.

It takes time, there is no doubt, but we must persist when we take on any new venture. Sometimes it can take longer than we like, because we run into difficulties and roadblocks.  You have to expect new questions to appear while seeking the solution to the prior questions. That’s the nature of the game. But this ongoing cycle also promotes goal setting and makes us more driven as educators.
The next step

In my last post, I was talking about the uses of Blendspace as a means to curate resources and flip your classroom. It does not matter what you ultimately decide to use, but having one place to keep your resources is a really great idea. We can all become overwhelmed by the many new technology tools that are brought to our attention every day. There are so many out there and choosing one can be quite difficult. So how do you make that decision? Looking at sites such as Graphite or EdShelf can help.  Seeing the feedback of other educators that have used some of these technologies in their classroom is definitely a good way to learn more about a tool, its functionality and applicability in your classroom. For example, using something like EdShelf, you can get a summary of the uses of a web tool, see what age group it is recommended for, which areas of instruction it would apply to, and read some stories about user experiences. If you have not checked EdShelf out yet, I recommend taking a look.

Back to Blendspace: Many possibilities

So going back to Blendspace, I like to talk about it because it really does provide a variety of benefits to me both personally and professionally.  It enables me to flip the classroom and to save that vital classroom time when we’re all together, for student interactions, engaging activities, or even for students to work independently while I facilitate their activities, rather than talk the whole class period. I can create a lesson and share it with them through their account on Blendspace or through the URL link and post it on Edmodo. Regardless of how the lesson is shared, they have access to many resources and can learn asynchronously outside of the classroom, on their own schedule, using whatever device they choose.

Learning can take place anywhere at any time. Students can work on a lesson in the car on the way to a game or late at night when they decide to stay up and work on something. It does not matter because the choice is theirs and that’s the great thing about technology and the usefulness of tools like Blendspace which enable flipping the classroom and storing so many resources in one place. I have also used it as a great way to store some of the various assessment tools, presentation software, or examples of projects that I have created. It makes it easier to share ideas with colleagues and at conferences and it’s a great way for me to be able to review the work I have done, to make suggestions to others, and to also see my own growth and reflect on my progress on the learning continuum.

When students create projects for my class, they don’t have to worry about fumbling with a flash drive and I don’t have to worry about losing valuable class time opening emails and attachments.  There is no concern for privacy with any grades or other information being shown. I can compile all of their projects into one lesson, give it a title, and open up one lesson which contains all of their work and display them one after another for the class to enjoy. If the students want to see each other’s work they can access it, it is stored permanently and so we can always go back and obtain the link and see what tools they have already used in class.
Building a Lesson with Blendspace

Building a lesson for any level or discipline is quite easy as well. You can take any topic and using the tools provided such as Google Search, Educreations, Google Drive, Dropbox, selecting a file to upload from your computer, and several others to search for relevant information. All it takes is finding the resource and dragging it into place in your lesson. You can add boxes, move items around, but no matter what you do it is done quickly and enables you to provide a lot of additional learning opportunities and resources for the students. And it can also be used by the students to create a project for your class, if they want to include text or a quiz or a variety of media resources, they have many options.

So these are just some of the reasons why I am really happy that I found Blendspace and how its use has benefitted my classroom. My initial reasons for using it have evolved over the past 3 years and I continue to find new ways to integrate it into my classroom. I hope that you will check it out and create a lesson and see if it works for you. It might be another area which can provide great benefits in your classroom, or it might just lead you to explore other tools. Either way you will be integrating additional technology into your classroom and you and your students will be positively affected.

I hope you are enjoying the information and I look forward to sharing more with you next time, on different ways technology can be used to assess students. Thanks for reading. I would be happy to share ideas with you, feel free to contact me.

Visme: Case Study, thanks to Payman Taei for this opportunity

This was a case study Visme had done on my use of Visme in the classroom. Payman Taei provided me with the great opportunity to share ideas.

Case Study: How a teacher is using Visme in Classroom

image: http://blog.visme.co/wp-content/uploads/2015/05/visme-education.jpg

Today we are interviewing Rachelle Poth, a High School teacher currently teaching Spanish in Pennsylvania.   Rachelle  likes to integrate and keep up with new technologies and she has found Visme to be a great tool to use in the classroom.

Let’s learn a bit more about Rachelle and her experience with Visme in her own words:

You have been teaching for quite some time. Can you share your background with our viewers?

image: http://blog.visme.co/wp-content/uploads/2015/05/visme-education-case-study.jpg

visme-education-case-study

I have been a Foreign Language Teacher at Riverview Junior Senior High School in Oakmont PA since 1997. I currently teach Spanish levels I through IV, but have also taught French during my time at Riverview.

I continued teaching full time and then received my Juris Doctor Degree in June 2006 and passed the Bar Exam that July.  I am currently pursuing my Master’s Degree in Instructional Technology at Duquesne University because of my commitment to lifelong learning and to providing the best possible learning opportunities for my students.

You seem to keep up with new technologies and trends.  Why do you use Technology in classroom?

I love integrating technology into my classroom, and have sought to find new ways to help students learn better through the integration of technology.  Prior to beginning the master’s program, I had started using an LMS, a messaging service and various project based presentation tools to build a more personalized, collaborative and innovative classroom through technology.

I have presented sessions on technology during Professional Development days held within my school district and last March I was nominated as a Pennsylvania Keystone Star for Technology.

From over 400 nominees in Pennsylvania who completed the application process after nomination, I was fortunate to have been selected as 1 of the 100 educators in Pennsylvania to attend a weeklong Keystone Summit held at Kutztown University last July.

My experience at the summit was tremendously valuable and it was an opportunity to interact with other educators, build new connections and share ideas.

I have continued to seek opportunities to share and learn about the integration of technology and enjoy attending conferences and EdCamps, presenting technology sessions, and participating in technology and education related chats through Twitter as often as possible. 

My presentations are focused on ways that technology can be used to provide personalized, creative and enhanced learning opportunities for students and how teachers can use various tools to make this possible.

I have presented technology sessions at Lehigh University and the TRETC Conference in Pittsburgh in November.  This February, I had the tremendous opportunity to be involved at PETE&C (Pennsylvania Educational Technology Expo and Conference) for the first time. 

I presented two sessions at PETE&C and also had two teams of my students showing their skills developed through Spanish classes in the showcase. 

I recently presented at the IUP Foreign Language Methodology Conference in April and I will be presenting two sessions at ISTE this summer and am so excited to have such a tremendous opportunity and look forward to meeting new people and re-connecting with colleagues.

What Types of technology do you use in your classroom

image: http://blog.visme.co/wp-content/uploads/2015/05/profile-conference.jpg

profile-conference

Read more at http://blog.visme.co/how-a-teacher-and-students-use-visme-in-classroom-education/#Vu2k0m58BjVCKjAZ.99

TeacherCast Educational Network | Developing Standards-Based Instructional Technology Integration

Technology Integration - Instructional Coaching - Productivity Secrets for Educators

Leadership Liner Notes: Sean Gaillard

Built on Connection. Tuned for Impact.

Stories by Thomas Oppong on Medium

Dr. Rachelle Dené Poth @Rdene915 Educator, Consultant & Keynote Speaker, Author, Attorney #THRIVEinEDU

Hooked On Innovation

When Innovation slaps you in the face, we slap back.

Teach Better

Dr. Rachelle Dené Poth @Rdene915 Educator, Consultant & Keynote Speaker, Author, Attorney #THRIVEinEDU

BrianKulak.com

Dr. Rachelle Dené Poth @Rdene915 Educator, Consultant & Keynote Speaker, Author, Attorney #THRIVEinEDU

The Principal of Change

Stories of learning and leading

Mandy Froehlich

Dr. Rachelle Dené Poth @Rdene915 Educator, Consultant & Keynote Speaker, Author, Attorney #THRIVEinEDU

Katie Martin

Informed by research, refined by practice

#RocknTheBoat

Rocking today's classrooms, one teacher, student, and class at a time.

User Generated Education

Education as it should be - passion-based.

Learning as I go: Reflections & lessons learned

Dr. Rachelle Dené Poth @Rdene915 Educator, Consultant & Keynote Speaker, Author, Attorney #THRIVEinEDU

Serendipity in Education

Join me, Allyson Apsey, as I stumble upon the fortunes of learning, laughing, and celebrating alongside incredible people.