Buncee Holiday Hugs


Have you heard about the Buncee Holiday Hugs? This is an absolutely amazing project that has taken place during the months of November and December. Through this project, students from around the world have created Buncees and shared their work on a Buncee Board for everyone to see. There are now 957 Buncees added to this Board!

So what are these Buncees being used for?


Buncee is partnering with children’s hospitals from around the world to share the Buncees that have been created for Holiday Hugs. These amazing Buncees will be shared with children who will be spending their time in the hospital during the holidays.

The Holiday Hugs project was started by Amy Storer with inspiration from Michael Drezek. The idea evolved from Amy’s own experience as she was spending time with her mother in the hospital over the holidays. The idea for Buncee Holiday Hugs then came to life through the connections with Amy and Marie Arturi, Creator of Buncee. Holiday Hugs is another wonderful project that follows past projects such as the Buncee Buddies (a penpal project that connects students globally to collaborate on different themes) and Miles of Smiles with Michael Drezek.

To learn more, watch this interview with Amy Storer and Brian Romero Smith in which they discuss this amazing Holiday Hugs project and their hopes for it during this holiday season.

Here are a few of the wonderful messages shared with the children. What I love the most is that the messages written on each of these Buncees can be enjoyed by everyone through the use of Immersive Reader. A fifth grade class created this Buncee story for their Holiday Hug and with Immersive Reader, not only can the language be translated, but the story can then be read to the children as well. Beyond simply sharing a wish for the holidays, students can tell stories, send messages, tell jokes, express themselves and it is accessible and can be enjoyed by everyone.

Each Buncee is uniquely different, adding in winter themes, specific holiday traditions and celebrations, animations and even video messages for the children.

Seeing each student share a story, a joke, offer encouragement, record videos, or share their picture to lift others up, truly is inspiring.

Each Holiday Hug is heartfelt from student to student.

With Buncee’s integration with Immersive Reader, students can write a message and share it with any child around the world for them to enjoy. The use of Immersive Reader in Buncee enables students to create multimedia content, improve language skills and build global awareness in authentic and meaningful ways.

Please take time to explore the Buncee Holiday Hugs and read more about this project and its incredible impact on the lives of so many children and on everyone who has participated.

Look at the different creations! I hope you will take some time to explore the Buncee Holiday Hugs and read more about this wonderful project and its incredible impact on the lives of so many children and on everyone who has participated.


Screenleap for Education: Learn From Anywhere at Anytime

This post is sponsored by Screenleap. Opinions expressed are my own.

At the end of January, I attended the Future of Educational Technology Conference (FETC) in Orlando. FETC has become one of my favorite conferences to attend and each year I return to my school with a lot of new ideas and tools that I’m excited to try in my classroom and share with colleagues and educator friends. This year was no exception. After reading about the 31 start-up companies that would be participating in the “Pitch Fest” competition happening in the expo hall, I decided that I wanted to start there. These companies—the “best-of-the-best startups”—would be pitching their products and services to a panel of judges. I find this to be one of the “musts” for me each year to learn about the new ideas and products available to educators. I enjoy getting to talk with the companies to understand their tools and how it benefits educators and students.

null

Before arriving, I had received a flyer from Screenleap. I took a quick look, but decided to set it aside and instead make time to meet with Tuyen Truong, the CEO and Founder of Screenleap, at the conference. We had a great conversation and I was immediately impressed with what I learned about Screenleap from Tuyen and from the reactions of other attendees who had stopped by the booth to learn more about Screenleap.

Not long after speaking with Tuyen, I presented my own poster session on designing “Creative, Personalized, and Productive Classrooms.” A common interest of the attendees was that they wanted to know options that would enable them to share lessons, to work with schedule changes that interrupted the normal class periods, and to provide access to learning opportunities for their students when their students needed them. Screenleap immediately popped into my mind and so I gave them a brief overview and pointed them in the direction of Screenleap’s booth in the EdTech Startup area.  

null

Tools with Purpose: Getting Started Quickly

Common issues for teachers regarding education tools are knowing where to start and whether something will have a big learning curve. These are both important factors, but we should also consider the WHY behind adding the technology. Based on the interests of the educators that I spoke with, thinking through it and trying it out on my own, Screenleap definitely addresses these concerns by making it easy for teachers to set up and start using with students and by saving valuable time for teachers who use it.

So How Does It Work?

null

Screenleap for Education allows teachers to share their screen with students and record it for later viewing. Whether the students are in the classroom or absent from class on a given day, they can watch the screen share live from wherever they are or access the lesson afterward when it is convenient for them. You can learn more about Screenleap for Education here. If you would like to try it out, you can start a free trial here!

Why Use Screenleap for Education?

When thinking about adding some new technology into the classroom, we really need to focus on the why behind choosing a specific tool or method. What difference will adding this tool make and how can it enhance the learning process and go beyond the traditional methods that are being used? What sets it apart from other tools you are currently using?

I think the benefits are clear with Screenleap for Education:

  1. Teachers can share from any device (including Chromebooks, iPads, Android, PCs, and Macs).
  2. Students don’t need to install any software to view their teacher’s screen, which makes it easily accessible to all students and saves time on IT administration.
  3. Everything is automatically recorded on the cloud for later playback. Teachers don’t need to manually upload the recording after the screen share.
  4. It saves teachers a lot of time because now they do not need to reteach lessons to students who miss a class since the recorded lessons are available for students to watch on their schedule. In addition, when it comes to re-teaching, you don’t always present the information the same way, so having a solid lesson that can quickly be shared with students to view and learn from is a real benefit for you.

Ideas for Using the Recording Feature

Depending on the content area you teach, or even if you have a different role than a classroom teacher, creating these recordings is easy and of great benefit. Having recordings available that you can share with colleagues, offer as extra instruction for students needing review, or even as a way to get feedback from colleagues about how you delivered a lesson, are just a few of the great ways to use the recording feature of Screenleap for Education. There are a lot of other possibilities for teachers, students, and administrators when the recording feature is used as part of a teacher’s daily instruction.

Getting Started

I found Screenleap for Education very intuitive and easy to get started with:

  1. After creating your account, there is an initial setup step where you can create your classes and add students to them.
  2. Once your classes are set up, it is easy to start sharing your screen with your students: all you need to do is click on the button for the class you want to share when your class starts. If it’s your first time sharing your screen, you will be walked through a one-time app installation before your screen share begins. null
  3. Once your screen share has started, your students can watch your screen share by signing into their accounts and clicking on the “View live class” button for your class.
  4. While you are sharing your screen, it is automatically recorded in the cloud.
  5. When you stop your screen share and have recording enabled, your recording will be processed and made available to you from the “Recordings” page. If you have automatic sharing configured, the recording will also be made available for your students to review.

null

Additional Features That I Like

  • If you want to remove something from your class recording, you can do so and then upload the updated version.
  • You can share the same recording with multiple classes.
  • You can track student engagement in real-time by clicking on “engagement” or after the recording has been processed. You will see a snapshot of the engagement graph at the bottom of every recording.

Conclusion

Screenleap for Education offers a lot of benefits for teachers, students, and administrators: students can easily follow along in the classroom or from home, teachers do not have to reteach lessons that students miss, students can review lessons before tests, and administrators have resources available  that can help to improve test scores for their schools through better learning. In addition, being able to stay connected and keep up with class—even when not in the classroom—and having information available to share with other teachers and administrators really makes Screenleap stand out when it comes to tools that benefit student learning.

Let me know what you think of Screenleap for Education. Again, you can start a free trial here

Exploring and Creating with 3D Bear Poth

Sponsored Content, All opinions are my own

Sign up for your free one month trial! https://3dbear.io/freetrial

Exploring the world in AR: 3DBear brings your environment to life

Ever since learning about 3DBear a few months ago, I have continued to be impressed with the platform and the company’s focus on meeting the needs and interests of educators and students. At both FETC and TCEA, I had the opportunity to spend time speaking with the 3DBear team and was able to get a better understanding of their vision for 3DBear and learn more about the newer features and ways to use it in the classroom. Even when I first started creating with 3DBear, I immediately saw a lot of benefits for classroom use regardless of content area or grade level, or even one’s role in education. With a library full of icons to choose from, animations, music, options for changing colors and sizes, moving object positions, and other functions like adding audio and student voice, it is possible to engage students in truly unique ways to learn. It did not take long to see the potential for using 3DBear not only as a tool for students as the creators but also as an instructional tool for teachers as a way to engage students more in learning by “hooking” them in with the use of augmented reality. 3DBear can be a game changer for students, acting as a catalyst to draw students in and let them go on a creative adventure. Get started today with a free teacher trial here!

Why use Augmented Reality?

A popular topic at both FETC and TCEA was Augmented and Virtual Reality. Often questions are asked whether the use of AR and VR has sustainability in education and I believe that there is. Each day I receive numerous email alerts sharing news from around the world about how teachers are using augmented and virtual reality to amplify student learning. Tools like 3DBear have tremendous potential to immerse students in a meaningful learning adventure, giving them more control of how, when and where they learn. Besides being fun to use, it offers students time to build their skills in critical thinking, problem-solving, collaboration and fosters creativity. It lets students make decisions and leads to a more student-driven classroom. This is what we want for our students, choices, agency, and engagement.

(photo credit to Mitch Weisburgh)

Walking among or narrowly escaping the dinosaurs

While presenting several sessions at both of these conferences this month, I noticed a lot of people starting to use 3DBear in unique ways. During sessions, attendees chose to be more active, and rather than simply listening in to how these augmented reality tools can be used, instead began quickly creating with them and even sharing them out socially. Completely unaware of the danger that I was in until seeing the tweet, I was surprised and thankful that I escaped the dinosaur lurking behind me as I presented at FETC! But I was concerned about the attendees when I saw the dinosaur that was lurking in the front of the room near Jaime. The excitement behind using these tools is evident when people begin creating and sharing them during your session, just minutes after you’ve introduced and only minimally demonstrated the tool. The learning curve of 3DBear? Not much at all! It’s very easy to navigate and dive right in to create your own world in your physical environment. Get started today!

(photo credit Mitch Weisburgh)

Why 3DBear

Students can use it to create 3D objects in different spaces and can then record a story to go along with it. The potential and power of storytelling in AR is awesome. What better way to have students represent their learning than to design their own world, decide what 3D objects to place in their environment and then create a narration to go along with it. Students can even upload items from their device or from Thingiverse. Student-driven learning and possible for students in grades K and up. More than just listening to teachers and how it benefits students, ask students for feedback. (See a video from a school in Medford and how students responded to 3DBear). Also seek feedback from educators, whether on social media or in my experience from attendees in the different sessions presented at FETC and TCEA.

Potential for Storytelling and Adventure

As educators, we want our students to have a learning “experience,” more than the traditional methods of learning and classroom instruction can offer. We need to empower students to become more than consumers of content, and instead help them to embrace the opportunity to become the creators and driving their own learning. By doing this, we start them on a learning journey that will serve to attach more meaning to the content, in a personalized and exciting way to learn, and above all, a more authentic experience.

There are many possibilities for using 3DBear and because time can be a deciding factor when it comes to exploring new tools and methods for classroom use, this is where 3DBear offers a lot for educators. Teachers have access to a teacher dashboard where they can see student work, track progress and explore the worlds that students are creating. There are lesson plans for Coding, Design Thinking, ELA, Math, Science, Social Studies, STEM, and STEAM-related themes available for different grade levels which include pacing guidelines. While the lessons are drafted for certain grade levels or range of grades, slight adjustments in the content enables teachers to implement these lessons into their classroom.

One of the best things about 3DBear is that teachers won’t have to spend a lot of time trying to figure out how to get started using it in the classroom. We can learn just enough and then put it in the hands of our students and let them run with it. Many students learn more by doing, and when they have opportunities to engage in hands-on activities, it leads to more personalized experiences and student-driven learning. A world of learning that they create is right in their hands.

When thinking about adding some new technology into the classroom, we really need to focus on the why behind choosing a specific tool or method. Ask ourselves what makes it different and what can it do differently for students that can enhance the learning process and go beyond the traditional methods that are already being used in the classroom. What sets it apart from other options or methods you have been using? I think the answer is clear. Students are the designers.

A Few Ideas to Try

  1. My town: Sharing where we live, describing a location or any lesson where students need to narrate a story, they can create an environment using 3DBear and add characters and more into their project. Once created, students can tell a story about the scene or even narrate in a foreign language. Why not have students create a “welcome to our town” project, adding in 3D objects and telling a story that can be shared with the community? A good way to share student work and give more meaning to the work they are doing.

(Alamo photo credit Jaime Donally)

  1. A book summary: One idea is to have students review a book, summarize something they read in class by bringing it to life with 3DBear. If the number of devices is an issue, use stations and have students work in pairs or small groups, each adding to the story.
  2. Let me teach you: Give students an opportunity to be the teacher. Choose a theme or have students select a topic and then come up with a way to use 3DBear to explain it to classmates. There are many options available for students to choose from, and it will reinforce their problem-solving, critical thinking, and collaboration skills, as well as boost creativity as they decide how to best visualize their lesson for others.
  3. Actors in a scene: Give students the chance to interact with a 3D character and maybe even sing together or dance together (who doesn’t love doing the floss with a 3D character?).
  4. Random objects: To really push their thinking, why not create a scene with a variety of characters, objects and more, and then ask students to write a story about it. A task like this can be applied to so many content areas, and grade levels and will definitely be a more authentic way to practice and learn. For students in Spanish classes, it is fun to add random objects into the classroom and have students write a story to describe it. Or, another possibility is to provide students with a narration in the target language and have them create a scene to represent the story.

So many ways for students to leverage technology for learning. They need our guidance to find a starting point sometimes, but then we need to just let them go with it and explore and create on their own. Besides building technology skills and learning about emerging trends, they will engage in powerful learning that not only reinforces the content area but also promotes the development of social emotional learning skills in the process. Augmented Reality has many benefits, the key is staying focused on your “why” for wanting to use it, and then finding the right task to get started. And remember, let the students take charge and learn from and teach one another, including you. Sign up for your teacher trial at 3DBear!

And share how you are using 3DBear in your classroom! @Rdene915

A better way to track growth and promote reflection

Assessments used to track student progress are certainly not new to teachers. However, it is important to consider that if you consistently use the same tool for assessment, these materials should be curated and referred to throughout the year. This ensures a conversation can happen between teachers, students, and guardians, reviewing  progress and growth.

Kidblog offers extended options for promoting student choice, giving students ownership in learning, and facilitating communication between home and school (family engagement in learning is critical for student success).  Over the years, I have tried to encourage students to keep prior assessments or writing assignments as artifacts of their work to share with families. It wasn’t long before these papers were misplaced and the opportunities for review, reflection and growth disappeared. Using Kidblog’s built-in digital portfolios empower students to self-regulate learning and develop their metacognitive skills. It also allows a conversation between student, teacher, and families happen.

Tracking growth in a more accessible way

There are many benefits of using safe student publishing that go beyond simply blogging and improving communication skills. Through Kidblog, students gain the tools necessary to prepare for their future with the skills they need to be successful.

  • Promotes digital literacy and citizenship: Blogging engages students in building their writing skills whether it be basic English grammar, practicing foreign language skills, or learning to write in a specific format such as a persuasive text or narrative. Students can share their posts with classmates and provide feedback to one another. Peer assessment builds student collaboration skills and promotes digital citizenship and the responsible use of digital tools.
  • Track their growth: Students build their online presence and create their own space unique to their needs. They develop confidence as they become more creative in their expression and learn to self-assess with each blog post they write. Because Kidblog offers a safe learning space, students can get started by writing posts that are private, visible by the teacher, and then continue to grow their audience, sharing their work with classmates, connections, and beyond. Using Kidblog across multiple courses provides students with an even greater opportunity to track their progress across the course of a semester, school year, or even year-over-year.


  • Build relationships and become confident learners: Receiving feedback throughout the learning journey is critical to student growth. However, some students may be hesitant in sharing their thoughts with their peers in the classroom. Through blogging, when students create their own online space, they can comfortably begin to develop their voice, express their thoughts in a personal space, and become more confident learners. The relationships that form by sharing their work at first with their teacher and then by publishing it to a larger community have a tremendous impact on student growth. Publishing work to a wider audience benefits the student through the additional feedback that can be provided. Students know their work is having an impact on readers.
  • Goal setting: When students consistently create through blogging, they can use their history (in digital portfolios) as a guide to push forward with goals. Each student can use Kidblog as a space to set personal learning goals. By publishing their goals in the class, they are held accountable and, in turn, will be motivated to hit those goals. Preparing students for their future requires that we provide opportunities for them to learn responsibility, to work within a schedule with different tasks and timelines.


  • Personal expression and growth mindset: Kidblog provides a space for students to explore their passions, be creative, and reflective. Students have the opportunity to share these passions with the world, and hopefully, make a connection with another student based off of these passions.


Consider adopting Kidblog as your tool for promoting student growth and formative assessment. Teacher premium memberships are a great way for an individual teacher to pilot Kidblog in all their classes, with benefits like automatic digital portfolio curation for your students, a class page, moderation tools to customize your audience levels per post, and so much more.

Connecting with Students at the Start of the School Year

Recently published on DefinedSTEM

The start of each new school year is such an exciting time for educators and students. After the summer break, educators head back into their classrooms and schools, hopefully feeling recharged, excited for the new school year, and ready with a list of new teaching ideas. Planning for the first day and first week back to school are so important, we want to set up our classrooms but also need to focus on the environment and culture we are creating. Of course, there are classroom expectations and class details that we need to share with our students, but we need to do something first. In starting to plan instruction and methods, we first should focus on learning about our students and showing that we are invested in their success. By starting here, we begin to develop our classroom culture and set up a welcoming environment for learning.

Welcoming students in and learning together

At the start of the school year, and every day thereafter, we should be intentional about being present. We need to spend time greeting all students and welcoming them back to school. Beyond the students on our rosters, It is important to acknowledge all students as we see them in the halls and throughout the building.  The power behind creating a positive and supportive climate in the building and in each classroom starts with teachers. When we are visible and show students that we are excited about school, we will start making connections that will help in fostering a positive classroom culture.

It can be challenging to start a daily routine of school after a summer break, or any extended break during the year. We must set a good example by engaging our students in conversations, showing an interest in who they are, encouraging and providing opportunities for peer connections. These intentional strategies to get to know our students will positively impact the learning environment

There are many ways to learn about our students. There are icebreakers and other games that can be used as a way to learn about one another. As educators, this is our opportunity to take time to encourage students to share their thoughts and interests with peers, and also what and how they hope to learn in your class.

Making those connections

There are many tools available to set up methods of communication and collaboration and to help students develop these critical skills for their future. For learning, we have to determine how to make ourselves available to students when they have questions or need additional support or resources. The questions do not stop when the school day ends, or over the weekend break. Without a way to ask questions during these times, students can become frustrated and the potential for learning diminishes. In our increasingly digital world, we have access to so many resources, but we also need to know how to find the right tools. First, I recommend that educators find a tool that enables students to connect, to ask questions, and to access classroom resources. Among the digital options available today, it still can be challenging to select the right one. A few examples are setting up a classroom website, a messaging app or using an LMS.

A classroom website is great for having a centralized location for students to access resources, post questions, review content and more. Websites and using LMS platforms can easily be set up using EdmodoSchoologyGoogle ClassroomWeebly a Google Site, or even Padlet.  Communication is also easier with a messaging tool that enables the sending of reminders, links to resources, or that integrates with other digital tools for learning. A few options are Bloomz (for parent-teacher communication) and Remind. There are several other options available, depending on your needs and the level you teach. I have used Voxer with several of my classes, especially for talking about Project Based Learning and sharing ideas and reflections.  One thing to keep in mind is to find out about the kind of technology and internet access available to the students.

Learning about each student

Even the slightest interactions can provide so much information about a student. It happens through those quick conversations as students enter the room, or by including fun activities in the lesson, and creating a supportive, welcoming environment where students feel valued. Engaging in some of these practices will help to build and foster positive relationships. The beginning of the year is the perfect time to start creating connections with one other.

Some quick ways to get started are by having students create a collaborative Google Slides Presentation, or use another digital tool, like Buncee or even Padlet perhaps,  for students to create one slide or add some information. Encourage each student to contribute by adding in fun facts, share how they spent the summer, or the weekend,  to help each member of the class to learn about one another. I did this with my Spanish III and IV students and it was fun to learn more about each student and their summer experiences and we had some fun in the process.

A personal goal at the start of each school year is to learn about my students and help everyone start to feel comfortable in our classroom. We used some icebreaker games, a great game of Bingo, shared stories, and it definitely helps students to learn about each other and for me to learn about them.  Our classroom culture continues to develop each and with it brings new learning opportunities.

Another great way that I have found to learn about each student is through the use of project-based learning. When students have the choice to determine what it is that they want to study and can drive their own learning, we can connect more with each student and understand who they are and what their passions are for learning.  The students can learn about their peers as well as become more globally aware of what it is like to be a student in different parts of the world and to just really explore whatever it is that they want. For us as educators, it creates a way to extend our own learning and we can continue to improve and learn and grow with and from our students,  starting from the beginning of the year.


No-tech, Low-Tech or All Tech: 5 new ideas to try


**Slightly updated from an earlier post, but some ideas to get that energy back up

Ending  the year with 5 random ideas: Going back to basics 

The end of the school year is a great time to try some new ideas. With summer approaching,  we have time to reflect on methods used this year and to seek out new ideas and tools, to come up with creative and innovative methods and ways to welcome to students back in the fall. Hopefully these new activities will help to keep students more engaged in learning.

Here are 5 ways to have students connect, collaborate and create. These are also helpful for building peer relationships and for reviewing content or assessing skills at the end of the year. These ideas can be no-tech or using something suggested by the students.

1) Random games or icebreaker style: There are tons of ways to create icebreakers, whether by using paper and pencil or even with digital tools. For example, with Buncee, Piktochart or Canva students can come up with four statements about themselves to share with classmates. These can be in the form of three truths and a lie, as a way to help students learn about their peers and for the teacher to learn about the students. It is beneficial for making connections with one another, finding things in common, but also to appreciate the different perspectives and backgrounds students bring into the classroom. It will be a great way to enhance communication and comfort in the classroom and also, if tech is used, to start teaching students alternative ways to present information.

Screen Shot 2017-12-07 at 8.37.18 PM.png

2) Categories:  Create a template with 4 or 5 different categories related to the content area and grade level being taught. After deciding on categories, select 5 or 6 letters of the alphabet, or use numbers, that students must use to come up with a word, topic or date, that ties into each category. Students can randomly be assigned to small groups and can then share what their group came up with. This activity will promote communication between peers and provide an opportunity for collaboration and some fun as well. It can also be a good way to have students review, be creative and brainstorm new ideas even. It will provide time for teachers to assess student needs and decide the next steps in the lesson, as we keep moving toward the summer break.


3) Word art: Students need different ways to practice the content and one way that helps some learners is through visual learning. Students can use vocabulary, verbs or any content material to generate word art. Students can create a word cloud using paper and marker or try using a digital tool like WordCloud, or WordItOut, or other similar word cloud generators available. After the word clouds are created, teachers can build on the learning potential by having students post their work in the classroom, having a gallery walk where other groups can discuss the terms, brainstorm new ideas, define or translate them (if a foreign language) and increase the authentic learning materials in the classroom.


4) Music: Music can really liven up the classroom and be useful for helping students remember the material. One idea is to have students create rhymes or a song using a vocabulary list, names of famous people, state or world capitals, monuments or anything related to the content area. Students can work in pairs or a small group and create a song which can be used as a mnemonic device, to help them retain the information in a more meaningful way. For presentation purposes, students can then have the choice of sharing live in class or perhaps trying a tool like Flipgrid or Recap to record and share with classmates. It can even be followed up by posting the video on a Padlet and encouraging students to comment in writing, or leave a reply on Flipgrid. These student creations will add to the authentic classroom resources and engage students more in learning.

Screen Shot 2017-10-28 at 9.04.12 PM.png

5) Creating games: Students can create a game as a way to help themselves and their peers practice the material. It can be a game made up using paper or any materials the students decide on or created using one of the digital tools available like Kahoot, Quizlet or Quizizz. Students will have a more authentic learning experience when they select the specific vocabulary they need to practice, which will will give more personalized learning opportunities.

In trying one or all of these activities, it presents an opportunity for the students to work together, to build their relationships, to collaborate and to engage in more authentic learning experiences. And it provides the teacher with an opportunity to step aside and become a facilitator, and to use the time as an opportunity to not only assess student learning but to interact more and provide feedback for students.


There are many ways to practice the content material and engage students more in learning, these are just a few of the ideas that I have tried in my classroom this school year, and they are a work in progress. Knowing that something works takes reflection and student input, and one thing I have noticed in the few short weeks we have been in school, is that students are asking more questions and thinking of new ways to extend their learning. I have more time to move around and work with every student and provide more individualized instruction and really understand each student’s progress.

They are asking, “Can we…?, What if…?, Is it okay to…?” and adding their creativity into our activities. They are also suggesting improvements, “Maybe we could…, It might be better if you…, and This has helped me to remember…can we keep doing these activities?”  And my answer to all of these has been “Yes, I think we should try it.” If it works, then great. And if not, we will try again!”


7 Tips to Get The Most Out of Blogging This Year

Originally Published on Kidblog,

Getting ready for the start of a new school year – new students, new curriculum, and new tools – means teachers have a lot of preparation ahead of them. Whether new to Kidblog or a veteran classroom blogger, these tips will help you get the most out of your class blog this year.1) There is no better way to start the year than by way of introductions. Blogging can be a great way to get your students comfortable with you as their new teacher, as well as, their new classmates. In my classroom, I also use this time to cover expectations in the classroom. This is all done in a “Welcome back to school” blog post. Choose a fun theme for the class, add some links and include helpful information. Share information about you, including some fun facts, and encourage students to then respond to your post. You can begin to develop those vital relationships for your classroom.

2) Get parents connected. Make the decision to use blogs as a way to keep parents informed about what is going on in the classroom. Set a goal to write a blog post with a weekly update and share what is going on in the classroom, give highlights of upcoming events and activities the students will be participating in. Also, use the blog as a way to share student work with parents, which will really connect the home and the classroom, and involve all members of the learning community.

3) Involve students in planning for blog posts. Encourage students to come up with their own ideas or to work with peers to brainstorm some writing prompts to use throughout the year. Gather their ideas and then draw from their prompts. Involving students in the decision making process in the classroom helps to provide more authentic and meaningful learning experiences. It promotes student voice and choice in the classroom and helps students feel more valued and empowered. By actively engaging them in classroom decisions, students will feel more connected to the content and their peers.

4) Create a bridge between content areas by doing some cross-curricular blog posts. Find time to talk with and encourage other teachers who may not be using blogs, to work with you to create some cross-curricular opportunities. The blog can be a way for students to complete some writing assignments or projects for communicating their ideas and showing their learning. Students create their own personal space to share ideas and really have an opportunity to practice their skills for multiple content areas in a comfortable manner.

5) Try adding some other tech tools to app smash with Kidblog or use Kidblog as the means to share student work! Implementing other tools will help students develop their technology skills and digital literacy. For example, have students create a Buncee and write about what they’ve created, or, they may share it with a peer to create a story. These apps can be easily embed into Kidblog for their classmates to comment.

6) Have a routine for sharing student blog posts and set aside time in class for the students to work together to share their blogs, offer feedback and learn to reflect on their work. Making time for students to work with peers will build those positive classroom relationships and help students to become more confident in their learning. Their confidence will increase through the writing process and also by communicating and collaborating in the classroom.

7) Be sure to have resources available for students so they understand how to use the blog, how to write a post and to properly cite any images or other information they add to their posts. A great way to do this is by screen-casting a tutorial available to students, as well as, creating a “guide post” that gives students pointers on how to publish a post, the required format, and other information related to your expectations. By providing all the information in a place which is accessible, the process will be much easier for students throughout the year to have the support they need when they need it.

6 Digital Tools To Engage Students

 Original Post Published on Teach Thought May 22, 2017, few updates added


Are you looking for some new ways to get students engaged this school year?

Here are 6 tools that I had found to be quite helpful as this school year winds down. More importantly, these are also some of the student favorites, in no particular order.


Flipgrid

Flipgrid is another video response tool that offers ways for students and teachers to interact with a variety of discussion topics. You start by creating a “grid” and then adding a “topic.” There have been some major updates and new features added to Flipgrid this summer. Longer recording length, stickers, gifs, integrations and more. Be sure to check it out!

A grid in my case is one of my Spanish classes.  Students go to the grid to see new topics which are posted for discussion and then record a response and even reply to classmates.

I have used Flipgrid as a way for students to reflect on their project-based learning, and for basic speaking assessments with my Spanish 1 and 2 students, where I can listen to their pronunciation and provide feedback. Flipgrid is also a way to connect students with other classrooms or even professionals in different fields, to connect with real-world applications of the content material.

Some additional features include the ability to give a rating to the response, read the transcript, provide written feedback which can then be emailed to each respondent, as long as an email address has been provided.

When setting up the topic, there are options for recording a video prompt, adding additional details in writing, and then customizing the topic based on whether or not other people can see the responses. You can freeze a topic, so new responses cannot be recorded but all prior responses can be viewed.

There are other features such as tracking the number of views, likes, and comments. Flipgrid is available on Chromebooks, iOS and Android devices and can also be embedded into an LMS or other websites. It is another tool that is easy to set up and might just be what you are looking for, especially at the end of the year,  to have students provide feedback on the course, to offer some information to help with the summer reflection.


This slideshow requires JavaScript.

Recap 2.0

Recap 2.0 is a Question and Answer platform available on Chromebooks, iPads, iPhones and Android devices, which can be implemented right away and is easy to use. Recap enables teachers and students to ask questions, share a reflection, and provides a comfortable way for students to communicate their thoughts. Recap also had many new updates this summer and is a great way to spark curiosity in students and to help students learn ways of asking questions and seeking more independent learning.

Students can submit questions and receive direct feedback from the teacher, parents can receive feedback by email through Recap, and there are many other features available for assessment and classroom management. Recently Recap added another feature to its platform by introducing ‘Journeys.’

In a Recap Journey, teachers create a multi-step path for students. It starts with a 60-second video and then the learning path, which leads to more independent learning and can also be a great way to differentiate instruction. As an end to the “Journey”, students can share their information or create a presentation.

In my experience with the Journeys, I had students explore Spanish-speaking countries and included different links for them to explore more based on their own interests.

It was very easy to create my own Journey and there are also many Journeys available to try through the Recap Discover.

2016 Pioneer Badge

Kahoot!

By now, you’ve likely heard of Kahoot! Especially last week when CHALLENGES came out after a period of Beta testing following discussions at ISTE in San Antonio. I was fortunate to be one of the testers and Challenges are great for having students practice the content and even for fun with family and friends.

Kahoot! is great for assessments and having a game based learning element added to your classroom. It can even be used for professional development or family fun. Kahoot! offers many quizzes in the public library which can be duplicated and then edited to make your own.

When playing, it also has added new features for auto advancing, playing in ” ghost mode ” which enables players to try and beat their first score. ‘Jumble,’ which is one of the most recent additions has proved to be a lot of fun and very beneficial for learning.

In Jumble, you create a question and each of the four colored tiles becomes part of the response. When the question appears on the board, the squares on the board are shown but the order is “jumbled.” Players must then slide the squares into the right order to either spell the word, properly form the sentence, or answer the question.

As a foreign language teacher, this has been quite beneficial for having students practice their spelling as well as for reinforcing proper word order for sentence structure in Spanish. Playing with Jumble mode has livened up the classroom because it is something different to try and the students are always excited about trying new things.

Setting up a game played in Jumble mode, or encouraging students to create games as a review, will add to classroom resources and be more authentic practice for the students.
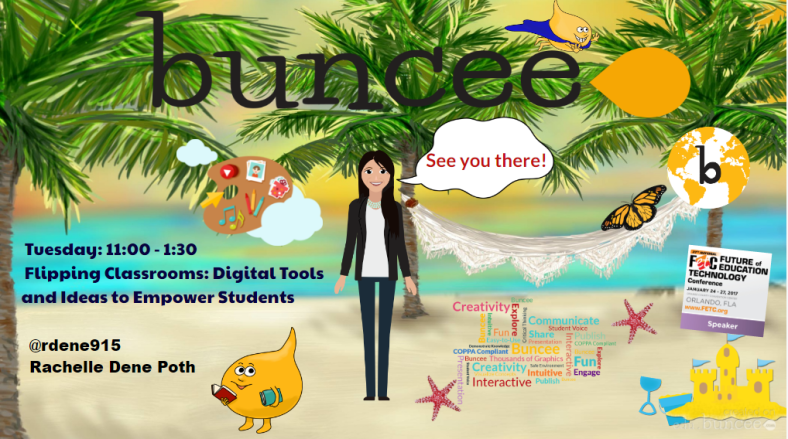
Buncee

Buncee is a multimedia presentation tool which can be used to create interactive presentations, cards, signs and other engaging visuals.  (see recent post on new Buncee features, and look into Buncee Classroom)

There are many new items added to their library and some additional features, including the ability to use it for assessment. I have enjoyed testing out Buncee with my students. It is easy to create with Buncee, you can add multiple items o n to the canvas and move them around very easily. Teachers can create lessons with assessments through the classroom edition.

But what is most exciting about Buncee is that it offers many ways for students to be creative and more engaged in learning by creating something authentic, as there are thousands of items that you can add to bring it to life and make it your own.

Students can design Buncees for any class and will have the opportunity to create more authentic work which represents what they can do with the language material we have covered. Creating will be a lot of fun for students and teachers. And great for doing a Twitter Chat too! Lots of great templates.

full-1

Telegraph

Telegraph is a very easy site to publish a stand-alone web page, which can be used to create a sign, a newsletter, a journal entry, or anything as an alternative format to pen and paper or using a Word or Google Document.

It is simple to use: type in the website, add a title to it, your name and add some pictures or links to other websites and once you’re finished, you publish it and it provides you with a web address. You can easily share that link with anyone.

My students created a site to tell about a favorite trip, one to talk about sports and favorite athletes, and another some even made Mother’s Day pages and then printed them. If you’re looking for a way to have students practice simple writing skills and do so in a more digital way, I’d recommend trying Telegraph. No log-in is required and it’s very easy to use.

Quizizz

Quizziz is a fun assessment tool that continues to add more features, which makes obtaining feedback from students and providing feedback to them much easier. Some of the newer features include receiving a daily report of the Quizizz summary and being able to send parents the results of a student’s Quizizz game. (See new Quizizz features)

The daily summary report shows the number of Quizizz games used, number of responses, percentage correct as well as additional information. It’s nice to be able to have that data available so quickly. There is also the option to email the data directly to parents, which is great especially for communicating student progress and in a timely manner.

Quizizz is another tool which is easy to implement, you simply create your own by adding your own questions or search from the public Quizizz available and drag in the questions you want and then edit them according to your preferences.

Other benefits include the ability to either play it live or assign it as “practice” or homework. You can store your Quizizz games into Collections to find them easily, quickly build games and it has a much improved UI, and it was pretty good to begin with.

And if you create the Quizizz and do not have enough time for students to finish, no worries because when students use the same login and pin number, they can pick up right where they left off in the game.

This slideshow requires JavaScript.

CoSpacesEdu

CoSpacesEdu: Opening up new learning worlds 

COSP.jpeg

I have always been a fan of technology and any time I learn about a new tool, I go straight to the computer if time allows, create an account and start trying to figure it out on my own.  Or if I don’t have time, I will add it to my seemingly never-ending list of tools that I want to check out. Last summer, I came across CoSpaces. I had no idea what to expect other than knowing that the purpose was for creating and experiencing a virtual learning environment. I created an account, looked at the gallery of what was available, and tried to figure out exactly how to create my own 3D space.

I am the type of learner who would rather struggle and figure things out on my own first. I think it is better as a teacher, to work through those struggles so that we can better help our students. If I’ve exhausted all of my efforts, then I will look for a help section or connect with other educators that I know have experience using the tool. Sometimes even simply posting a question on Twitter, or searching YouTube for helpful videos, will give the answers that I need. However with CoSpaces, I was determined to work through it on my own because as soon as I started trying it, I knew right away that it was something I would want to use in my new STEAM Emerging Technology course for the upcoming school year. And while I greatly enjoy  learning from the students, I also enjoy being there to watch the student responses as they begin to figure things out on their own and have those “aha” moments when they realize that they’ve uncovered exactly how to do something. Better yet is when they share this knowledge with their peers and also teach me new things to do with what we are working on.


My plans for using CoSpacesEdu were uncertain at the time, because I knew virtual reality was a topic that I wanted to cover in my class. My course is focused on STEAM and Emerging Tech. I had plans to help students develop some vital technology skills, starting with learning about digital citizenship and then adding on new tech skills as we progressed.  I knew that many students did not have much experience creating with anything other than Microsoft Word or PowerPoint, if even these two. I also wanted to know the different possibilities for using CoSpaces in the classroom, so I spent some time looking at the gallery, I joined the community on Facebook and reached out to the CoSpaces team to see what additional information I could find. But while doing all of this I did manage to create my own project in which I added many random items and had a lot of fun creating. I was truly amazed at what I was able to do within my own “space”. The ideas started flowing for how I could use this in my STEAM course and also with my foreign language classes. I could foresee students who had to create items such as biomes or do a book report, or a science project using CoSpaces as a way to represent these by building their own space and environment to represent the story they were trying to recreate or to tell. Talk about creativity, imagination, innovation and critical thinking, and more all in one tool.


As with my other projects this year with my STEAM course, I wanted to find a way to connect using this tool for our class with a learning target or project for another class. There are so many possibilities. While waiting for some feedback, I decided to offer a few different options for students to choose from after looking through the gallery. Consulting a friend of mine who is outstanding in the field of AR/VR, Jaime Donally, (@JaimeDonally) who gave me some really fantastic ideas for creating with CoSpaces. I was also fortunate to have a conversation with Manuela, who provided a lot of insight into the new features that CoSpaces would be offering. There are updates sent regularly with details about the new features and links to sample projects and helpful videos.  

So if you have not yet checked out CoSpacesEdu, I recommend that you do because I guarantee that you will find it has applicability for something in your classroom. And it is a tool that will further engage students in their learning. Once they have created their own project, they can then immerse themselves in their own environment with the use of the app on the iPad or installing it on their phone and having a headset to walk through their own environment. How cool is that!


So for our first project in STEAM, I asked students to create three scenes in which they either told a story about a TV show, a movie or a book that they had read, or create a different type of a living space, or come up with their own focus, as long as they included the required number of elements into their project. Once they were finished, I had them share their link on a Padlet, so that all projects could be accessible and that students could take turns walking through each other’s environment. The students were excited and amazed at what they were doing. While looking at the gallery and playing some of the games were fun, being able to create their own space, walk through it and explore on their own was way better, according to several of my students.

Screen Shot 2017-08-20 at 5.48.06 PM.png


There are some new features with CoSpaces and I’m sure the changes will continue to come. I recommend that you check it out and think about something that you may be teaching in your class or a project coming up in which students could create a virtual space. Using CoSpaces will really open up your learning environment and immerse students in authentic experiences, increase student engagement and I believe add to motivation the students have for learning and taking some risks and being up to the challenge of figuring out exactly how things work. And hopefully the next time they have project rather than wanting to create in PowerPoint or with Google Slides, they will think of CoSpaces Edu as the perfect way to represent what they know and can do with the material

Building Skills with App Smashing: Buncee, Padlet and now new Buncee Boards!!

Buncee

There are a lot of great digital tools that promote student creativity and choice and give students an opportunity to learn about each other in the process. Two tools that have worked well together for this purpose are Buncee and Padlet. Using these together promotes student creativity, provides more authentic and meaningful ways for students to share backgrounds and introduce themselves to classmates. It builds digital citizenship and technology skills by teaching students how to interact in a virtual space. It promotes communication and collaboration through the sharing of projects and opens the ability to engage in conversation through the commenting feature on Padlet.


When students start the school year, learning about classroom procedures and becoming familiar with their peers are important activities. Teachers go about these procedures in different ways, some even choosing to dive right into the content material and to open up opportunities for these typical procedures on a daily basis. The past few years I have tried to get students to interact more at the start of the year, share who they are, their experiences, their interests and have them set some goals as well. I try to do so with variety of icebreakers or other activities like surveys or classroom games to get the conversations started. However, this year I plan to have students share their information by creating a visual representation. Students will be able to choose from the library of thousands of images, props, icons, animations and more in Buncee to tell their story. The requirement will be that they use very little in terms of text and rather choose the images, animations and even videos to tell their story. I also hope that it creates a way for students to share some learning goals they may have or things they wish their teacher knew.

BunceeJenna

Before the advancements in technology and the increase in types and number of tools available, sharing these creations required either printing or sending through email or storing on a flash drive. But with collaborative tools such as Padlet, it has been very simple to not only share the information quickly but to embed a Buncee project right onto the Padlet so it is fully visible to everyone instantly. By doing this, students have gained new knowledge of technology, developed peer relationships, teachers learn about the students, the students will learn about each other, and it will start the conversations going. By using imagery rather than so many words, students will be able to see some commonalities in the classroom which will help to drive the development of a classroom culture.

Besides the learning potential in this, I think it is a lot of fun and highly engaging for students to create and to see what their classmates have created. I would not be setting a good example if I myself did not create a Buncee and add it into the group. Students need to learn about their teachers as much as the teachers need to learn about the students. I’ve heard the quote and read the quote of Teddy Roosevelt many times “Children do not care how much you know until they know how much you care.”  This couldn’t be truer, so we need to learn about our students and show that we care about them and their success.

BunceeSpain

Combining Buncee and Padlet

Throughout this app smashing (when two tools are used in conjunction to create and present a product), students enhance their skills in many areas. In terms of the ISTE Student Standards, all seven are addressed in completing these activities. The main one addressed is 6, Creative Communicator. Students have a choice and their voice is represented in creating their Buncee. But in the process of creating, they become Global Collaborators because by posting it on Padlet, others can view their work and comment. They are Empowered Learners because they have choice and voice in their learning experiences. Computational Thinkers because they are deciding how to present the information in the Buncee, Innovative designers choosing from the thousands of features available in the library to put into their own creation. Digital Citizens because they are learning to respect others’ work and to publish and post responsibly. For some students, this will be the first time they are really interacting with digital tools and so it will be perhaps a big learning curve. However, everyone will be doing the same thing and there will be comfort in this which will help student confidence to increase. I promote student empowerment and it will be a good way to set up the classroom culture and to help students gain some new skills moving forward.

FETCpresentation

New Buncee Boards! Announced today!

Today is an exciting day for Buncee and the many users of Buncee. The newest feature, Buncee boards, provide a great way to gather resources in one place, open up communication and collaboration, and share ideas with others in and out of the classroom. There are a lot of great ideas for using #BunceeBoards in the classroom, so be sure to check out this post: 10 ways to use Buncee Boards to see some of the ways Buncee Boards can be used in the classroom. There are a lof of great ways to use these in the classroom, and even better, students can have fun sharing, commenting and posting reactions to the boards.

There are many possibilities for using Buncee in the classroom and the nice thing about it, the best thing about it, is that it promotes choice and authentic creations for students and teachers and anyone. It is a skill that students can learn and can share with their families which will open up more learning opportunities beyond the school setting and move it into the community and beyond.