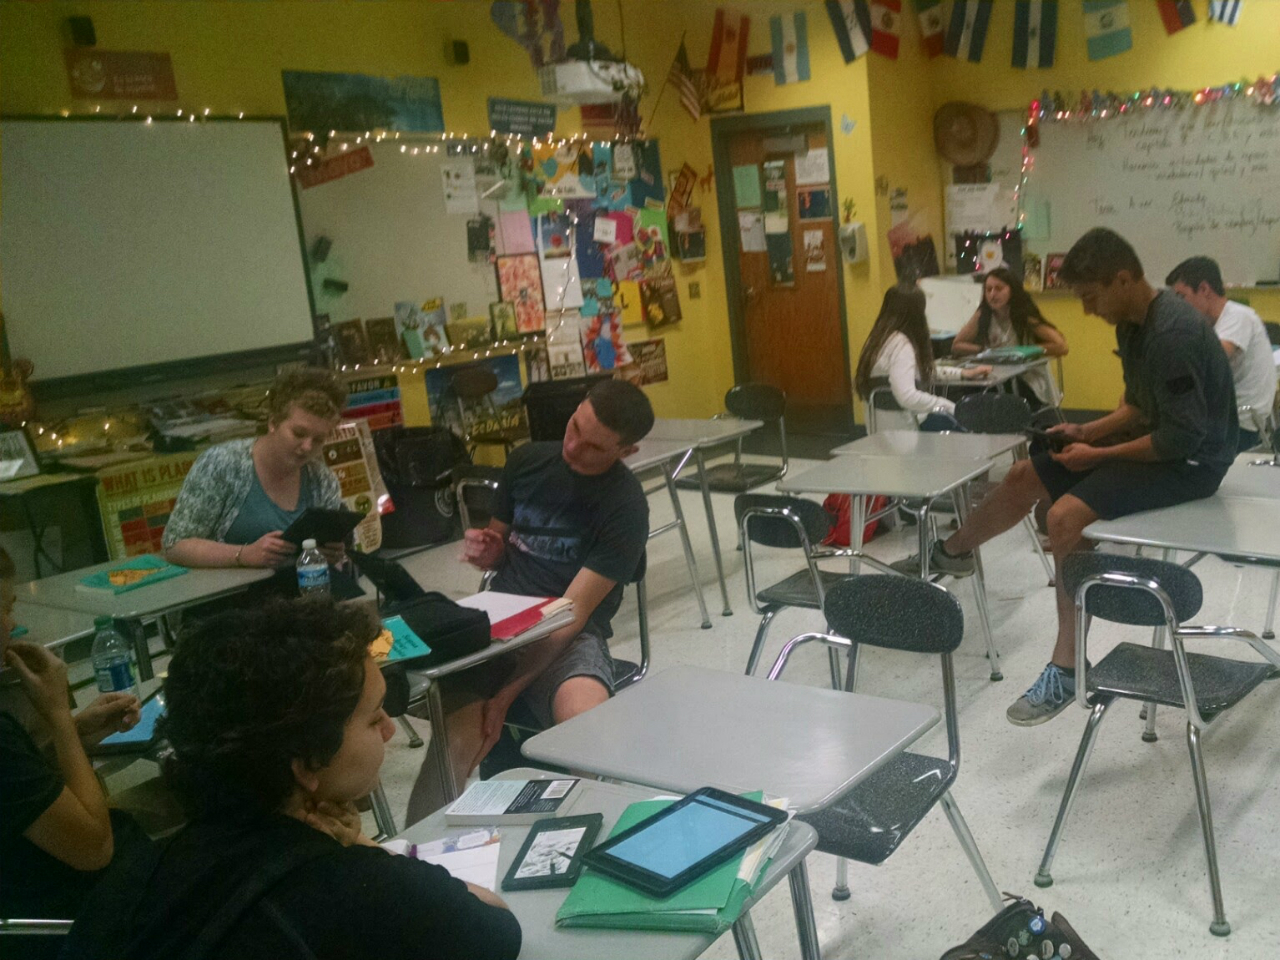
Implementing an App in the Classroom in 3 Steps

Thank you to Meghan and EdTech: Focus on K-12:  Glad to be a part of this discussion.

Two education experts offer up best practices for utilizing mobile technology.

With more and more K–12 students owning mobile devices, and with Pearson Education reporting that 72 percent of elementary students and 66 percent of middle school students want use mobile devices more in classroom, now might be the best time to add an app as a regular part of school work.

However, as EdTech reported, a survey done by Kent State University’s Research Center for Educational Technology (RCET) found that 30 percent of general education had received training on apps, and 87 percent wished to receive some sort of training on mobile apps.

We’ve consulted with a researcher and an educator who have expertise in adding mobile technology — particularly apps — into the classroom.

Step One: Identify What Kind of App You’d Like to Use

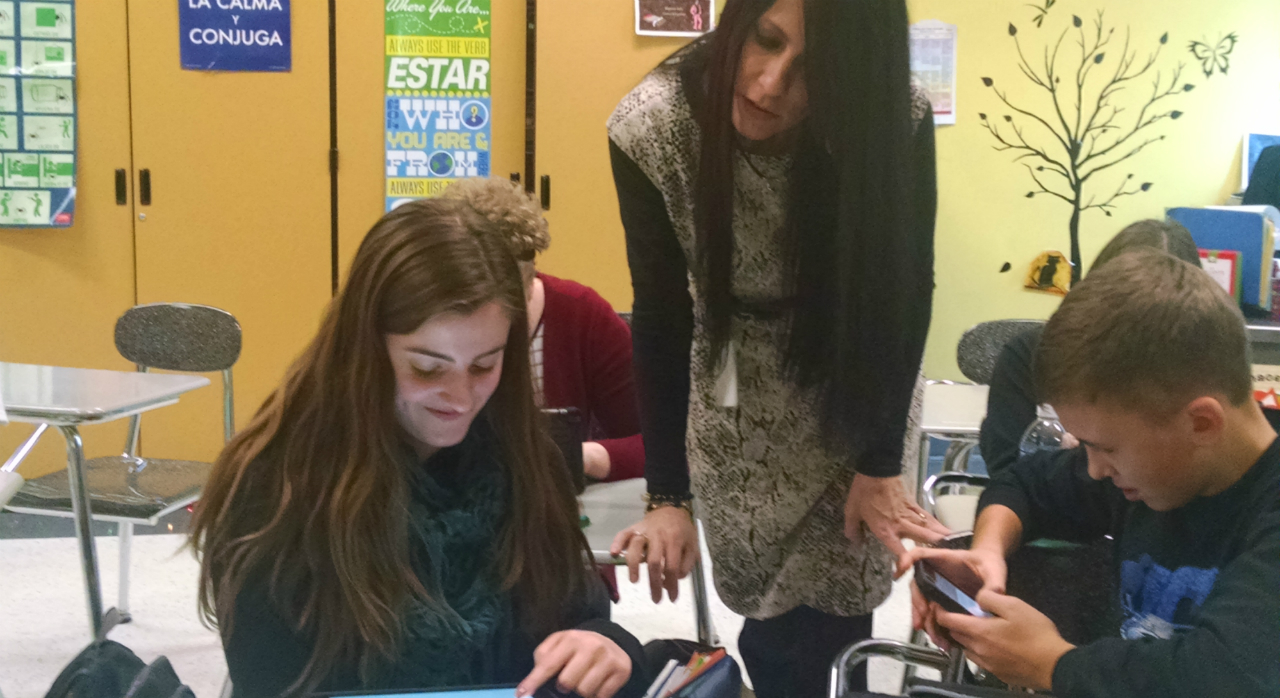
For Rachelle Poth, a Spanish teacher at Pennsylvania’s Riverview Junior/Senior High School, using mobile technology in her classroom came out of a desire to provide easier and more accessible communication with her students. For Poth, the messaging app Celly was the perfect fit to remind students of assignments and provide a place to put class resources.

“[Using an app] can seem overwhelming for a teacher who isn’t necessarily using technology at all or not using it much,” Poth says. “The key is to look at your classroom and ask, ‘What is one thing that is bothering me or taking up too much time?’”

Poth, who is also an education technology mentor with Common Sense Education, says that finding an app that will work with your class is dependent on what category you might need. She recommends the following:

  • For messaging: Celly and Remind for communicating with students, and Bloomz for parent-teacher communication
  • For assessment: Quiz creation tools like Quizlet and Kahoot!
  • For classroom organization: Learning management tools like Edmodo and Google Classroom

Another way to figure out where an app might be helpful is by asking students, Poth says.

“Pose the question to students, like, ‘If you could change one thing about homework, what would it be?’” she says. “You might hear no more homework at first, but if you dig deeper, you’ll find issues.”

Step Two: Find a Quality App and Test It

Once educators have decided what they want in an app, they might get overwhelmed by the sheer number of options.

Poth recommends reading teacher reviews and sample uses on a site like Common Sense Education or EdShelf. She also says you can chat with the communities on those sites or on Twitter to get feedback from other educators.

At Kent State’s RCET, Karl Kosko, an assistant professor, and others are evaluating apps specifically for special education teachers as part of the SpedApps project. Their database can be accessed by all educators.

Once a teacher has found the right app, he or she will need to do one more thing before introducing it to students: Test it.

“It seems like a very simple thing, but it is the first and foremost,” Kosko says. “Educators should play through the app and think about how their students will use it and misuse it.”

Step Three: Make Sure the App Connects with Your Lesson

Perhaps the most important step of all for educators is choosing technology that supports their teaching and their curricula.

Kosko suggests that teachers really think about how they are going to teach their students to use the app, and then use it for a purpose that will work in the classroom.

“Don’t just use it randomly,” he says. “The apps should be related to something students are currently learning.”

Also, if using anything that needs technology at home, Poth says teachers need to be aware of what students have access to.

“At the beginning of each school year, I give my students a paper and ask them what kind of device they have, if they access at home and what kind of tools they know how to use,” she says.

WAVEBREAKMEDIA/THINKSTOCK

Flipping Roles: Students Move From Edtech Learners To Leader

Student reflections

Published on November 30, 2016

By Formative Educator Rachelle Dene Poth

Technology has created so many ways for teachers to provide choices for students, enable learning to occur anytime and anywhere, and to also be able to further differentiate instruction for the students. In addition to teachers being able to take advantage of the resources available to deliver instruction and assess students, these digital tools also create the possibility for students to take more ownership in their learning and become empowered learners.

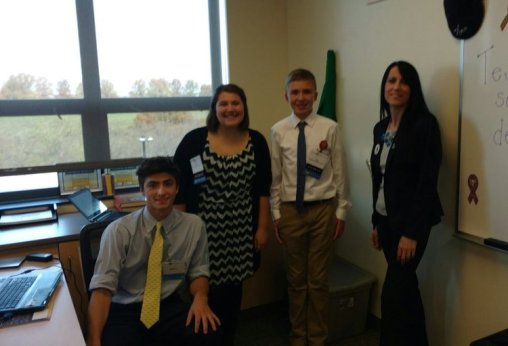
Rachelle and her edtech leaders!

Rachelle and her edtech leaders!

We need to offer diverse learning opportunities for students and to provide the support needed to encourage them to take more ownership in their learning and to become the leaders in the classroom. Students have to be more than just consumers, they need the chance to create, to experience learning from different perspectives and take this new knowledge and apply it in different ways to meet their needs.

How do teachers know what is working in the classroom? Teachers can use assessment tools and monitor student progress, but it is far more valuable and important to classroom culture and growth, to work on relationships and build collaboration by asking students to be a part of the conversation and creation of class materials. When teachers do this, they understand what helps students to learn better, be more engaged, and have a more authentic learning experience.  It also becomes a way to build student confidence and transform them into classroom leaders and advocates, who can then share their knowledge and experience with others in their class and then the community.

Give Them Choices And Let Them Lead

At the end of last year, I wanted to see what students thought about creating these assessments using tools which were traditionally used by teachers to deliver instruction.  Cassy shared her experience in the prior post and emphasized the importance of including students in the decisions of when and how to integrate technology.  Because reflection is key, I took this information and thought about the logical next step.  How could I share the message about Formative, or even more importantly, how could the students share their input with others, especially educators?

Students Take Over

Last month, Cassy had the opportunity to take the lead and present to a group of educators at a technology conference in Pittsburgh, and show how Formative can be used in their classrooms. Cassy had become the teacher, she created a lesson with Formative and offered her perspective on the use of edtech.  This time, I asked several students to participate in an edtech conference, and to present the session. Cassy taught the attendees about Formative. Here are her thoughts on the experience…

Student Perspective On Edtech: Cassy Becomes The Teacher

9th grader Cassy presenting Formative to teachers!

9th grader Cassy presenting Formative to teachers!

Cassy: “On November 8th, 2016, I participated with two other students in TRETC (Three Rivers Educational Technology Conference) where educators and technology directors from the Pittsburgh area presented sessions on uses of technology.  I am extremely grateful that I had this opportunity to share what I learned about and what I have created with technology. Formative was the perfect choice of a tool to share with the group of educators. I feel Formative is a wonderful, interactive and creative way to teach, complete assessments and increase engagement in teaching environments. I was very excited that I was able to inform others about this web tool because it means other students can have the same great opportunity I have been given, which is to use technology to learn and be creative.

Cassy had teachers respond to a Show Your Work question and draw their own flowers!

Cassy had teachers respond to a Show Your Work question and draw their own flowers!

    For the presentation, I created my own Formativewhich included a video, a true/false question, a multiple choice question, a short answer question, and a draw your response question. I included all of these so the group could see how many different options and aspects there are to Formative. I also explained the other possibilites with Formative, how to assign the Formative and answered any questions from educators or technology directors. One teacher asked if we (meaning my Spanish 3 class) have used Formative in the classroom. I told her that we have used it very often and I enjoyed it every time. I also explained how it is possible to see all of the responses of those participating in the Formative. While I talked about all of these great aspects of Formative and more, the group participated in the Formative I created and were able to see all of each other’s’ responses.

The dynamic teacher-student duo showing educators how to act on live responses!

The dynamic teacher-student duo showing educators how to act on live responses!

    I was very pleased with how the group reacted. I felt I had explained Formative well enough that everyone had a general, if not advanced understanding of how Formative worked and the advantages of using it. Seeing the smiles and hearing the laughter of everyone in the room meant that I had accomplished my goal of informing and sharing what I was so passionate about and making an impact with technology.

I am so lucky to have had the opportunity to present at TRETC with my fellow students and my extremely talented and intelligent teacher. Mrs. Poth has opened so many doors for me and has taught me so much. Learning about tools, like Formative, has made me realize how useful technology is for learning. It was wonderful to hear what Mrs. Poth had to say about Formative on top of what I had to share about it. The group was able to see two perspectives on how Formative has impacted the classroom, which I felt made a very big impact.  I admire her opinions and her comments. I am very appreciative that I could hear and see my fellow students and teacher talk about what they love so much about technology.

Being able to present with Mrs. Poth, was a great opportunity. I am very pleased I could share what I love so much about technology. Formative encompasses everything I love about technology: maximum creativity, endless possibilities and strong usefulness. I can’t think of a better tool I would have wanted to present than one that shows and encompasses my passion for technology: Formative.”

Want to learn more about giving your students ownership over edtech and opportunities to present tools to teachers? Tweet to @Rdene915  or @goformative !  

Piktochart: An edtech interview

This is a post by Jacqueline Jensen, following our Blab interview talking edtech in the classroom.  Thanks for this post and the opportunity Jacqueline and Piktochart!

Talking EdTech with Teachers

As Piktochart’s Community Evangelist, fostering community among our 5-million-strong user base is one of my primary goals. As I wrote after first joining, my role here on the Piktochart team focuses on interacting with our users at every level — from live events around the world and conference talks to jumping onto the latest up and coming social platform to chat with Piktochart users.

So far, we’ve tried a number of new initiatives. We think it’s important to share valuable content with not only our user community, but with startups, designers, educators, and marketers all across the globe. When we tried out Blab, we picked an awesome guest and gathered community questions to chat about.

Back in June, we went looking for educators to join us to discuss more about how to bring technology into the classroom. Education technology, also known simply as EdTech, refers to the creation and use of software and hardware intended to bring technology to education.

This segment of the technology world has heated up thanks to investment from organizations like the Bill and Melinda Gates Foundation, the United States government, and even tech venture capital investment firms like Andreessen Horowitz. In fact, in just the first half of 2015, private investors alone poured $2.5 billion into EdTech companies — leading to the creation of countless technologies for classrooms around the world.

Here at Piktochart, our team was thrilled to hear we were recently honored in the American Association of School Librarian’s 2016 Best Websites for Teaching and Learning. Educators have been using Piktochart in their classrooms since we launched in 2012, and we couldn’t be more pleased to know we are making a difference in the minds of students around the world.

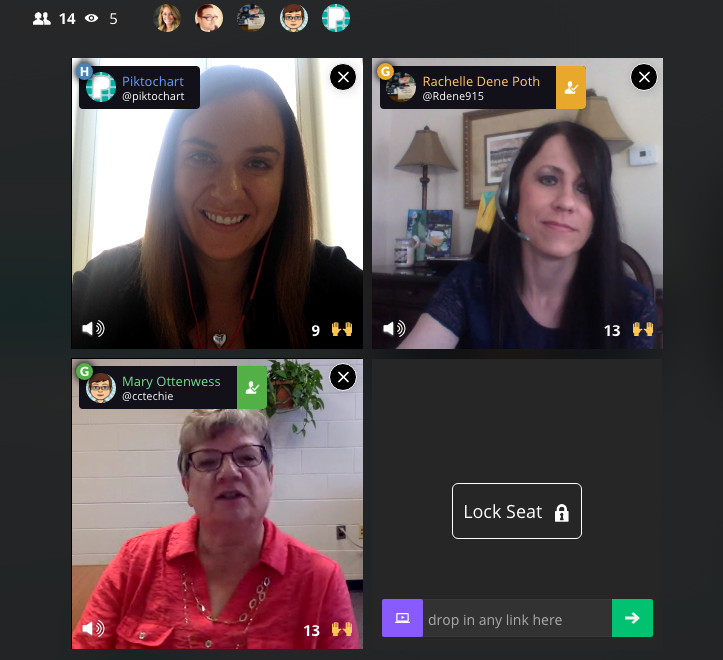
To get the skinny on what’s going on in classrooms when it comes to EdTech — from best practices and challenges to favorite tools and privacy policies — we brought in two Piktochart users who are making a big impact by bringing technology into their school. For the first time, we had two guests on our Blab,Rachelle Poth and Mary Ottenwess.

Rachelle is a foreign language teacher at Riverview Junior-Senior High School in Oakmont, PA. She enjoys using technology in the classroom and finding ways for students to have more choices in their learning. She has presented at several technology conferences in Pennsylvania and at ISTE in Denver this past June.

Mary has been in education for 25 years. She started out in a public high school library and is now the Instructional Technology Specialist at Catholic Central High School in Grand Rapids, MI. She was the one that didn’t step back when they asked for volunteers to run the computer lab and thus her adventures in EdTech began!


What is your biggest pain point with your school’s current EdTech setup?

Rachelle said her biggest complaint when it comes to EdTech tools, which is shared by other teachers she talks to, is the fact that things sometimes don’t go as planned with technology.

“Best case scenario doesn’t always happen when it comes to technology,” she said. “You have to be prepared for the little bumps that come along the way.”

Mary echoed Rachelle’s thoughts about technology being unpredictable. She also added that limited professional development time for teachers is another hurdle when it comes to her school’s EdTech setup.

“An hour once a month just isn’t enough time,” said Mary. “Students come in an hour late and we have a meeting with all teachers at the school. Teachers will go around and talk about what they are using in their classrooms, discuss a particular tool, or discuss a method. Because we are trying to cover so much in a single hour, hitting everyone’s skill and comfort level as well as giving them time to try the tool often means a lot of 1:1 follow-up.”

“As a workaround for time, we have teachers create tutorials to view prior to the professional development sessions,” noted K-12 EdTech coordinatorCourtney Kofeldt in the chat.

What opportunities are given to kids through EdTech and how can teachers learn to embrace them?

Mary said EdTech really expands a student’s world. They can collaborate and share with not only each other, but with experts in the field. Students can use project-based learning and inquiry-learning, and they can use and develop real-world skills for college or a career. For teachers, Mary thinks technology makes things simpler.

Rachelle agreed. She believes the opportunities provided by technology are tremendous.

“Technology provides opportunities to students to allow them to show what they have learned and to use a tool that is meaningful to them. Without the technology, they wouldn’t have been as engaged,” she said. “I don’t use technology for the sake of using it, but rather as a way to increase opportunities.”

When given a choice of tools to utilize on their projects, Rachelle finds students talk to their friends about the learning curve of each software. Students work together, collaborate, and learn from each other about how to use technology.

What’s the best thing technology has allowed you to do in your school that you couldn’t have done otherwise?

Mary shared an example from her school, Catholic Central High School in Grand Rapids, MI. Using technology, a French teacher was able to bring in a video feed from a classroom in Canada. The American students communicate in French to sharpen their skills, and they’re also able to learn more about the other students culturally.

“Students are not only collaborating with the students in another country, but those next to them in their classroom too,” explained Mary. “It’s fun to watch the collaboration.”

Rachelle says that technology has allowed her to continue the conversation with students after class time ends. She found more and more that her students had questions once they got home and started working on their homework or projects, and technology allowed her to be available to them during those key moments.

“It really bothered me that when class ended, that would stop their learning process in a sense,” she said. “I use technology to bridge that disconnect. I use messaging to help.”

Do you as the teacher (or your school) assess the privacy and security of a tool before letting students try it?

Rachelle said she pays close attention to privacy and security settings before bringing a tool into the classroom. She does this by creating an account on her own and reviewing the settings herself. Rachelle also sends home a notice to parents at the beginning of the year informing them of the tools that will be used in the classroom.

She also relies on the thoughts of other teachers, and she noted these sites and communities as her go-to sources:

  • Common Sense Graphite, a community of educators who take the guesswork out of finding innovative ways to use technology in the classroom;
  • EdShelf, a socially-curated discovery engine of websites, mobile apps, desktop programs, and electronic products for teaching and learning;
  • EdCamp, an organic, participant-driven professional learning experience led by a community created by educators, for educators.

Mary added that her school has a tech team on staff who will verify security before launching a new tool in the classroom. First, they start with a pilot program and monitor progress while the new EdTech tool is being tested in the classroom. During that pilot, they will be on the lookout for glitches or security holes.

Which tool/platform/methodology has been the biggest hit in your classroom and why?

Rachelle, Mary, and participants in the chat were excited to share their favorite EdTech tools! Check out the list below:

What are 3 most important skills kids have gained in your classroom thanks to technology?

Everyone agreed that more collaboration and creativity is taking place in the classroom thanks to technology.

“I have noticed students really develop the 6C’s — Communication, Collaboration, Critical Thinking, Creativity, Character, and Citizenship — when tech is integrated,” said Courtney Kofeldt in the chat.

Rachelle added she often notices that projects from her students go above and beyond her expectations. “Technology gives them that voice to speak out and be part of something when otherwise they wouldn’t have been,” she said.

Mary says teachers have benefitted from technology as a way to improve their skills, too. She notices more collaboration happening between teachers and growth of their professional networks thanks to technology making it easier to work together.

Thanks to technology, both students and teachers alike are building up their confidence. “It’s ok to have something not work,” explained Mary. “Technology allows students to take the lead. Teachers aren’t always the one with all the knowledge.”

Mary also touched on her school’s Digital Citizenship Course, which is an ever-changing movement to educate students on the proper use of technology — when to use it (or leave it behind) and best practices.

“I teach motion graphics at UCLA, and it is wonderful to see what the students create once they understand the tools,” added Eric Rosner in the chat.

How can teachers improve their tech skills in order to make classes more interactive and multimedia oriented?

Rachelle’s advice is simple:

“Just pick something and start it!” she said. “Really. You don’t know if it’ll work for you until you try it. Pick something small and give it a try.”

She suggested teachers consider learning new tools alongside students. Rather than a teacher-driven project, why not try a student-driven project? She found her students enjoy it, and as a teacher, it keeps her fresh. Use the challenge of a new tool as a learning lesson for both the students and the educator.

“Not everything is going to work, and that’s ok,” added Mary. “We teach our kids to learn from failure, and we need to do the same.”

Mary advised teachers to expand their professional network to get to know other educators. Social channels are a great way to do this — and Mary specifically suggested getting involved in Twitter chats. For a comprehensive list of Twitter chats all about education, check out this list Mary shared with us on the Blab!

What are your recommendations for someone who is just starting to use technology in the classroom, and may be a bit hesitant?

Rachelle suggested focusing on one area in your classroom you can try to improve using technology. Give a new EdTech tool a shot, use it minimally, and be patient with getting comfortable with it.

Mary suggested finding another educator who is using technology you’d like to try and simply watching them use the tool in their classroom. Finding a tech mentor is key to getting comfortable!

How can tech help all students to be engaged, to reach each student?

If students are on different levels, Mary said EdTech tools can help bridge that gap. She particularly likes Khan Academy for this purpose. She also suggested putting up a rubric for an assignment, but allowing students to choose their technology tool to complete the project.

“Students are not all the same,” added Rachelle. “By giving them choice with technology tools, you’ll see they can create anything they desire, and you learn more about them as individuals. When the choices are given and nothing is set in stone, it pays off.”


The team at Piktochart had a blast during our Blab with Rachelle Poth and Mary Ottenwess! Thanks to both of them for stopping by! If you’re interested in learning more about how Piktochart can help out in your classroom, check out a few more of our EdTech posts!

This post originally appeared on Piktochart’s blog here.

Technology Can Make The Learning Process More Transparent

TeachThought: Thanks to Terry Heick for publishing part two of this post.

Technology Can Make The Learning Process More Transparentby Rachelle Dene Poth

In my last post, Finding Out What Students Are Thinking: 10 Tools To Get Them Talking, I shared tools that can help promote student communication.

The additional benefit for using tools like these is that you can take what you hear and learn and the next day in class anonymously share some ideas to get the discussion going.

Even if you try to keep things anonymous, you will have the students who immediately fess up and say “yeah that’s mine,” because that’s just what the students do, which is okay because they are willingly sharing what they said.

And if it does come down to a right or wrong kind of question and that student is in fact incorrect, that’s an even better lesson–a better example for the other students in the classroom to show that it’s okay to answer something and to be wrong.

These are the experiences that build character and growth mindset and help students become more involved in their own learning path.

A Few More Tools: Communication Through Collaboration

If you’re looking for a way to have students speak more regularly about different topics, share their ideas, or be more involved in class discussions, you may want to consider some other format for “talking.”

Having students write in their own blog, where they can keep their responses private and you can respond directly, is a great way to learn about the students and what they are thinking. Having this communication format is also helpful with relationship building.

Through blogging, you can give feedback which helps to provide support for students and can help them to gain confidence. By building confidence in this way, they have a chance to become more open to and comfortable with sharing their ideas in class.

As teachers, any opportunity to share our own experiences, especially when we share experiences that reflect our fears of making mistakes and taking risks, is helpful to our students.  Showing that we are sometimes wrong is okay, because we are all are constantly growing.

Writing Spaces

So what about some tools?

Wikispaces is a social writing platform for creating an online space for collaboration. Creating a wiki might be a great way to have students collaborate together on a topic if they are working in small groups. Some options for collaboration are creating a page for a discussion, set up a pro/con debate, or a even class website. Students can build confidence and comfort by collaborating in this way.

Padlet is a virtual wall for posting thoughts, discussion, and more. It could also be another way for students to work together and build some of these skills for collaborating any time and anywhere.

Tools For Reflection & Feedback

Choosing the right tool comes down to what type of conversation you looking to involve students in.

Is it open-ended?

Do you want the students to speak out in class or do you want them to think about something, have time to process it and answer after class?

That’s the benefit of offering blended or flipped learning experiences. The conversations don’t have to end when class ends. The questions don’t have to be asked during class because teachers can set up questions after class using tools like these I’ve shared, or Let’s Recap.

Let’s Recap is a way to record a prompt, ask questions, and then have students respond through video. Teachers can then view the response or see the daily reel, and provide feedback to each student.

A tool such as TodaysMeet can be useful for a “backchannel” chat in class, or to open up discussion after the school day ends. Either way, it is another quick option to get the conversation going or to use as a way for students to ask questions.

The goal of all of these tools is to get them talking–to know what their thoughts are–so that we can help them grow.

Why Does Student Feedback Matter?

Teachers need student feedback to help guide our next steps and provide learning experiences which are meaningful.  We want our students to feel comfortable. Depending on the age group being taught, the content being covered, and whether the technology is available and accessible to the students, you can determine which of these tools might facilitate learning the best.

Using technology just to use it doesn’t make sense. But using it to help students find their voice, learn more about what they want to do, what they can do, and what they are having trouble understanding does.

These tools and others like them, can help to connect those ends. And since learning feedback is critical to student growth, sometimes we need other methods for connecting with the students; this is when technology has a purpose.

Technology can expedite the feedback process and gives us real live results. We can give feedback to the students, the information is saved, and we can use it as a way to give a voice to those who would not necessarily be willing to use their voice in the classroom.

For now, maybe keep it simple. Start with the question, “What do I need to know about my students?”

Then look at these tools and others like them and start experimenting.

How Students Can Use Timeline Templates in the Classroom

Written by: Rachelle Dene Poth

Published on November 11, 2016

How Students Can Use Timeline Templates in the Classroom

As a foreign language teacher, I am always looking for innovative ways to allow my students to demonstrate what they have learned.

I want students to be able to choose a tool that brings out their creative side and, as a result, leads to a more authentic and meaningful learning experience.

Because learning a language can be difficult, I try to design a variety of activities and projects that will provide students with practice and unique opportunities to develop their language skills through the creation of their projects.

RELATED: Visme Introduces New Infographic Timeline Templates


Using a Timeline Template as a Learning Tool

using-a-timeline-template-as-a-learning-tool

As a student, I recall having to create a timeline in a history or science class to display events or processes. Timelines are a great way to help students organize thoughts and can be very beneficial for meeting the needs of different learning styles.

Creating timelines on paper or poster board are still great options, especially when availability and accessibility of technology and resources is an issue. However, through the use of digital tools, it is much easier to create a timeline that is more visually engaging and provides additional interactive features.

With a tool like Visme, students can select their preferred timeline template and add icons, search for images within the platform or upload their own. With such a wide selection of fonts and other graphic assets, they are able to enhance their visual thinking skills and create a personalized learning product.


How to Use Timelines in the Classroom

types of timelines for classroom and education

In each level, we discuss topics like childhood, recipes, travel plans, school schedules, future plans and more. It had not occurred to me before that I could have students create a timeline to narrate these events.

A timeline could be just as effective as the traditional narrative format, so I decided to go with it and have students choose a timeline template for one of the summer assignments, which entailed narrating a sequence of ten events.

I looked forward to seeing what students created with Visme. Some used the timeline templates available and others decided to design their own timelines from scratch.


Ideas for Timeline Projects

ideas-for-timeline-projects for students

In an educational setting, the use of an infographic timeline can serve many purposes. Students can use it to narrate a personal experience or illustrate something they have learned in class. Teachers can use one to show students the steps they should follow in a process, rather than a traditional word document or other worksheet.

For example, here are just a few ideas of how teachers and educators in general can use timeline templates in the classroom:

  • In a physics or chemistry lab, a teacher could easily create an infographic timeline to tell students how to complete the lab assignment.
  • In an elementary setting, teachers could create a timeline to help students learn how to count to 10, learn the alphabet, or even show the steps to tying one’s shoe.
  • In a cooking class, a timeline template can be customized with your own information to explain the sequence of food preparation, steps in a recipe or procedures for cleaning up the classroom space.

There really are a lot of options available to teachers and students in an educational setting, or to anyone who wants to highlight events or the chronology of something.

And even if the subject matter at hand does not seem like it could involve the creation of a timeline, this is a great opportunity to let students devise their own way of thinking about a topic.


Why Choose Visme?

visme timeline template

Creating a timeline with Visme is a simple and engaging process. The timeline templates available can help teachers and students create something very visual and clearly labeled that can be quickly customized to their needs because of Visme’s easy-to-use drag-and-drop tool.

I decided that the “back to school” summer assignment for some of my Spanish classes this year would be to create a timeline that included at least ten events. Some options included sharing summer experiences, creating a top ten list of favorite activities, talking about a special summer trip–no topic was off limits as long as it included the required grammar topics.

Part of their task was to also choose whether they wanted to create a horizontal or vertical timeline.


Questions to Consider

Any time I try something new, I ask students about their learning experiences. Was it something beneficial? Did it help them learn the material better?

Student feedback is so vital to what we do as teachers, so I took this as an opportunity to try something new with them and let them decide how they wanted to complete this task and then to gather information and reflect on their feedback.

The students were excited to work with the new timeline templates and happy to share their experiences and opinions:


What Students Had to Say

examples of student timeline projects


Christoph

“To start, I absolutely love Visme. I have used it for two Spanish Projects so far, and it is a very easy tool to use. The presentation style makes it very easy to present information in a way that is pleasing to the eye and engaging. Along with this, it makes it possible to share large amounts of information for completing projects of any size, in a much cleaner and clearer format.

I can picture myself using Visme in the future to create mini-presentations as well as large scale projects that I could use notecards with as well. In addition, Visme offers an option to switch things up from a normal presentation.

In class, after ten people have shared Powerpoint presentations, a teacher finds it nice to have another well-made project shown that stands out and is different from all the others.

quote Visme timeline templates

Finally, Visme allows the user to create things with more detail than any other project-creating website or tool. There are a plethora of tools that can be utilized to enhance the project such as icons, shapes, pictures, audio, and a ton of themes. I would recommend this to other students and will continue using Visme in the future for more classes!”


Marina

“Visme was such an amazing tool to work with for our Spanish timeline project! I absolutely loved being able to create my own template while also being able to choose from a lot of different timeline templates.

Visme is a very easy tool to use. Everything is set up and labeled so if a person would have not read the directions about how to use the site to create, they still would have been able to use it. It is an amazing tool for presentations and is unlike any other presentation tools we have ever used. They give you so many options with how to make your project really unique.

quote Visme timeline templates

Visme allows you to insert audio, pictures, shapes and many other wonderful details to customize and really make it your own. I would recommend Visme to a lot of the people in my class because it is unlike any tool we have used before!”


Cassy

“Visme is a great tool to use for projects, presentations, infographics and more. My favorite thing about Visme is how easy it is to use. The timeline templates create an outline that allow you to organize your information in a way that is attractive to the eye. I enjoyed using Visme because it also enabled me to be creative with my project.

Visme has so many options and variations in creating my project. I could insert photos, text, graphics, backgrounds and add audio to enhance my project.

quote Visme timeline templates

I can complete a project in a variety of different ways to fit my needs for what is best for my assignment. It is also very easy to share the work that I have created using Visme. I can publish my work to social media and websites or just present my project to my class.

I am appreciative that I am able to use Visme in class. Web tools like Visme can enhance my learning and understanding of many topics while also letting me be creative and use my imagination. You can create with Visme in an easy and organized fashion.”


Your Turn

What types of infographic projects have you tried with your students or in a classroom setting? If you have any specific projects or ideas you’d like to share, don’t hesitate to drop us a line in the comments section below.

And if you haven’t already taken Visme for a test run, you can sign up here and use it for free for as long as you like.

90% of all information transmitted to our brains is visual.
People remember…
Become a more effective visual communicator.With Visme, you can create, share or download your visuals with no design training.It’s free! Take a tour.

About the Author

Rachelle Poth is a Spanish Teacher at Riverview Junior Senior High School in Oakmont, PA. She is also an attorney and earned her Juris Doctor Degree from Duquesne University School of Law and recently received the Master’s Degree in Instructional Technology from Duquesne.

She enjoys presenting at conferences on technology and learning more ways to advance student learning. Connect with her on Twitter @rdene915.

Leave a Reply

Name (required)

Mail (will not be published) (required)

Website

timeline template classroom header

How Students Can Use Timeline Templates in the Classroom

Mastering Infographics

November 11, 2016

visual-thinking5

How to Unlock Your Creative Potential Through Visual Thinking

Mastering Infographics

September 8, 2016

Load More

Create Stunning Infographics

Want to set yourself apart from the rest? Start creating stunning infographics within minutes with our easy drag-and-drop software. Access 100+ beautiful templates, 100+ free fonts and millions of images and icons right now.

Start Creating Now for Free

Savehttps://accounts.google.com/o/oauth2/postmessageRelay?parent=http%3A%2F%2Fblog.visme.co&jsh=m%3B%2F_%2Fscs%2Fapps-static%2F_%2Fjs%2Fk%3Doz.gapi.en.bRDJBM_7ci0.O%2Fm%3D__features__%2Fam%3DAQ%2Frt%3Dj%2Fd%3D1%2Frs%3DAGLTcCOSwnIWUMP5w0nTVAkpqqeITg0qCA#rpctoken=314119063&forcesecure=1

Some Alternatives to Traditional Homework

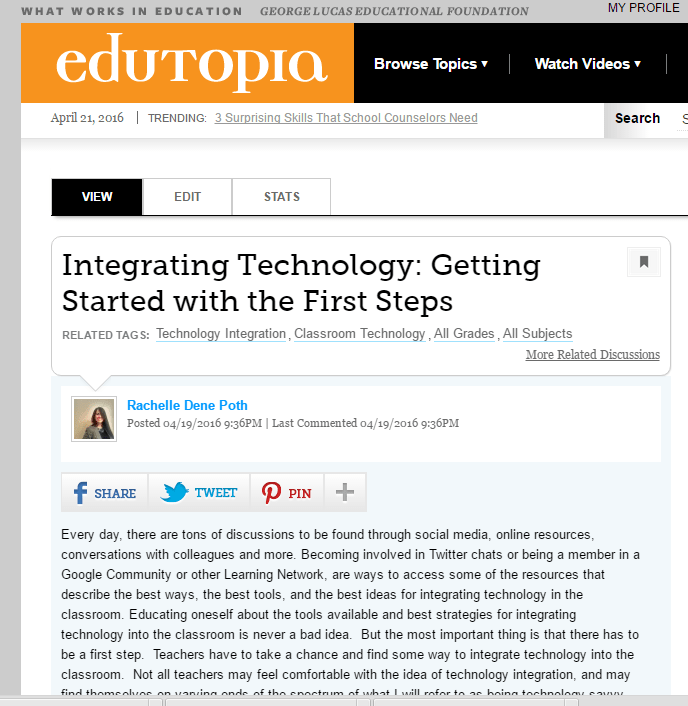
Posted in Edutopia Community Discussion, the second part of my thoughts on Homework Alternatives.

As a student in elementary and high school, I recall having homework assignments in most, if not all of my classes each night. I remember carrying home a lot of worksheets, lugging home several textbooks, and at times transporting poster board and binders back and forth to school.  We had a lot of tests, pop quizzes, and projects.  Most of the time, I remember the homework was the same for each student, in each class, and I cannot recall now nor do I even know if I was aware back then, of students doing different assignments. I understand why teachers assign homework which is the same, the purpose is to assess students on a particular skill, and maybe it just really works for that learning target. And some benefits for students are having a peer, to work through an assignment with or ask for clarification, can be helpful.  But it can also be detrimental, for a few reasons.  Students are not getting the practice they need by having the same assignment, and the possibility of students copying assignments is also something to consider.  Copying assignments leads to a loss of learning, and students will have to re-learn the material twice. There is a lot of discussion about the real value of and purpose for homework, and these are just a few of the pros and cons to consider.


Over the past few years, with the rise of technology and so many options available for learning experiences through it, solely using a worksheet or assigning the same homework does not have to persist. I have noticed variations in my students, both during our interactions in the classroom but also while grading assignments and projects, or even just reading the responses to their reflections or blogs.  For homework, some students can finish the worksheet in two minutes, possibly before the end of the class period, if time remains.  And there are others, who may struggle to complete the work and as a result, end up spending 20 or 30 minutes on the exact same assignment. So, I asked myself, how can I reach both types of learners, and provide opportunities that will be beneficial, meaningful, but more importantly more personal to their needs. How can I give each student the practice that they need?

Making some changes

So how did I decide to change the “everybody has the same homework” practice?  After a holiday break and taking some time to reflect over the first part of the year and talking with students, I decided to seek ways to give students options for the type of homework they wanted to complete.  I came up with two or three choices of how I could do this, and will admit, that I was a bit anxious, since changing the traditional homework assignments would involve taking a risk.  But I truly believed that it was worth it, to see what, if any difference it would make for my students.

The three options I started with were:

1.    Quizlet: I had sets of cards and as an alternate assignment, I asked the students to select and complete activities which they felt would help them the most.  Because we have a class account, I can monitor their progress and they have many options for practicing the vocabulary, playing games and other activities to build their skills.

2.    Kahoot!: We have played games of Kahoot! in class for the past few years, and initially I was using it as a class game, using games which I created. But I soon realized that making up so many quizzes was really time consuming.  While there are lots of public quizzes available, I wanted to have the questions be more specific to their needs.  So for a different type of homework assignment, I asked students to create their own Kahoot! game using a specific number of terms or verbs and share it with our class. This led to more authentic practice and a lot more resources for all students to learn from.

3.    Blendspace: I have an account with Blendspace, and I can create and share lessons that I have created which include videos, games, tutorials and much more.  As homework practice, I can decide to assign a particular lesson for students to work through or I can simply share the URL and provide resources and give students the choice to use the resources within the lesson.

4.    Other options: Some other ideas for changing the type of homework assignments used are to create a list of different assignments or tasks and give students some choices in how to practice the content material. They may decide to work through all of them, or simply use some, but the important thing is that the choice is theirs and the practice will be more meaningful. Assigning homework in this way encourages students to have a choice on where to begin, not all students have to do the same thing, and it helps to focus on their individual needs.


What did the students think?

The students appreciated having more of a choice in assignments.  Using these options gave them the chance to try some new ways of learning, which they were not used to, but it was a way to provide differentiation.  I know that having a lot of games available to play in class with Kahoot and the extra Quizlet study cards, benefitted all students. The one tricky part is being able to monitor their work, but this comes with developing the relationships and having clear expectations. Including students in the conversation and making sure we focus on the accountability and responsibility aspects will help. The students are more engaged, become more empowered by having a choice in their learning path.

We can use methods like this to focus on the areas where students need help the most. Personalizing the homework assignments in these ways can prove to be time consuming, as far as tracking their work, but it is completely worth it because of how beneficial it is to their learning. And that is what matters most.

Flipping the Classroom: Use an infographic, see what happens

Posted by on September 7, 2016 .

Piktochart is the perfect example of a tool that can be used by anyone for almost anything. You can create flyers, brochures, presentations, and reports. It doesn’t matter what line of work you are in because any of the templates can be used by anybody.

For example, as a teacher, I can create posters for my classroom or presentations for my lessons. I can have my students use Piktochart to create projects for our class. Piktochart can be used for conveying information for professional development, to show evidence of learning, and so much more. I’ve even used it to create a birthday card for a friend. You can download the image, share it, or print it, and they always look amazing.

books-school-field-pencilIn addition, students have a tremendous amount of choice when it comes to creating with Piktochart. Even students who say they are not creative find that their creativity comes out once they get started.

I have some quotations that I plan to incorporate into a poster for my classroom, and by having so many design options within Piktochart, I know I can create something personal, vibrant, and visually engaging for my students. I feel confident that even though I’m not a designer, I can still create something that will stand out and make my students curious about how they might be able to create something similar.

You might think that these ideas won’t work for you because you don’t work in education, marketing, or design. But step back and think about all of the digital tools and resources out there.

While it’s helpful to know what their “intended” purpose is, that doesn’t mean it can’t also fit your specific needs. Sometimes all it takes is some creative thinking (and some trial and error), and you’ll find a way to make it work for you. Once you get started, the ideas keep coming.


Getting Started

It’s all about taking a step back and looking at the picture from a different angle. When I started using Piktochart two years ago, it was my first experience with infographics. I had only recently learned what an “infographic” was.

I really wasn’t sure what to create, so I decided to start with my course syllabus. I copied the content from a Word document, pasted it into the template, and added some different visually engaging images around the text. It was a great way to add some technology to my classroom and to introduce students to the concept and benefit of using infographics for presentations.

Then I realized I could have my students use Piktochart to create projects to tell me about themselves, to talk about their family, and for many other uses where I would have normally just used paper. From there, the ideas just kept coming.

brainstorm-idea-thoughtNot that they were always my own. Often the new ideas were brought on by seeing the work of my students, or I’d be inspired by a conversation with other educators at conferences. My ideas for using infographics in the classroom kept growing.

One of my best ideas came to me recently while I was attending ISTE in Denver. My presentation was about using Piktochart to create infographics and presentations. Our discussion focused on how engaging and interactive these creations can be, and it occurred to me that there’s absolutely no reason why you couldn’t use Piktochart to run a flipped classroom lesson or to lead someone through a process.

Simply choose a template and add your information, and you will have created a lesson for students in which you lead them step-by-step through a lesson in a visually engaging way. You can include your links to websites, embed video in it, add your images, and so much more.


My Classroom Lesson

While I was at ISTE, I began thinking about using Piktochart as a means to provide a flipped or blended learning experience through the use of an infographic.

In order to test the idea of what would be or could be a lesson, I created a lesson with activities in a document as I normally would. Then, I transferred the lesson into one of my favorite Piktochart templates.

I numbered the steps, and I included some of the links and all of the necessary information. I added some icons, changed the backgrounds, and altered the sizes of images and the colors of the backgrounds.

I’m going to test it out with my students and get their thoughts. I plan to have some students use the paper format and others use the infographic in order to gauge their responses to my flipped classroom experiment.

As a teacher, my purpose for creating something like this is to engage my students and provide more for them. I want to give them something visually appealing that adds to their learning experience. The impact that digital tools have on my students is very important to me, and I carefully select tools that will provide the most choices for them and that prove to be more meaningful and beneficial.

globes-school-lantern-learnTaking this concept a step further, I could also flip it again and have the students create their own lesson in the same way that I did. By doing this, students develop leadership skills and are empowered. They gain new perspective as the “teacher”. They get to be creative, and they drive their own learning.

The teacher then becomes the student, and he or she has the opportunity to learn and gain another perspective that will be beneficial to their role in the classroom. There are many options for using infographics like this. You just have to find what works best for you.


Limitless Technology

From a teacher’s perspective, I think that if you are looking for ways to flip your classroom or to make it more interesting and engaging, infographics (particularly ones you can create with Piktochart) are the way to go.

Even if you are not in the educational field, think of the documents that you have to create in your line of work. You can easily paste the information into one of the templates. You can add your own photography or logos, search for new images, add icons, change the font colors or the backgrounds, and so much more. It is very easy to do, and it just takes that first step to get started.

When it comes to technology, I’m starting to think that there really are no limits. There is something out there for everyone to use. And while it may not be apparent at first, give it a little bit of time. If you are not sure where to start, make a birthday card for a friend.

https://magic.piktochart.com/embed/15072511-spainlesson

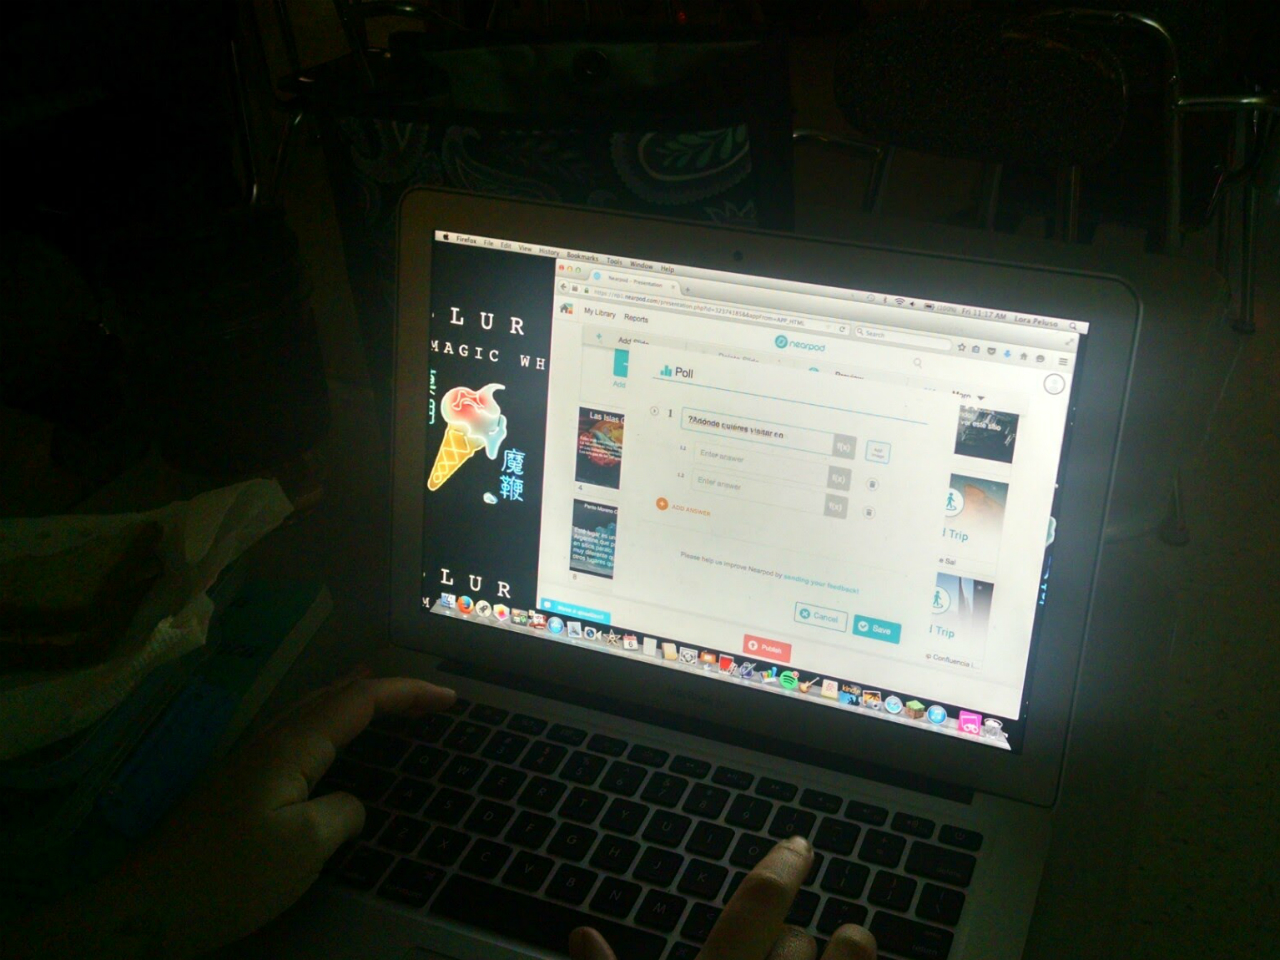
Nearpod – Increasing cultural awareness and student engagement through interactive lessons and virtual field trips

Using Nearpod in class

I have used Nearpod many times, but during the past few months, I had an opportunity to dive in and see what it can provide for student-led learning. As part of conference presentations, graduate coursework and lessons for my Spanish classes, I have a much greater understanding of its capabilities for instruction and the tremendous features it offers for education. At the end of the school year, after noticing a decrease in student engagement and motivation, I wanted to try some innovative, different methods of instruction.

Technology in our classroom: It has a purpose

Students work with many digital tools and choose how to showcase their learning.  Using technology to provide authentic and meaningful learning experiences leads to an increase in student engagement, motivation, and content mastery. I am invested in providing diverse learning opportunities and look for innovative ways to introduce content and promote student choice.  Students need to do more than just be receptors of information, they need to be creators! After reflecting on my practice and thinking about student needs, I had my students create a project using digital tools typically used by teachers to facilitate a lesson.

The Project

I first used Nearpod to review South American culture and verb tenses.  The virtual field trips were fantastic and the students were much more engaged in the lesson. I then wondered how students would like creating a Nearpod lesson and taking control in the classroom, so I put them up to the challenge! After my students created and facilitated their Nearpod lessons, they had some fantastic feedback about using Nearpod as a tool for both teaching AND learning.

So what did the students say?

“I used Nearpod for a class project about South America, and the amazing virtual tours took my presentation to another level. I consider myself tech-savvy, but I’ve never seen anything like this; I’d recommend Nearpod to anyone wanting a real step-up from Powerpoints, Prezis, or Google Slides!” – Sydney

“As someone who finds technology unnecessary at times, I often do not enjoy using some of the tools I have in the past. Nearpod has really gotten me excited about the possibilities of technology in the classroom! Being able to take an adventure on virtual tours and experience culture first hand is something I have never been able to do before. Nearpod is a great tool for every classroom!”    -Patrick

“Having so many choices for activities to use were educational and fun. Choices make learning more enjoyable for students. It provides more than just listening to a presentation, or watching a video, and not really being held accountable. I recommend Nearpod for other educators and anyone looking for a new way to present information. -Izabel

Learners to leaders

Using Nearpod means that learning is no longer confined to the traditional classroom setting, nor that the “teacher” is the only person providing instruction.  Students were empowered in their learning.  Seeing their transformation from learners to leaders was tremendous. The choice was theirs.

Students teaching a Nearpod lesson 1

Students teaching a Nearpod lesson 2

Students working on projects in class 1

Getting started with blogging

Thank you @Kidblog for publishing my recent post on how to start blogging with your students.  Great way to start off the new school year.

Getting Started: Tips for launching a successful class blog

Enthusiastic Students Showcase Kidblog

Summer is full of opportunities for reflecting, learning, and planning. Teachers and students have the ability to review the past year and develop goals for both the summer and the upcoming school year.  While summer gives teachers a chance to unwind and relax, it is often used as a time for exploration and preparation for the new year.

During their time off, many teachers participate in professional development events, become involved in learning communities, and look for new ways to engage their students in the classroom.  I am no different. This summer I had many opportunities to connect with other educators and discuss ideas for increasing engagement in students’ learning and blogging became a common topic. I welcomed these conversations as I have seen first hand the positive results blogging has had on my students.  These discussions revolved around questions about getting students started, privacy, the best use of blogs in the classroom, and how to create new ideas and keep students motivated to blog in and out of the classroom. I was always happy to offer my advice. I created this post in hopes of sharing what I learned from these discussions with a wider audience.

The benefits to student blogging are endless. If you are looking for something new to try with your students, to get them talking, and to learn about your students, I highly recommend blogging as a way to start this new school year.

If you are not familiar with classroom blogging, I suggest setting up your “class URL” first – select a theme, familiarize yourself with the settings, features and how students will create their accounts and log-in.  Additionally, by setting up an account as a student in your class you can better understand the student experience and be prepared to answer any questions. Once everything is ready for real students, creating a handout to explain the use of blogging for your class, listing your expectations and some guidelines, and encouraging creativity in the process, is a great way to start the blogging conversation.

I have tried various methods to getting students started in our class blog. Regardless of the method you choose, it is always worth while to start with a conversation regarding your class blog. Talk about what students will write, when they will use the blog, who will be reading their posts, etc. Getting students excited about the options for post styles, fonts, and the wide audience they can reach in the process is helpful in driving motivation to write.

One option to get students started writing in class is through the use of prompt responses. I started small by instructing students how to join the class and having them begin responding to my posts with meaningful discussion points. If you have time in class to do this, facilitate as the students create their account, personalize their page and begin writing. Eventually students will feel comfortable and excited about creating their own ideas for writing.

Another successful way to get students blogging is to start with what they know – pen and paper. Try providing a prompt and having students write a response on paper, as they had done in the past. This is a great way to ensure students learn to evaluate their work and self-correct. It also reinforces that the true value in blogging is to feel comfortable and confident in expressing one’s ideas and using it as a means for personal growth. Once the students have written their responses, you can ask them create their Kidblog student account and use their writing as the first entry.  By having the first draft, and then entering it as a blog post, students have the opportunity to think, reflect and work on their skills.

Either option provides a great starting point. I recommend that you base your decisions for your class blogging on your students and what will be the most beneficial to your classroom.

Getting students excited about blogging only takes that first step. It is a continuous work in progress.  We are all involved in ongoing learning, and by being learners ourselves, we can help our students to take risks, accept challenges, reflect, and grow. And, through the process, we learn about each other, reinforcing the value of relationship building and support in the classroom.

ABOUT THE AUTHOR

I am a Spanish Teacher at Riverview Junior Senior High School in Oakmont, PA. I am also an attorney and earned my Juris Doctor Degree from Duquesne University School of Law and recently received the Master’s Degree in Instructional Technology from Duquesne. I enjoy presenting at conferences on technology and learning more ways to benefit student learning. I am the Communications Chair for the ISTE Mobile Learning Network, a Member at Large for Games & Sims, the Innovation Resources Co-Chair for the Teacher Education Network and the PAECT Historian. Additionally, I am proud to be involved in several communities including being a Common Sense Media Educator, Amazon Inspire Educator, WeVideo Ambassador, Edmodo Certified Trainer, Nearpod Certified Educator and also participate in several other networks. I enjoy blogging and writing for Kidblog and I am always looking for new learning opportunities to benefit my students. You can connect with me on Twitter @rdene915.

Recap: Let’s Get Students Talking

I tried Recap at the end of the year and really enjoyed what it offered.   I appreciate the opportunity to have my experience shared on Recap.

Posted on July 20, 2016Posted in Guest Post

Student voice is very important in education today. Teachers benefit greatly by understanding what the students’ needs and interests are, their backgrounds and other experiences they bring with them to the classroom. Students participate in so many diverse learning experiences aimed at providing the best practice through multi-modal instructional methods, to personalize instruction, drive student learning and to provide the resources and support necessary for student success. And while the teacher may believe that each learning experience they provide is valuable and will benefit the students’ growth in the class, it is critical to seek input from the students themselves to really understand the impact these methods have on their learning.

Involving students in conversations can happen in many mediums. With all of the digital tools available today, there are endless possibilities available for substituting the traditional face-to-face conversations or having students write some type of a response such as a self-reflection in class. Having students reflect on a particular learning experience or participate in a discussion after class, are valuable opportunities for teachers as well to learn more about the students and to continue building those vital relationships. Including students in the planning and gathering input from them benefits the learning environment tremendously and there are many ways to do this. I found a new method of encouraging students to share their thoughts this year, through Recap.

Deciding to Try Recap

Toward the end of the school year, I wanted to try some new tools in the classroom, to keep students engaged and motivated through the end of the year. I thought that trying out some new ideas would work well at this time, because I could use the information to reflect and plan over the summer. I came across Recap and was very interested in trying it out with my students.
I was initially unsure of whether it would be easy to implement into my classroom, or even how I would use it, but as with all things, sometimes you have to just take a chance and see how it works out. So I did just that and created a class for my students using Recap. The first time I logged in and created a video in which I asked the students to share their thoughts about some of the projects we had done, some of the tools that we had used, and any other insight that they wanted to provide to me. I explained how Recap would work and set up my recording for them. It was very easy to use and to set up. More important, students were excited about this new experience and felt comfortable in sharing their ideas.

Ideas for Using Recap

There are many uses for Recap in and outside of the classroom to have students respond to a prompt, have a debate on a topic, use it for a speaking assessment, and many more possibilities depending on content and grade level taught. But one of the biggest benefits I think it provides is a comfortable way for students to connect with their teachers and to honestly share their ideas, thoughts or reflections. Students are often afraid to speak up, we all are, and having a tool which enables the assessment or reflection to be done in the comfort of one’s own home or place, is very beneficial.
After the first time my students completed the assignment, watching their responses compiled into a daily reel, several things were clear. I could see that they were comfortable, which was very important to me, especially when trying something new like Recap. I also appreciated the fact that they took the risk to share their ideas and provided honest evaluations of my teaching and their classroom experiences. And I really like that I was able to give them feedback as well following their video responses.

The Foreign Language Classroom

As a foreign language teacher, I can use this in my classroom to have students complete speaking assessments, discuss topics we are working on in class, whether it be a work of art or particular reading, and they can give their honest opinions in a more comfortable, safer environment for expressing themselves. It is also quite useful for students to do a reflection of my instruction or of their own skills, interests and needs in the classroom. The nice thing is that either way, teachers and students can learn about each other, and grow from the feedback given.

I was very excited after this initial experience with Recap and so I tried it with several of my other classes. The response was all positive and I know that I will use it a lot more in the upcoming school year to have students complete speaking assessments, have discussions and more activities like these. But more than these uses, it is a way for me to better understand their needs and to learn more about them in the process. A way to continue building the vital relationships that help to build a positive, supportive classroom environment.

There are many ways to use Recap in the classroom but also as part of professional development, conference presentations and much more.

About Rachelle Dene Poth

She is a Spanish Teacher at Riverview Junior Senior High School in Oakmont, PA. She is also an attorney and earned her Juris Doctor Degree from Duquesne University School of Law and recently received the Master’s Degree in Instructional Technology from Duquesne. She enjoys presenting at conferences on technology and learning more ways to benefit student learning. She is the Communications Chair for the ISTE Mobile Learning Network, a Member at Large for Games & Sims, the Innovation Resources Co-Chair for the Teacher Education Network and the PAECT Historian. Additionally, She is proud to be involved in several communities including being a Common Sense Media Educator, Amazon Inspire Educator, WeVideo Ambassador, Edmodo Certified Trainer, Nearpod Certified Educator and also participate in several other networks. She enjoys blogging and writing for Kidblog and is always looking for new learning opportunities to benefit my students. You can connect with her on Twitter @rdene915.

IMG_20160629_103429847 (2) (1)

TeacherCast Educational Network | Developing Standards-Based Instructional Technology Integration

Technology Integration - Instructional Coaching - Productivity Secrets for Educators

Leadership Liner Notes: Sean Gaillard

Built on Connection. Tuned for Impact.

Stories by Thomas Oppong on Medium

Dr. Rachelle Dené Poth @Rdene915 Educator, Consultant & Keynote Speaker, Author, Attorney #THRIVEinEDU

Hooked On Innovation

When Innovation slaps you in the face, we slap back.

Teach Better

Dr. Rachelle Dené Poth @Rdene915 Educator, Consultant & Keynote Speaker, Author, Attorney #THRIVEinEDU

BrianKulak.com

Dr. Rachelle Dené Poth @Rdene915 Educator, Consultant & Keynote Speaker, Author, Attorney #THRIVEinEDU

The Principal of Change

Stories of learning and leading

Mandy Froehlich

Dr. Rachelle Dené Poth @Rdene915 Educator, Consultant & Keynote Speaker, Author, Attorney #THRIVEinEDU

Katie Martin

Informed by research, refined by practice

#RocknTheBoat

Rocking today's classrooms, one teacher, student, and class at a time.

User Generated Education

Education as it should be - passion-based.

Learning as I go: Reflections & lessons learned

Dr. Rachelle Dené Poth @Rdene915 Educator, Consultant & Keynote Speaker, Author, Attorney #THRIVEinEDU

Serendipity in Education

Join me, Allyson Apsey, as I stumble upon the fortunes of learning, laughing, and celebrating alongside incredible people.